Showing posts with label onion. Show all posts

Monday, May 23, 2011

Sweet Apple and Onion Stuffed Pork Chops


I have to tell you something.

As a self proclaimed foodie I'm rather ashamed of this...

But I'm going to tell you anyway. Because you are my friends right??

Okay...here goes.

I'm a fairly timid cook.

I said it!

When I started this blog, I knew that I wasn't very creative. But that hasn't stopped me from being able to share great food with you all.

I have found many great dishes to share with my family and friends throughout this bloggy world.

However, I think that having this blog is making me more...adventurous? Creative? Something.

I want to be able to walk into a grocery store or market, pick up and item and come up with an amazing dish in my head that centers from this one ingredient.

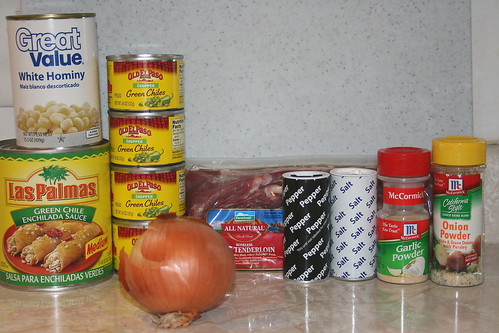
When we moved here to Austin and I ventured into my first HEB Plus, I walked by the butcher and saw these gorgeous boneless pork tenderloin chops. I couldn't help but to purchase them. They were practically screaming at me!

So I chatted with the butcher a bit and secured my lovely chops into my cart.

I carried that brown paper wrapped package of meat as tenderly as a birthday present. And I pretty much thought of it as such.

I came home and started wracking my brain trying to figure out what I was going to do with these luscious chops.

It just so happened that my friend The Chef called that night and I was telling her how badly I wished she was here so she could help me figure out what to do with these bad boys. Her immediate response was "stuff 'em!! Anything that thick and lovely should be stuffed!"

My brain quickly went into overdrive and I started thinking about my favorite flavor combination with pork: onions and apples. But I also love sweet, red apples with Vermont Sharp White Cheddar cheese.

It sounded like a winner to me! But I was sure The Hubble would veto the idea...the man hates cheese! I know, I know...how have we stayed married this long? Well, I just figure that means more cheese for me!

Anyway. I digress. So I told The Hubble about my conversation with The Chef and my resulting idea. He thought it sounded like a winner too! So I set to work!

This is the first time I have ever stuffed meat that wasn't a Thanksgiving turkey. And let me tell you, it was fun! LOL!

I threw together a quick stuffing and crossed my fingers as they made their way to the grill.

At one point, some of the stuffing fell out onto the grill. Of course, The Hubble and I set upon it like vultures. After that nibble I knew dinner would be off the hook that night!

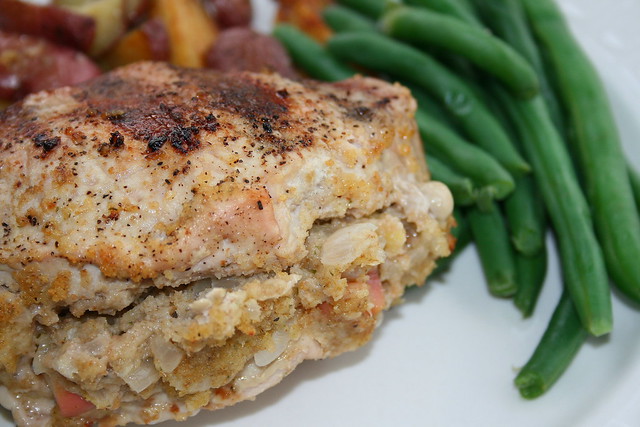
And I was right! These things were freaking amazing. They were juicy and tender. The stuffing was sweet and subtle. The perfect compliment to the lightly seasoned pork chop.

Seriously, looking at these pictures and talking about these pork chops is making me hungry all over again.

And! I'm pleased to say, I was inspired to create my own recipe! Maybe I'm on my way after all.

So now, it's up to you to go make these and love them as much as we did...because I know you will. You don't believe me?? Try it for yourself! Here's how:


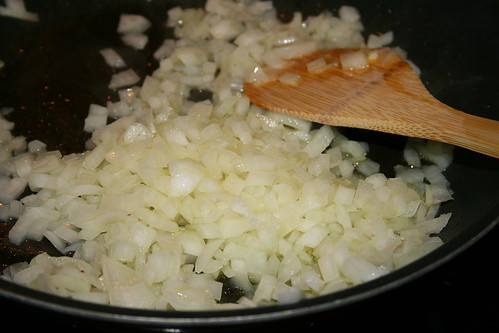
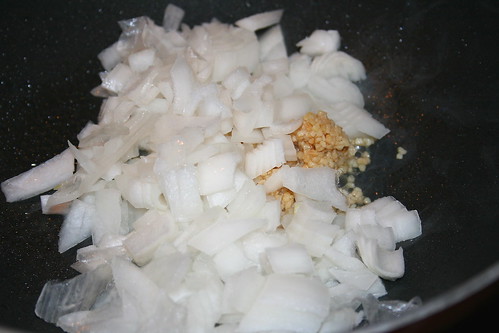
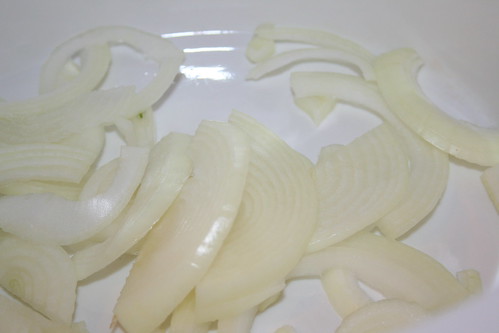
Let's start by sauteing up some onion...


And tossing in some apple. This is the delicious base to our stuffed pork chops!


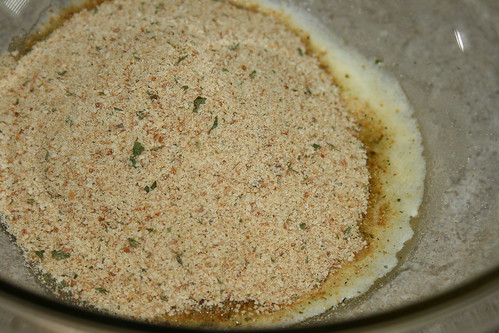
Melt some butter in a bowl and toss in the bread crumbs. Stir them up until the bread crumbs are well coated in butter.


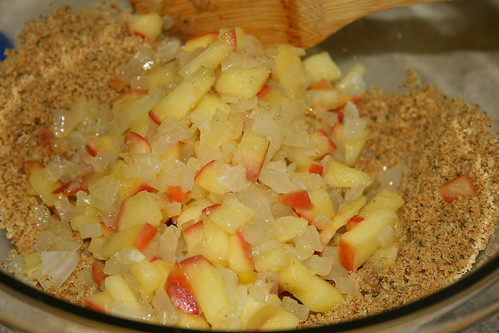
Now mix in the apple and onion.


And, of course, the cheese!


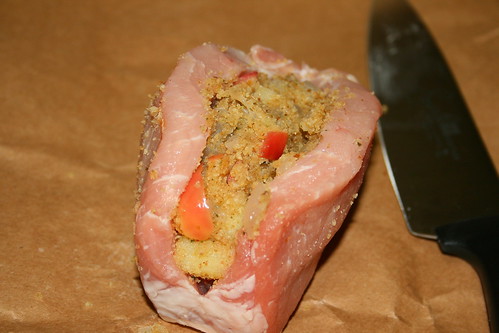
Now slice your chop, NOT all the way through...just create a sort of pocket. Then stuff those bad boys full of the bread crumb mixture.


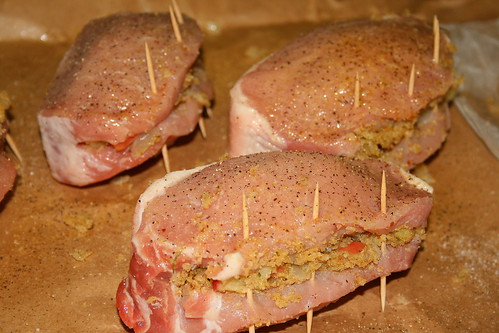
Now seal them up with toothpicks. Spray each side with nonstick cooking spray and season with salt and pepper.


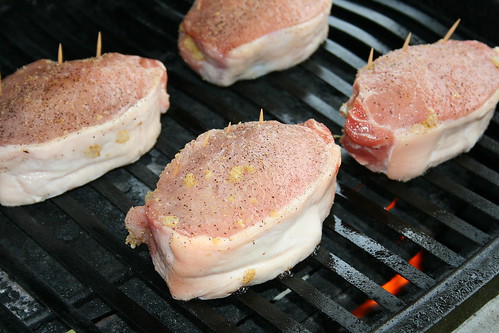
Toss them on the grill and cook them until the juices run clear, about 20-25 minutes.


Once cooked, place the chops on a cutting board and let them rest for about 5 minutes. Remove the toothpicks.


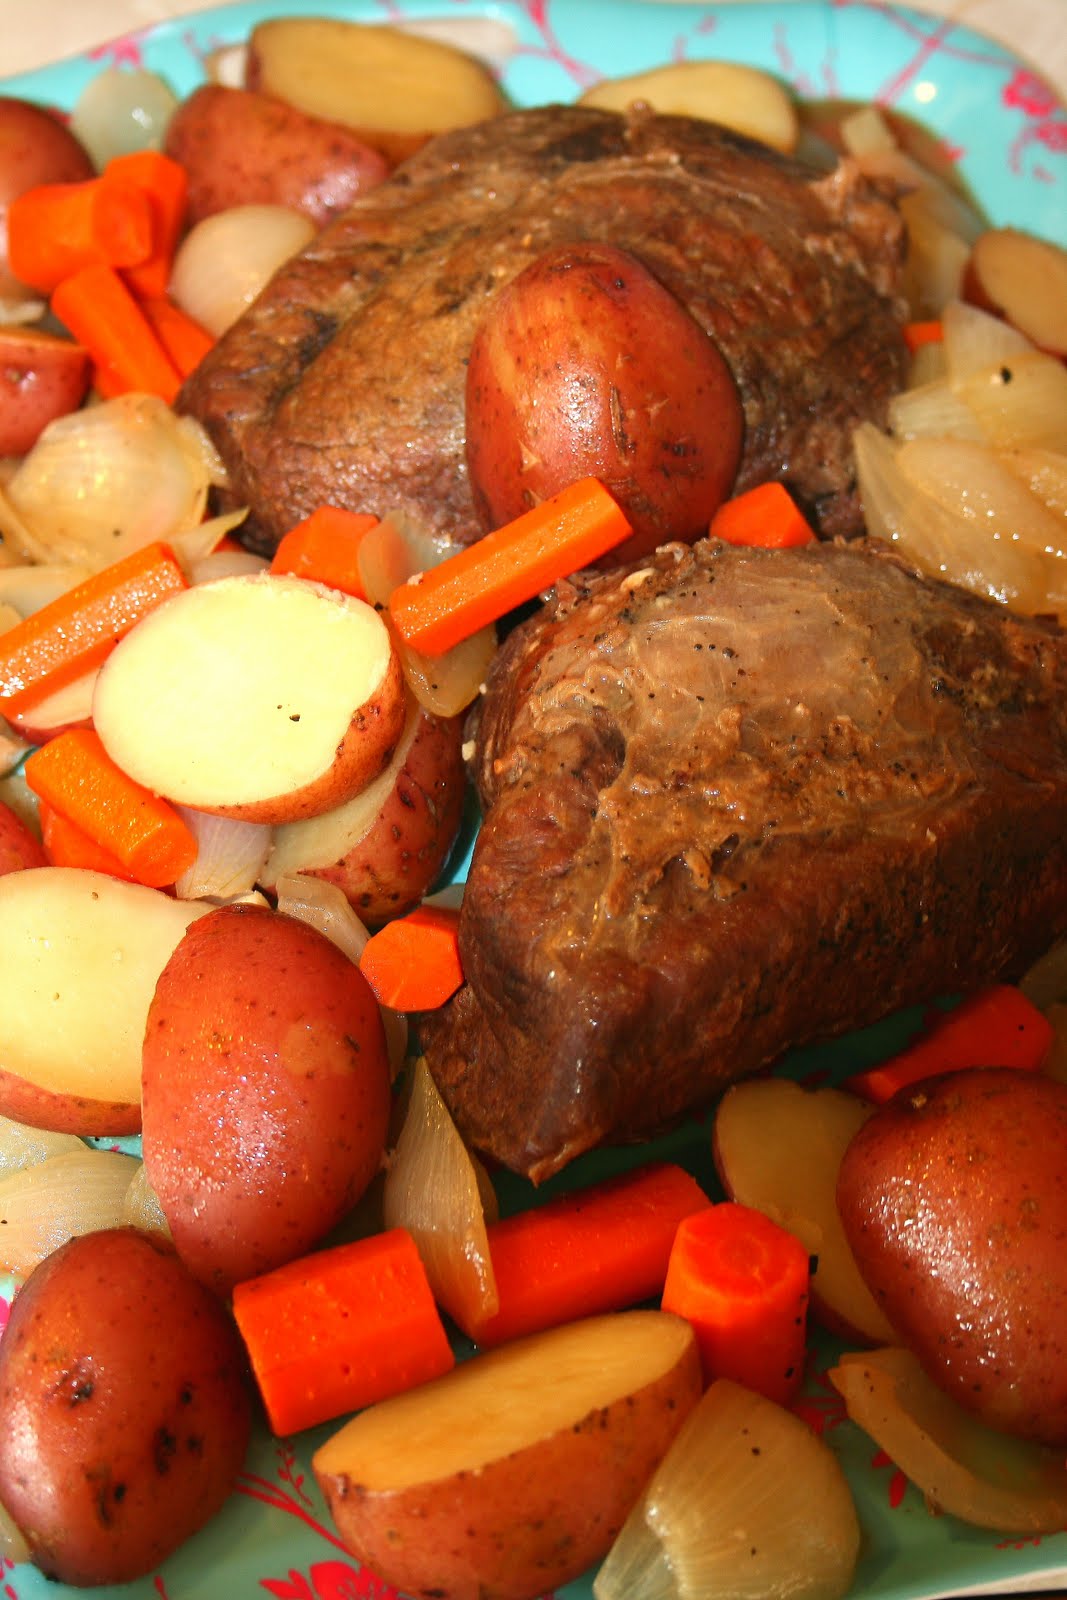
Serve them up with some veggies of your choice and enjoy!!!

Sweet Apple and Onion Stuffed Pork Chops

Printer Friendly Version

Ingredients:

  • 6 boneless pork tenderloin chops, at least 1 1/2-2 inches thick
  • 1 medium onion, diced
  • 1 medium apple, diced (I used a red apple)
  • 2 Tablespoons butter, melted
  • 1 cup bread crumbs (I used Italian style)
  • 1/4 cup shredded cheese (I used Vermont Sharp Cheddar)
  • salt and pepper to taste
Directions:
  1. Heat a medium skillet over medium-high heat. Spray with nonstick cooking spray.
  2. Add the diced onion and saute until tender, about 5 minutes.
  3. Add the diced apple and saute until tender, about 3 minutes.
  4. In a medium mixing bowl, melt the butter then add the bread crumbs and toss to coat.
  5. To the bread crumb mixture, mix in the onion and apple.
  6. Add the shredded cheese and mix to thoroughly combine.
  7. Slice the pork chops lengthwise leaving about 1/2 an inch on one side still in tact. 
  8. Stuff pork chops with bread crumb mixture. Secure with toothpicks
  9. Spray each side of the pork chops with nonstick cooking spray and season with salt and pepper.
  10. Grill the pork chops (or cook on a skillet) until the juices run clear, about 20-25 minutes.
  11. Remove from the grill and let rest about 5 minutes. 
  12. Remove toothpicks.
  13. Serve and enjoy!!

Thursday, May 12, 2011

Roasted Red Pepper Pesto Pasta


Okay guys.

Are you ready for the best pasta I've ever made???

Because this stuff was good.

And not just good...but GEWD!!!

I recently joined Foodbuzz's Featured Publisher program and was excited when I received my first Foodbuzz Tastemaker email.

The email was about Tyson® Grilled & Ready® frozen, prepared chicken or beef.

I wracked my brain for a couple weeks (while we were moving) as to what I would make for this program.

To be honest, I made a different dish first. But after throwing together this dish a night or two later (and tasting how delicious it was!) the consensus with me and my family was that this is the dish I should post.

This dish is super easy and amazingly good.

Now let me tell you about the Tyson® Grilled & Ready®. It's actually pretty awesome.

The Hubble was suspicious about the whole thing and didn't think it would taste like real meat. But it does. It's fantastic to have on hand (I'm buying another bag on our next grocery trip) for those weeknight dinners when you just need to throw some stuff together and feed people quickly.

Okay. On to today's dish. Which you seriously will NOT want to miss.

Remember this pesto we made on Monday??


We are going to need that. We are going to use a couple cups of that and turn it into a pasta sauce. YUM!!

This is literally beyond any pasta dish I've made yet. And every person who has tasted it agrees that it trumps the meal I made for the Tastemaker program previously.

So let's get cooking...


Spray your skillet with non-stick cooking spray. Heat it over medium-high heat. Now toss in your onion and garlic until tender, about 5 minutes, stirring frequently.


Toss in your Tyson Grilled & Ready diced chicken and heat until cooked through, 3-5 minutes.


Now dump in your pesto...


And cream. Stir it all up and heat it until warmed through. Add garlic salt to taste.


Toss the sauce over your prepared noodles until the noodles are all coated. Serve it up with some garlic bread (and extra grated Parmesan on top if you like). Enjoy!!!

As part of the Foodbuzz Tastemaker Program, I received a coupon for free Tyson® Grilled & Ready®. But the thoughts provided are my own.

Roasted Red Pepper Pesto Pasta

Printer Friendly Version

Ingredients:

  • 1 small onion, diced
  • 2 Tablespoons minced garlic
  • 2 cups Tyson Grilled & Ready diced chicken
  • 2 cups roasted red pepper pesto
  • 1/4 cup heavy cream
  • Linguini noodles
  • garlic salt, to taste
  • grated Parmesan (optional)
Directions:
  1. Prepare pasta as per directions on the package.
  2. Spray a large skillet with non-stick cooking spray. Heat over medium-high heat.
  3. Saute garlic and onion in skillet until tender, about 5 minutes.
  4. Add Tyson Grilled & Ready diced chicken until cooked through, about 3-5 minutes.
  5. Add pesto and heavy cream, heat until warm.
  6. Add garlic salt to taste.
  7. Toss over linguini, making sure pasta is fully coated with sauce.
  8. Top with grated Parmesan. Serve and enjoy!

Thursday, February 10, 2011

Crockpot Green Chile Pork


If you are looking at the picture above you may be thinking "is this girl out of her mind?? That doesn't look appetizing."

I totally understand. Yes, it's a putrid green color. I know.

But please, please, please...if you have never trusted me before...trust me now!

This stuff is good.

And when I say good...I mean G-E-W-D!

I've been trying to find my groove since getting back from our 3 week vacation.

Yes. I do know that it's already mid-February and I've been back for a month!

Even The Hubble decided he couldn't stand it anymore and FINALLY unpacked my suitcase last night. But not before telling me that we have been home for a month now and my suitcase was still sitting there.

I can't help it! I left sunny, warm, beautiful Texas and came back to snowpocalyse iceamageddon.

I've been cold, and I don't like it!

But! I have finally gotten up off my kiester and gotten back in the kitchen.

And if it makes you feel any better, this dish has definitely inspired me again.

I thought for sure it was going to turn out awful...I felt like my culinary skills would never return to me.

I was scared to taste this.

Like I said...it ain't pretty!

But when all was said and done, I stood over the crockpot, lid in my left hand, fork in my right. It smelled amazing. Surely it couldn't taste that bad right??

I twirled the pork around my fork like pasta. I brought it to my lips and took the plunge.

Then...

I did that whole "eyes roll into the back of your head this is SO good" thing.

Then I took a few more bites. I had to force myself to stop.

I went to my phone to send The Hubble a text message saying that I wished he was here because OH. MY. GAWD! This stuff was good! (The Hubble was in class by the way).

Luckily, there was a text from him saying he was on his way home. So I called him immediately and told him to hurry because he HAD to try this stuff!

When he walked in the door, his first comment was how good the house smelled (how many more times do you think I can work in the word 'good'??)

I hovered behind his shoulder as he took his first bite...then I watched him do the same eye roll thing.

We quickly served up dinner...

Then just as quickly served up seconds.

This meal is so easy it will make you cry. And it's so insanely delicious (good???) that it will make you want to slap your mother! (Which reminds me of that chicken sandwich commercial. You know the one, don't you?)

Okay. So please go forth and make this meal! Then come back and tell me who you ended up slapping because of it. I'll take the credit.


Ingredients: boneless pork tenderloin (a pork shoulder would be really good too), an onion, green chile enchilada sauce, green chiles, hominy, salt, pepper, garlic powder and onion powder. Too easy!


Slice up your onion and toss it into the crockpot.


Place the pork on top of the onion. Then sprinkle with a little salt, some pepper, garlic powder and onion powder. I didn't measure, but you can see the amount of seasoning I used on the pork. Do this to your own taste.


Now dump in the enchilada sauce and all the cans of green chiles.

Cook with the crockpot on low about 6-8 hours. The pork should be fully cooked and super easy to shred.


Shred that pork. Then dump in the hominy, juice and all. I only used one can with this recipe but I think it could definitely use another can.


Serve it up with some tortillas, crusty bread or The Hubble served his the next day with cheese and tortilla chips. Any way you do it...enjoy!!

Crockpot Green Chile Pork

Printer Friendly Version

Ingredients:

  • 2 lb boneless pork tenderloin or pork shoulder
  • 1 large onion
  • 1 can Las Palmas green enchilada sauce
  • 4 cans chopped green chiles
  • 1-2 cans hominy
  • salt
  • pepper
  • garlic powder
  • onion powder
Directions:
  1. Slice onion and toss into crockpot.
  2. Place pork on top of onion; sprinkle with salt, pepper, garlic powder and onion powder.
  3. Dump in enchilada sauce and green chiles.
  4. Cook on low 6-8 hours or until pork is thoroughly cooked through and shreds easily.
  5. Shred pork.
  6. Add hominy (with juice), cook 5 minutes more.
  7. Serve with tortillas, crusty bread or tortilla chips. 
  8. Enjoy!

Sunday, July 25, 2010

Bacon Wrapped Pork Chops with Apples and Onions


Do you know what the worst part about being a food blogger is?

Other food bloggers. And not in the bad way. I mean, in the way that there are too many recipes and not enough meals!

I may have to start taking my queue from the Hobbits in the Lord of the Rings series and start having breakfast, brunch, elevensies, lunch, onesies, afternoon snack, and all the other meals that Hobbits eat. Of course then I may be about 5,000 pounds and couldn't move around the kitchen to cook.


When I found out about food blogging it was through some communities on my livejournal page. I had discovered a couple food communities, one being food_porn. In this community I found the amazing food blog Crepes of Wrath by the beautiful Sydney.

This girl makes some of the most amazing looking meals that I've ever drooled over. One of these was this recipe for bacon wrapped pork chops with sweet sliced apples and onions. This meal is positively delicious.


The combination of flavors in this meal is heavenly. When I made it the first time I was at my father's house. I cooked this with some roasted sweet potatoes and rosemary olive oil and sea salt potatoes like Sydney suggested. My stepmom and I literally camped out on the stuff!


As the pork, apple, onion, and butter cook this juice is created in the bottom of the pan. Well, let me tell you how good this meal is. It's so good that my stepmom would not let me throw out that juice after all the meat was gone. Instead, she ate the juice as a soup.

When The Hubble came home from Afghanistan and I told him about this meal he was skeptical. Then I made it for him and he became a believer.


If I haven't convince you yet. If you are still a skeptic. I challenge you to try it! And you should definitely head over to Sydney's blog, The Crepes of Wrath to check out all the other amazingly delicious recipes she's cooked up!

Bacon Wrapped Pork Chops with Apples and Onions
Adapted from Crepes of Wrath

Ingredients:
  • 4 medium-sized pork chops
  • 1 lb sliced bacon
  • 2 medium apples, cored and sliced thinly
  • 2 teaspoons brown sugar
  • 1/2 teaspoon ground sage
  • 1 large yellow or white onion, sliced thinly
  • 2 tablespoons butter, cubed
Directions: 
  1. Preheat oven to 400 degrees F. 
  2. Slice apples thinly and place them in the bottom of an 8×8 pan. 
  3. Sprinkle two teaspoons of brown sugar and 1/2 teaspoon of sage over the apples.
  4. Top that with the sliced onions. Sprinkle the cubed butter over the onions.
  5. Wrap the bacon tightly around the pork chops. Place them on top of the onions and apples, and bake for 30 minutes.  (Sydney stated 15 minutes on each side but every time I've made them I've had to cook them a lot longer)
  6. Take the pan out and flip the pork chops over on the other side, then bake for another 30 minutes, until the bacon is lightly crisp. (If bacon is still soggy place under broiler for a few minutes until it browns and crisps) 
  7. Serve the pork chops with the apples, onions and plenty of juice from the pan. 
  8. Pair with roasted potatoes or some kind vegetable and enjoy!.

Saturday, June 5, 2010

New England Pot Roast


The school The Hubble is in has several foreign students in it. Within his group is a student from Poland. With us being so interested in different cultures and enjoying diversity amongst the people we associate with, The Hubble was more than willing to volunteer to be the Polish student's sponsor for the duration of the program.

Of course to me, that meant that I got to introduce the Polish student to American cuisine! Woohoo!! My dilemma was: what to make???

Naturally, I went with pot roast! What says "American cuisine" like pot roast?? But not just any pot roast, no. I was going to make him New England pot roast! And for dessert?? Congo Bars! The Hubble says the Polish student loved dinner. Now I just have to get him to give me some Polish recipes!

On to the recipe!


Ingredients: beef roast, potatoes, onions, carrots, horseradish sauce, salt, pepper, and water.


Generously salt...


And pepper both sides of the pot roast.


Place in a large Dutch oven and brown all sides.


I know this wasn't listed in the ingredients but once the top is brown I like to sprinkle it with Montreal Steak seasoning. Yum!


See how pretty...and yummy?!?!


After all the sides are browned and you've properly seasoned your roast, dump your horseradish sauce on that bad boy.


And just smear it all over the meat.


Now pour in some water. And pay no attention to the fact that I have two roasts in there. I couldn't find one big enough at our grocery store so I got two small ones. But you don't see that second one!


Bring the water to a boil while still ignoring my second roast. Unless you had the same small roast dilemma. Then you can look at my second one because you have a second one as well.

At this point we cover the roast, lower the heat, and let everything simmer for 2 and a half hours. You can now go take a bath, do the dishes, color your hair, read a book...heck, you can even watch a movie during this time!


When the house starts to smell so delicious you can hardly stand it anymore (about half an hour before the 2 and a half hours is up) you want to go start prepping your veggies. Wash your potatoes...


Cut them in half...


And place them in a large bowl.


Peel your carrots...


Chop off the tops...


And the bottoms...


Cut them into four pieces.


Toss them into the bowl with the potatoes.


Take your onion and chop off the top...


And the bottom...


And peel.


Cut it in half one way...


Then rotate it 45 degrees and cut in half the other way...


Yay! We just quartered an onion! Now do this several more times until all your onions are quartered.


Toss those in with the carrots and potatoes.


When the 2 and a half hours are up (oh man that looks good!)...


Dump your veggies in the pot with the meat.


Try to get all the potatoes as covered as possible. Then cover and cook another hour or so until the potatoes are cooked through.


When the potatoes are done remove everything to a platter. If you don't work very fast, cover it with foil to keep it warm.

Now at this point people started arriving so I don't have pictures of this part. But, you want to take about half a cup of the juice out of the pot and put it in a bowl. Whisk in a quarter cup of flour (like with did with the chicken with 20 cloves of garlic). When the flour dissolves, whisk that mixture back into the pot. Bring to a boil for a minute or two to thicken. Now you have a nice gravy to go over your post roast. Serve it up and enjoy!!

New England Pot Roast
Adapted from Betty Crocker BigRed Cookbook

Ingredients: 

  • 4 pound beef pot roast
  • salt
  • pepper
  • 1 jar (12-16 oz) horseradish sauce
  • 1 cup water
  • 8-10 small red potatoes, cut in half
  • 8-10 medium carrots, cut in fourths
  • 6-8 small onions, quartered
  • 1/4 cup flour (for gravy)
  • Montreal Steak Seasoning (optional)
 Directions:
  1. Generously salt and pepper both sides of meat.
  2. Place in large Dutch oven and brown all sides.
  3. Sprinkle with Montreal Steak seasoning (if desired).
  4. Spread horseradish all over meat.
  5. Add water, heat to boiling.
  6. Reduce heat, cover and simmer for 2 1/2 hours.
  7. Add potatoes, carrots and onions, cover and simmer another hour to an hour and 15 minutes, until potatoes are cooked through.
  8. Transfer meat and veggies to platter, cover with foil to keep warm.
  9. Remove 1/2 a cup of broth from pot. Whisk in flour. Whisk mixture back into pot. Allow to boil for 1 to 2 minutes until thick. Serve over roast and veggies. Enjoy!
Related Posts with Thumbnails