Showing posts with label bacon. Show all posts

Thursday, July 14, 2011

Maple Brown Sugar Bacon Banana Bread


Reading the name of this treat I'm sharing with you today, you may be thinking that my crazy pregnancy taste buds have completely taken over!

And maybe that's where this all started...

But I assure you, non-pregnant people have enjoyed this bread probably more than I have.

That's not to say I didn't enjoy this bread. But my poor mother seemed to be awfully obsessed with the stuff. She talked about it for days.

The bread is moist and sweet with the perfect amount of banana flavor. But the smoky, salty flavor of the bacon is a welcome surprise.

Honestly, I'm not crazy!

Well...maybe that's going a little far.

But it's not crazy taste buds!

If you are skeptical, I suggest you try this. I'll bet you will be a convert within 2 bites.

Let's get baking!


Whisk together the flour, baking soda and salt.


Cream together the butter and sugar.


Add in the banana, milk, sour cream and egg whites. Mix until well combined.


Mix in the maple syrup.


Add the dry ingredients and mix until well combined.


Stir in the bacon pieces.


Pour the batter into your prepared loaf pan and bake about an hour.


The cooling time depends on your will power here. But slice it up when it's cool enough, serve and enjoy!!


Maple Brown Sugar Bacon Banana BreadHeavily Adapted From Cooking Light 

Printer Friendly Version

Ingredients:

  • 2 cups unbleached all-purpose flour
  • 1 teaspoon baking soda
  • 1/2 teaspoon salt
  • 1 cup light brown sugar
  • 1/4 cup butter, softened
  • 3 ripe bananas, mashed
  • 1/4 cup fat-free milk
  • 1/4 cup low-fat sour cream
  • 2 large egg whites
  • 2 Tablespoons pure maple syrup
  • 4 slices maple bacon, cooked, cooled and roughly chopped

Directions:
  1.  Preheat oven to 350 degrees F. Spray a 9x5 inch loaf pan with baking spray.
  2. In a medium mixing bowl, whisk together flour, salt, and baking soda; set aside.
  3. Cream together butter and sugar in a large mixing bowl.
  4. Add banana, sour cream, egg, and milk to butter and sugar mixture, mix until well blended.
  5. Stir in maple syrup.
  6. Add flour mixture to banana mixture, blend until fully combined.
  7. Stir in the bacon pieces.
  8. Pour batter into prepared loaf pan.
  9. Bake about 1 hour or until a toothpick inserted in the center of the loaf comes out clean.
  10. Cool on wire rack in pan 10-15 minutes. Remove from pan and cool completely on cooling rack.
  11. Slice, serve and enjoy! 

Thursday, May 5, 2011

Bacon Ranch Chicken with Tiffany

When I was little, my sisters and I would spend every summer in Lawton, Oklahoma visiting our grandparents.

I remember these summers fondly and think of them as some of the best times of my childhood.

I used to sit for hours and watch my grandma cooking in the kitchen. She would make everything from pies to country fried chicken to biscuits with gravy. She was the best cook around and I loved to just be in her presence and spend time in that kitchen with her.

While I was in the kitchen with my grandma, my older sister was running around outside in that Oklahoma heat and humidity.

We have always joked that I got the cooking gene from my grandma and my poor older sister didn't. (I actually remember having to teach her how to open a can).

I started this food blog with her in mind. She has always been so scared of the kitchen and has always said she just couldn't cook. She didn't have it in her.

When I started this blog I included the step by step pictures so she could see how easy cooking could actually be. Over the last year or so of her reading this blog, she's become more and more confident. Now she makes things like cranberry pecan crusted tilapia and blackberry cobbler.

To say that I'm proud of her would be a gross understatement. She is such an inspiration and hearing about her cooking makes me absolutely ecstatic.

When I was trying to figure out who to ask to guest post on Jolts & Jollies while I was moving I actually thought of my dear older sister. I wanted to show that she could cook and also inspire even more confidence in her. I believe in her and her ability wholeheartedly and I want her to as well.

So today, I'm sharing with you a post from my older sister. I was lucky enough to be here to not only watch her cook but also taste how truly delicious this dish is.

Take it away Tiff!


When my sister first asked me to do a guest post on her blog it took me a minute to realize she meant the food blog. You see I'm not known to be much of a cook. In fact, I'm usually kicked out of the kitchen. However, I've recently begun to cook and have been experimenting to find a way to eat healthy and lose weight. One of my favorite inspirations is Hungry Girl. Hungry Girl is amazing taking real food ideas and making them healthy. None of this is diet food but real food that tastes good and is filling too. Since I'm fairly new to the world of cooking I've started with fairly easy recipes like Hungry Girl's new trios selections. This bacon ranch chicken is adapted from Hungry Girl's Ranch-O Bacon Chicken Trio. It's super easy, has three ingredients (four if you count the black pepper), tastes amazing, and surprisingly won't  hurt your bottom line.


The ingredients are fairly straight forward and simple: boneless, skinless, chicken breasts, dry ranch mix, pre-cooked bacon crumbles, and black pepper.


Season each side of the chicken breast with black pepper. Then sprinkle the dry ranch mix over the tops of each piece.


Put bacon evenly on the top of each breast, pressing down with a spatula to keep them from falling off.


Cook it up and enjoy!! Sound easy? Well it really is and it's a favorite for everyone in my family. Thanks to Hungry Girl and my dear sister for being an inspiration and helping even someone like me to learn to cook!

Bacon Ranch Chicken
Retrieved from Hungry Girl

Ingredients:

  • One 5-oz. raw boneless skinless lean chicken breast cutlet 
  • 1/2 tsp. dry ranch dressing/dip mix (I accidentally used 1/2 a tablespoon but ended up preferring it that way.)
  • 1 tbsp. precooked real crumbled bacon (like the kind by Oscar Mayer) (I put as much bacon as needed or desired to cover the tops of each breast)
  • Spices: black pepper
Directions:
  1. Preheat oven to 375 degrees.
  2. Spray a baking pan with nonstick spray. Season each side of the chicken with a dash of black pepper, and then place the chicken in the pan. Season the top of the chicken with ranch dressing/dip mix 
  3. Evenly place bacon over the top of the chicken. Use a spatula or the back of a spoon to gently press down and help the bacon adhere. 
  4. Bake in the oven until chicken is fully cooked, 20 - 25 minutes.
See I told you it was easy! I hope you all enjoy this quick, easy, and healthy recipe adapted from Hungry Girl's Ranch-O Bacon Chicken Trio. 


Thursday, February 3, 2011

Loaded Potato Soup


Okay people! It's cold!!

Not just cold...no...it's freaking COLD!

I thought I escaped the cold and the crazy blizzards when I moved away from Upstate New York.

Apparently I was wrong.

I don't think the Midwest should be this cold.

I mean...today's high is -2.

Did you get that??? NEGATIVE TWO!

LOL! What can you do??

Actually, the blizzard wasn't that bad for what I'm used to.

It's just that this place doesn't know how to handle this type of weather like Upstate New York did.

When we first arrived in New York it was mid February. We were driving through town and I grabbed The Hubble's arm and said "what's that?!?!!" as this huge monstrosity of a vehicle passed by. He looked at it, then turned to me and told me it was a plow.

A plow???? That's not like any plow I'd ever seen!!! That thing was huge!

Regular civilian pick up trucks had plow attachments for the winter months. People owned snowblowers before they owned lawn mowers. It was a different world up there.

Here, when there is a light dusting of snow, they shut down post. Insanity!

It's kind of cute though.

Until we get 6 inches of snow in a day and we are "snowed in" for 2 days. Then it gets annoying.

I enjoy staying at home and having lazy days. But when I'm forced to stay home and I can't go anywhere...then it becomes a problem.

But now, the sun is shining, the cute little plow came through my neighborhood and post is open once again. The Hubble went to work out. And I have the ability to leave if I so choose.

But now, I don't want to go! It's cold!!!

So, what better to warm up a soul than a hot, steaming bowl of soup.

And why not take it one step further and make it a thick, hearty potato soup.

And not only that! But it's healthy!

Crazy!

But no less real than the weather we've had here in the last few days.

Are you ready to warm up and fill your belly at the same time??

Let's get going!


Grab your ingredients: red potatoes, low-sodium chicken broth, low fat sour cream, prechopped onion, olive oil, bacon, flour, low fat shredded cheddar cheese, salt, pepper and chives.


Scrub and clean the potatoes. Pierce them with a fork. Then toss them in the microwave on high for 13 minutes of until they are tender. When fully cooked, remove from microwave and cut in half to cool.


While the potatoes are cooking, heat the olive oil in a skillet over medium-high heat. Add the onions and saute for 3 minutes.


Add in the chicken broth.


In a separate bowl, whisk together the flour and 1/2 a cup of milk.


Add the flour/milk mixture, along with another 1 1/2 cups of milk, to the skillet. Bring to a boil, stirring frequently, let cook 1 minute. Remove from heat.


Coarsely mash the potatoes into the milk/broth mixture. (I tried to remove the skin but decided against it. We like the skins in. If you don't, go and and discard the skins).


Separate the soup into bowls. Top with cheese, bacon and chives.

Serve and enjoy!!

Loaded Potato Soup
Adapted from Cooking Light

Printer Friendly Version

Ingredients:

  • 4 (6 ounce) red potatoes
  • 2 teaspoons olive oil
  • 1/2 cup onion (prechopped if desired)
  • 1 1/4 cup low-sodium chicken broth
  • 3 tablespoons all purpose flour
  • 2 cups fat free milk
  • 1/4 cup low fat sour cream
  • 1 teaspoon salt
  • 1/2 teaspoon black pepper
  • 3 bacon slices, halved
  • 1/3 cup low fat shredded cheddar cheese
  • 4 teaspoons chives
Directions:
  1. Pierce potatoes with a fork. Microwave on high 13 minutes, or until tender. Cut in half; cool slightly.
  2. While potatoes cook, heat oil in a saucepan over medium-high heat. Add onion; saute 3 minutes.
  3. Mix in chicken broth.
  4. Whisk together four and half cup milk in separate bowl. Add to pan with an addition 1 1/2 cups milk. Bring to a boil, stirring often. Cook 1 minute.
  5. Remove from and stir in sour cream, salt and pepper.
  6. Arrange bacon on paper towel on a microwave safe plate. Cover with a paper towel; microwave on high for 4 minutes. Let cool then crumble.
  7. Coarsely mash potatoes into soup. 
  8. Separate into bowls, top with cheese, chives and bacon.
  9. Serve and enjoy!

Thursday, December 16, 2010

Daring Cooks December 2010: Poached Eggs


Jenn and Jill have challenged The Daring Cooks to learn to perfect the technique of poaching an egg. They chose Eggs Benedict recipe from Alton Brown, Oeufs en Meurette from Cooking with Wine by Anne Willan, and Homemade Sundried Tomato & Pine Nut Seitan Sausages (poached) courtesy of Trudy of Veggie num num.

When I first read this month's challenge the only thing going through my mind was that scene in Julie & Julia when Julie Powell tried to poach an egg. As soon as she dumped the egg into the water, both her and her friend said "eeewwwww."

All I could think of was failure!

How was I going to do this???

Well. I'm sure I've said that with past challenges as well. Right??

And I made it through those challenges. Right??

So I moved forth in my quest to poach an egg.

I'm going to be honest with you...I had never even tried a poached egg before this challenge.

I had seen eggs benedict on menus before but I was never brave enough to order it. Please don't ask me why.

I am a sucker for spinach though, so when I thought about making this dish, I had to go with the spinach addition for an eggs florentine.

Let me tell you. I took one bite of this and just sat there looking at my plate. Eventually my friend asked me what I thought and all I could say was "why have I never eaten this before???"

It was delicious!!!

It was SO delicious that after I ate mine, and the extra one, I made The Hubble run to the store for sourdough bread and avocado. When he got back, we quickly set to making a California style eggs benedict with toasted sourdough, pan seared deli turkey, sliced fresh avocado and a poached egg with hollandaise. That was amazing too!!!

Thanks to Jenn and Jill for such an awesome challenge. Even The Hubble has considered having this for dinner again!

And, as always, if you would like to see how the other Daring Cooks did with this challenge, check out the blogroll.

Until then...let's get cooking!


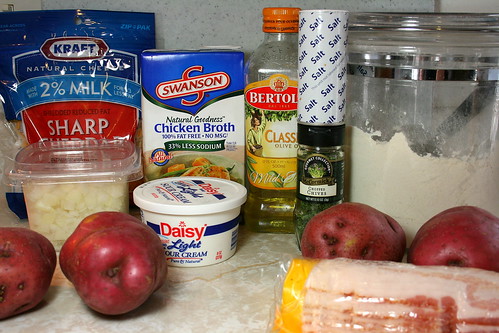
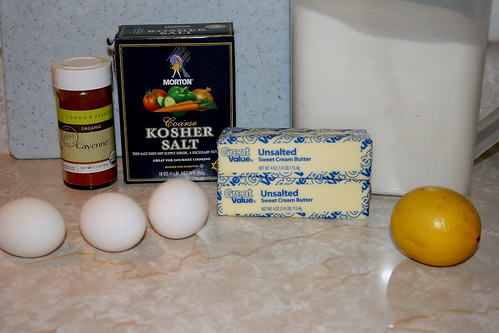
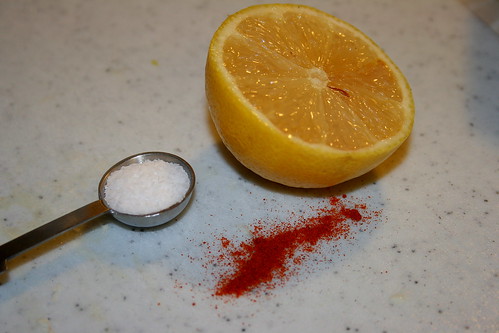
First up, the hollandaise. Get your ingredients: butter, kosher salt, lemon juice, egg yolks, sugar and cayenne pepper.


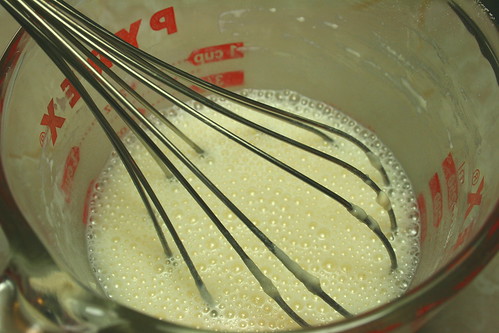
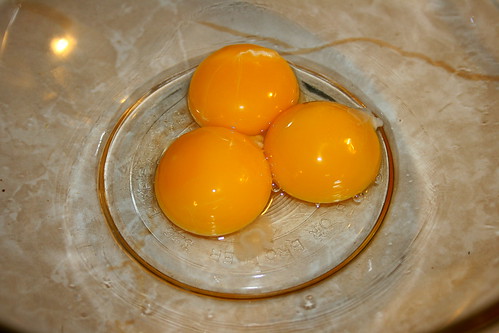
Plop your egg yolks in a bowl with a teaspoon of water.


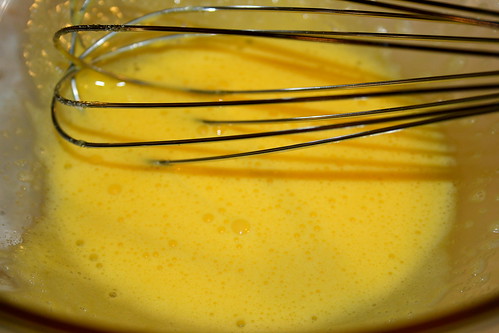
Whisk, whisk, whisk until the mixture is light and frothy. Then add the sugar and whisk about 30 seconds more.


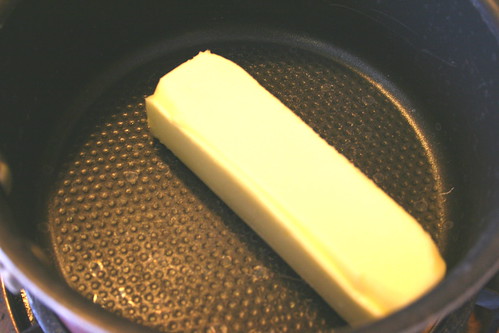
Cut your butter into small squares.


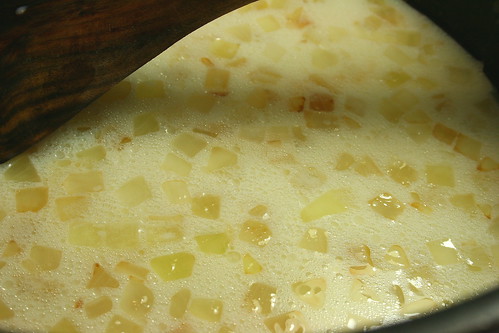
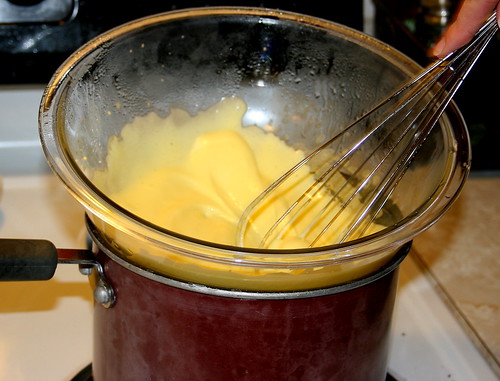
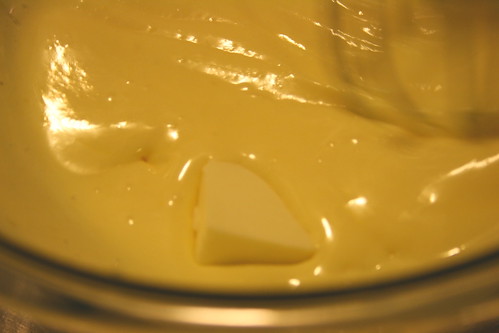
Now heat a couple inches of water in a saucepan. Place the bowl with the eggs yolks on top of the saucepan so the water is not touching the bottom. Whisk continuously until the eggs thicken enough to coat the back of a spoon, about 3-5 minutes.


Remove the bowl from the heat (DO NOT TURN OFF THE WATER). While whisking frantically continuously start adding in the butter, a bit at a time, and melting it into the egg yolk mixture. As you add the butter, you may need to return the bowl to the heat to help it along. Just don't keep it on too long.

At this point you may feel as though your arm is going to fall off...just keep whisking.


When all the butter is melted into the egg yolks, add the salt, lemon juice and cayenne pepper.


Then pour the hollandaise sauce into a thermos or some other container to keep it warm. I used my favorite Starbucks travel mug.


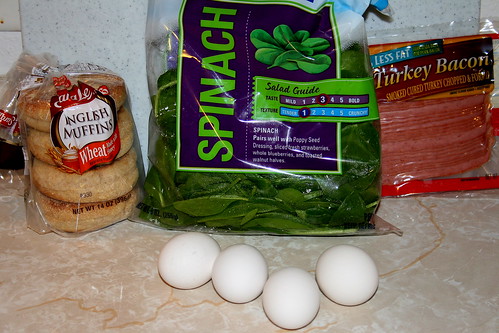
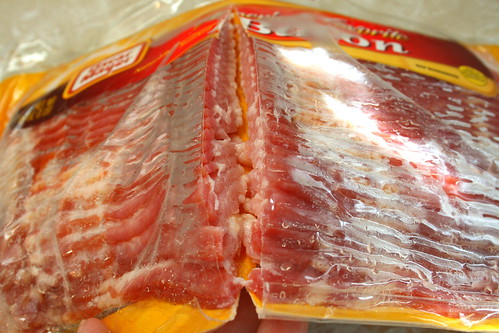
Now comes the good stuff. Gather your ingredients to make your meal. English muffins, spinach, bacon (I used turkey bacon but you can use Canadian bacon or regular bacon or even ham).


Fry up your bacon....


Until crispy and let it drain on a paper towel lined plate.


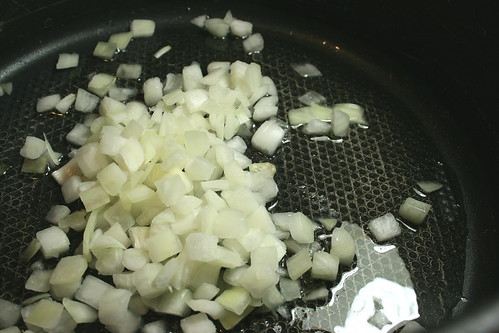
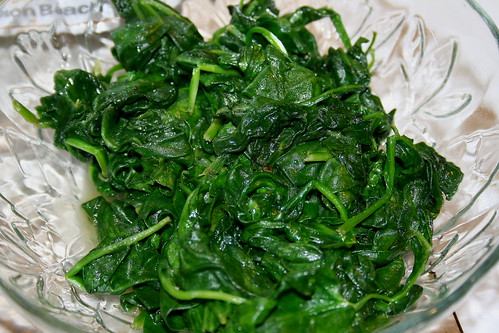
Toss your spinach in a large skillet...


And cook until it is wilted. Set aside and let cool.

And don't forget to toast your English muffin!


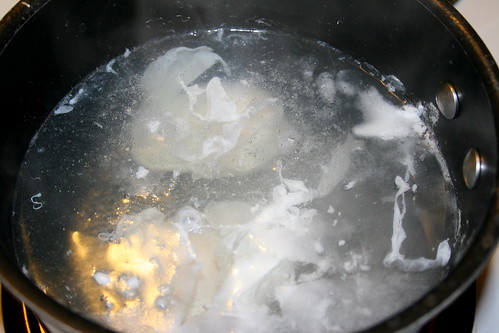
The water you used to heat your hollandaise should still be simmering. If you don't have at least 2-3 inches in the pot, add some more and bring it back to a simmer. Now...very carefully break the eggs directly over the water (all the water shouting ow, ow, ow! because the steam is burning off your skin...but it's okay. You will live).

If you are not comfortable burning off your skin breaking the eggs directly into the water, you can break them into a small bowl then gently pour them into the water.

Let the eggs cook for about 3 minutes until the whites aren't jiggly. As you stand there, it's totally okay for you to liken the floating eggs to alien beings...I'm sure others have thought the same thing.


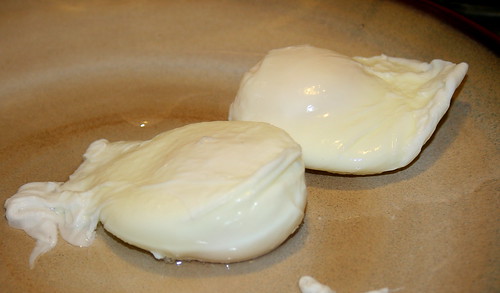
Look how pretty! Success on the first try!!!


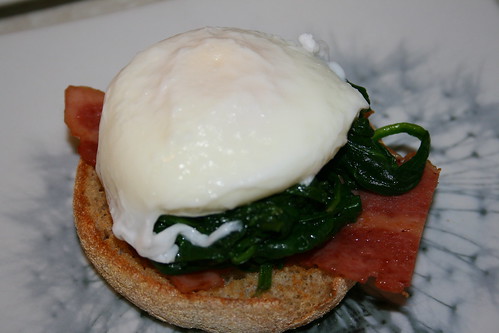
Grab half of a toasted English muffin and top it with a piece of bacon.


Add a quarter cup of spinach on top of the bacon.


Then top the spinach with a poached egg.


On top of the entire thing, pour some hollandaise sauce.


Serve and enjoy!!

Eggs Florentine
Adapted from The Daring Kitchen


Ingredients:
  • 4 eggs (size is your choice)
  • 2 English muffins
  • 4 slices of Canadian bacon/turkey bacon
  • 1 cup wilted spinach
  • Chives, for garnish (optional)
  • Splash of vinegar (for poaching)
For the hollandaise (makes 1.5 cups):
  • 3 large egg yolks
  • 1 teaspoon water
  • 1/4 teaspoon sugar
  • 12 tablespoon unsalted butter, chilled and cut in small pieces
  • 1/2 teaspoon kosher salt
  • 2 teaspoon freshly squeezed lemon juice
  • Pinch cayenne pepper (optional)
Directions:

  1. Fill a medium saucepan halfway with water and bring to a simmer.
  2. Cut the chilled butter into small pieces and set aside.
  3. Whisk egg yolks and 1 teaspoon water in a mixing bowl large enough to sit on the saucepan without touching the water (or in top portion of a double boiler). Whisk for 1–2 minutes, until egg yolks lighten. Add the sugar and whisk 30 seconds more.
  4. Place bowl on saucepan over simmering water and whisk steadily 3–5 minutes until the yolks thicken to coat the back of a spoon.
  5. Remove from heat (but let the water continue to simmer) and whisk in the butter, 1 piece at a time. Move the bowl to the pan again as needed to melt the butter, making sure to whisk constantly.
  6. Once all the butter is incorporated, remove from heat and whisk in the salt, lemon juice, and cayenne pepper (if using).
  7. Keep the hollandaise warm while you poach your eggs in a thermos, carafe, or bowl that you have preheated with warm water.
  8. If the water simmering in your pan has gotten too low, add enough so that you have 2–3 inches of water and bring back to a simmer.
  9. Add salt and a splash of vinegar (any kind will do). 
  10. Crack eggs directly into the very gently simmering water (or crack first into a bowl and gently drop into the water), making sure they’re separated. Cook for 3 minutes for a viscous but still runny yolk.
  11. While waiting for the eggs, quickly fry the bacon, wilt the spinach and toast your English muffin.
  12. Top each half of English muffin with a piece of bacon and a quarter cup of spinach. Remove the eggs with a slotted spoon, draining well, and place on top of the spinach. Top with hollandaise and chopped chives, and enjoy!

Wednesday, September 22, 2010

Sweet Green Bean Bundles


As the weather turns chilly and Summer turns into Fall, my thoughts always turn toward the holidays.

How could they not?? With the annual release of the pumpkin spice latte and walking through stores decked out in holiday garb, it's no wonder that I begin to think of the fun times and family visits ahead.

One of my favorite holidays is Thanksgiving (insert "duh" here).

Yes, yes...I know. Thanksgiving is supposed to be a time of thanks. Of being with loved ones and being grateful for everything life has given us. But I choose to focus on what is most important about Thanksgiving. The food!

One of my favorite things to make for Thanksgiving dinner (and any other pot luck, get together or finger foods type meals) are these sweet green bean bundles. My friend Wendy brought these for a pot luck dinner a few years back and I've been making them ever since.

To be honest, I don't usually like vegetables. But when they are smothered in butter and brown sugar and wrapped in bacon I just can't resist myself! What pushes these little guys over the edge though is the hint of garlic salt. Yum!

Do you want to learn how to make these?? Well let's go!


These ingredients are simple: bacon, brown sugar, garlic salt, butter, and 3 cans of green beans.


Start by draining the juice from all the cans of green beans.


Now take your package of bacon and just cut it right down the middle.


Gather up about 7 green beans and wrap them in one of those half slices of bacon.


Place the bundle in a 9x13in baking dish and repeat until all the green beans and bacon are bundled up and placed in the dish.


Now toss a stick of butter in a small saucepan and melt it down.


Once the butter is melted, toss in your brown sugar.


Stir continuously until all the brown sugar dissolves and the butter and sugar are well incorporated. You should be left with a yummy looking sauce.


Now quickly pour that sauce over the green bean bundles making sure each bundle gets nice and sauced.


Now sprinkle some garlic salt on top of the glazed bundles.


Cover the dish and bake the whole thing for about 45 minutes. (NOTE: If the bacon is not crispy enough for you when the cooking time is complete, turn on the broiler for a few minutes to brown and crisp the bacon).


When it's done, you will have this sugary, buttery, bacony, melty, crispy, delicious treat either for eating by themselves or as a side with one of your favorite dishes. Enjoy!

Sweet Green Bean Bundles
Retrieved from Allrecipes.com

Printer Friendly Version

Ingredients:
  • 3 (14.5 ounce) cans whole green beans, drained
  • 1 pound bacon, cut in half
  • 1/2 cup butter
  • 1 cup brown sugar
  • 1 teaspoon garlic salt
Directions:
  1. Preheat oven to 350 degrees F.
  2. Drain green beans.
  3. Cut bacon in half.
  4.  Wrap 7 green beans in a half slice of bacon and place in 9x13inch baking dish repeating until all bacon and or green beans are used.
  5. Melt butter in small saucepan.
  6. Add brown sugar and stir continuously until sugar dissolves and butter and sugar are well incorporated.
  7. Pour sugar and butter mixture over green bean bundles.
  8. Sprinkle with garlic salt.
  9. Cover with foil and bake 45 minutes. (NOTE: If the bacon is not crispy enough for you when the cooking time is complete, turn on the broiler for a few minutes to brown and crisp the bacon).
  10. Enjoy!
Related Posts with Thumbnails