Tuesday, November 29, 2011

Black Forest Trifle with Duncan Hines and Comstock-Wilderness {Giveaway Closed}


Hi! How was your Thanksgiving??

Mine was good. My Baby Sis, the kids, and I drove 13 hours to Alabama to spend the holiday with my Dad. It was really nice and we had a great time. And, of course, the food was amazing!

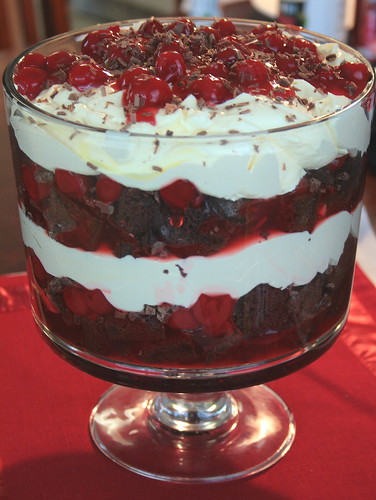
Before I took off to the deep South, I was lucky enough to snag a couple cans of some cherry pie filling and some brownie mix to make this trifle.

Being part of the Foodbuzz Tastemaker program has given me so many opportunities to stretch my creativity in the kitchen and this time was no exception.

Through this program I was gifted with coupons for a Duncan Hines product and a can of Comstock-Wilderness fruit filling.

The BEST part about this program is that now, I get to give TWO lucky blog readers TWO coupons for Duncan Hines products! Check out the end of this post to find out how to enter to win!

Now, on to the good stuff.

I love trifles.

I think they are so easy to put together but that they transport your dessert into something spectacular. Most people think it takes me hours to make these desserts. But that isn't the case.

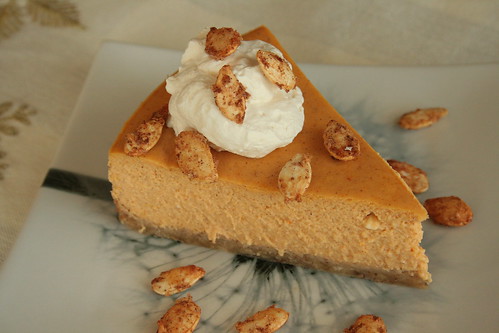
These flavors are perfect for a holiday dessert. And what's really cool about trifles is that you can also use the dessert as a centerpiece for your holiday table!

Let me show you how easy this is to make:


Bake up your brownies according to the package.


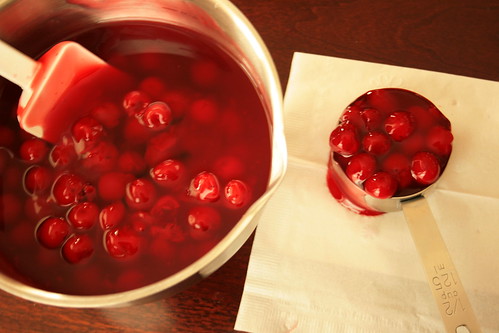
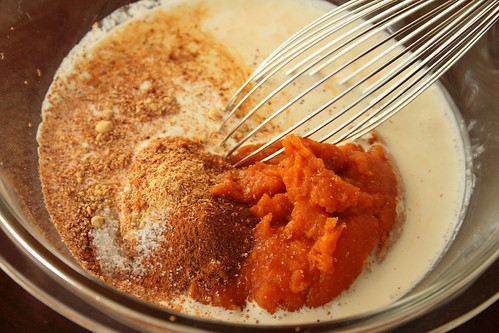
Mix up your cherry pie filling with the almond extract, set aside a 1/2 cup of the mixture. Mix the juice into the bowl.


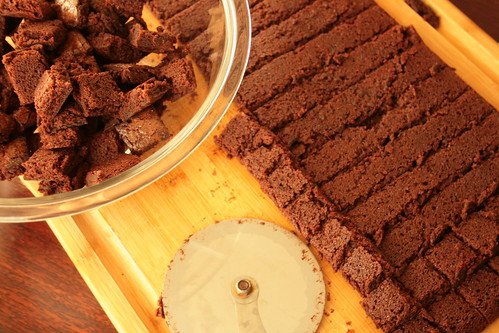
Cut up your brownies into small cubes.


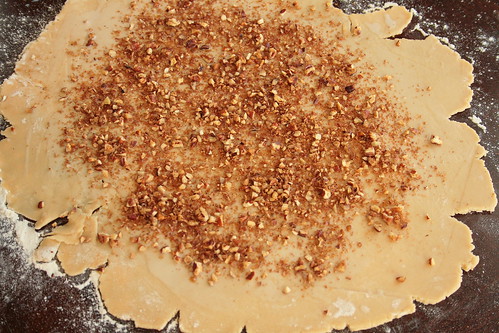
And chop up the majority of your chocolate bars.


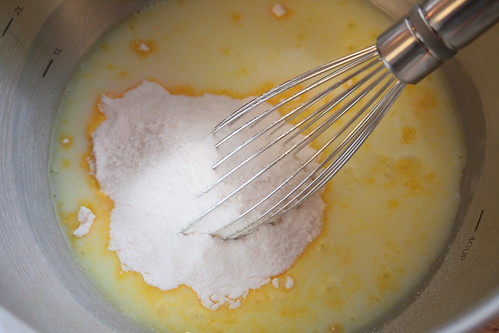
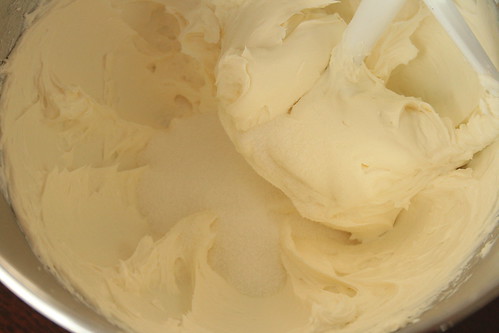
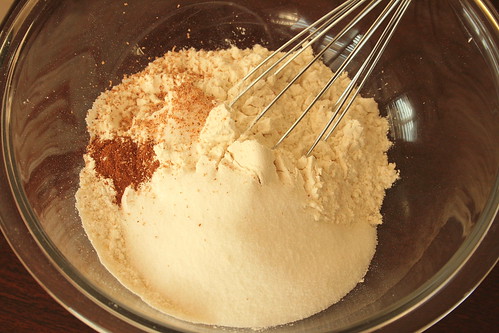
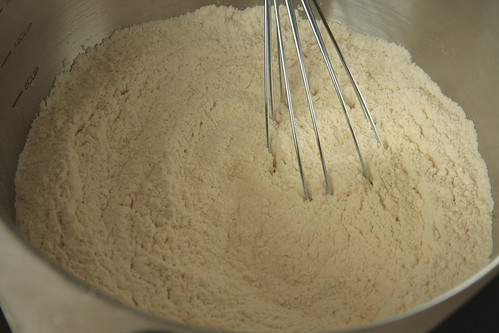
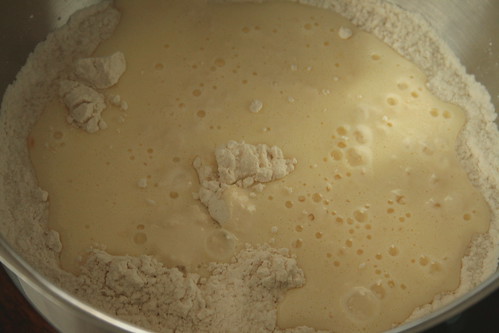
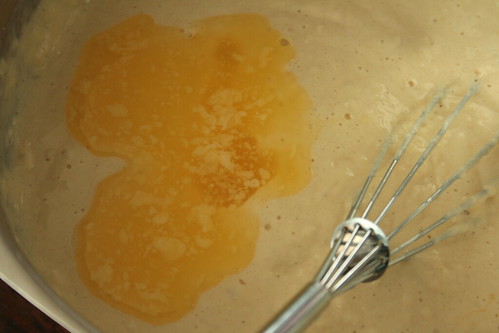
Whisk together the pudding mix and milk until thick.


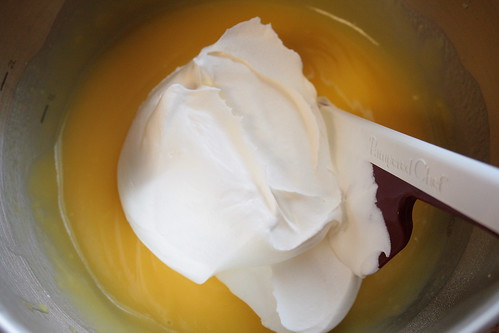
Then fold in the whipped topping.

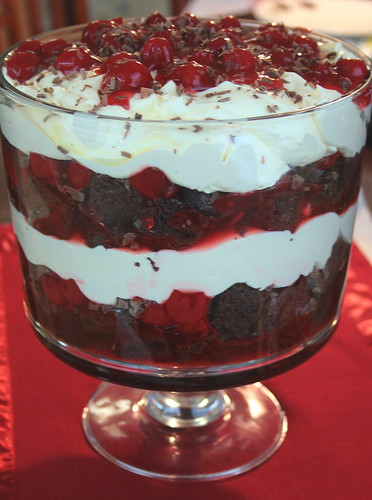
Assemble your trifle.
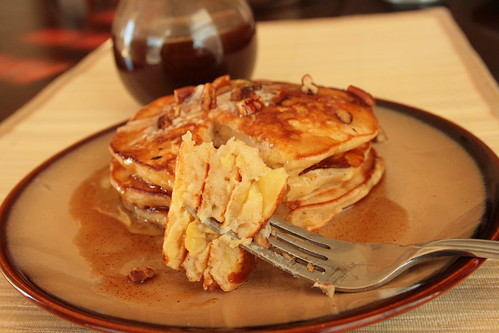

Serve and enjoy!!


As part of the Foodbuzz Tastemaker Program, I received coupons from Duncan Hines and Comstock-Wilderness

Black Forest Trifle
Adapted from The Pampered Chef

Printer Friendly Version

Ingredients:

  • 1 (18-21 ounce) package brownie mix (plus ingredients to make cake-like brownies)
  • 2 (1.55 ounce each) milk chocolate candy bars
  • 2 (21 ounce) cans cherry pie filling
  • 1 1/2 teaspoons almond extract
  • 1/2 cup cranberry-cherry juice
  • 2 cups fat free milk
  • 2 (3.4 ounce each) packages vanilla instant pudding and pie filling mix
  • 1 (8 ounce) container frozen whipped topping, thawed
Directions:
  1. Preheat oven to 350 degrees F. Spray a 13 x 9 inch baking pan with baking spray.
  2. Make brownie mix according to package for cake like brownies. Spread into baking pan and bake 18-20 minutes or until a toothpick inserted into the center comes out clean. Allow to cool completely.
  3. Invert brownies onto large cutting board and cut into 1 inch cubes. Place in refrigerator.
  4. Roughly chop 1 1/2 of the chocolate bars. Reserve the other 1/2 for garnish.
  5. In a medium mixing bowl, combine the cherry pie filling and almond extract. Remove 1/2 cup to use for garnish.
  6. Stir the juice into remaining pie filling mixture.
  7. In a separate medium mixing bowl, whisk together the milk and pudding mix until thickened.
  8. Fold in the whipped topping until no white streaks are left.
  9. Assemble the trifle: place half of the brownie cubes into the bottom of a trifle bowl. Top with half the cherry pie filling mixture. Top with half the whipped topping mixture. Repeat for another layer. Top trifle with the reserved 1/2 cup of the cherry pie mixture. Using a vegetable peeler, peel off chocolate shavings onto the top of the trifle. 
  10. Refrigerate trifle for 30-60 minutes before serving.
  11. Serve and enjoy!
THIS GIVEAWAY IS NOW CLOSED
THE GIVEAWAY

TWO winners will EACH win TWO coupons from Dunan Hines

To Enter:

1. Go to Duncan Hines website and tell me what you will make with your winnings.

2. "Like" Duncan Hines on Facebook

3. Follow @RealDuncanHines on Twitter

4. Follow Jolts & Jollies through Google Friend Connect or RSS Feed.

5. "Like" Jolts & Jollies on Facebook

6. Follow @mannadonn on Twitter

7. Tweet the following: "I entered to win a giveaway with @mannadonn and @RealDuncanHines" and include a link of this post.

That's it! SEVEN ways to enter!! This giveaway will end on Monday, December 5th at midnight CST and the winner will be announced Tuesday, December 6th. Good Luck!!

Tuesday, November 22, 2011

Pumpkin Cheesecake with Ginger Pecan Crust

**Don't forget to enter my giveaway HERE.**


When I was little, I would never swallow something that I didn't like. What was even more awesome than this was that I would never spit it out either.

I would stand there, holding whatever it was in my mouth until it started seeping out from between my lips.

One of the things that I've always disliked is cheesecake.

I also have this weird habit of continuing to try things that I don't like just to make sure I don't like it.

One year, The Hubble gave me a bite of his New York cheesecake (The Hubble loves cheesecake). I took the bite and a few seconds after putting the bite in my mouth I realized that I was holding it there. Not swallowing, not spitting it out.

At that point I figured since I was an adult, I should force myself to swallow it.

The one exception to this dislike of cheesecake is the pumpkin cheesecake.

When I worked at the Barnes & Noble in Las Cruces, NM my boss there convinced me to try a piece of pumpkin cheesecake. I fell head over heels in love!

Pumpkin cheesecake is like a smooth, creamy pumpkin pie. Ten times better than regular pumpkin pie. I was hooked!

When The Cake Slice Bakers voted on this pumpkin cheesecake for the month of November, I was a bit hesitant but also excited. See, I already have a pumpkin cheesecake recipe that I like. BUT, I was definitely willing to give this one a try. Especially when I realized the crust was made of ground pecans and crystallized ginger!

This cheesecake did NOT disappoint. In fact, it may replace my other recipe. It is smooth and creamy. This is the first cheesecake I've made that didn't crack. And the crust. Oh the crust. I am a sucker for all things ginger, and when it's crystallized ginger?? Be still my heart!

This recipe is definitely a keeper. Do youself a favor...run out and get the ingredients to make this and serve it at your Thanksgiving Day feast. Your loved ones will thank you!

Let's bake!


Let's make the crust first. Throw all the ingredients in the bowl of a food processor. Process that stuff until the pecans are finely ground and the whole thing starts to come together as a dough.


Press the mixture into a greased, foil wrapped springform pan.


Then bake it up until the edges start to brown. Place it on a wire rack and let it cool completely.


While that's cooling, we can make the filling. Whisk together the pumpkin, cream and some spices.


Then cream the cream cheese until it's fluffy.


Add the granulated...


And brown sugar gradually.


Then add the eggs, one at a time. Make sure you mix well and scrape the bowl in between each addition.


Now mix in the pumpkin mixture.


And the cornstarch.


Pour the filling onto the cooled crust. Place the whole thing in a water bath and bake it up until the top is set but still a bit wobbly.


Place the pan on a wire rack, remove the foil and immediately run a paring knife along the edges to prevent the top of the cake from cracking.

Make your pumpkin seeds and whipped cream if you are going to.


Slice the cake, dollop with whipped cream, sprinkle with the pumpkin seeds, serve, and enjoy!!


Pumpkin Cheesecake with Ginger Pecan Crust
Adapted from The Cake Book

Printer Friendly Version

Ingredients:

For the Crust

  • 1 cup unbleached all purpose flour
  • 1/4 cup firmly packed light brown sugar
  • 1/8 teaspoon salt
  • 1/3 cup pecans
  • 1/4 cup chopped crystallized ginger
  • 1/2 cup (1 stick) cold, unsalted butter, cut into 1/2 inch cubes
  • 1 Tablespoon cold water
For the Filling
  • 1 cup pumpkin puree
  • 1/2 cup heavy cream
  • 2 teaspoons pure vanilla extract
  • 1 teaspoon ground cinnamon
  • 1/2 teaspoon ground ginger
  • 1/4 teaspoon freshly grated nutmeg
  • 1/4 teaspoon salt
  • 1 1/4 pounds (2 1/2-8 ounce blocks) lower fat cream cheese, softened
  • 1/2 cup granulated sugar
  • 1/2 cup firmly packed light brown sugar
  • 1 Tablespoon cornstarch
  • 4 large eggs
For the Sugared Pumpkin Seeds
  • 1/2 cup hulled raw pumpkin seeds
  • 1 large egg white
  • Pinch of salt
  • 2 Tablespoons granulated sugar
  • 1/8 teaspoon ground cinnamon
For the Whipped Cream
  • 1 1/2 cups heavy cream
  • 3 Tablespoons powdered sugar
  • 1 1/2 teaspoons pure vanilla extract
Directions:

For the Crust
  1. Position a rack in the center of the oven. Preheat oven to 350 degrees F. Spray a 9x3 inch springform pan with baking spray. Cut an 18 inch square of heavy duty aluminum foil and wrap the foil around the outside of the pan.
  2. Place the ingredients for the crust in the bowl of a food processor. Process until the pecans are finely ground and the dough comes together.
  3. Press dough into an even layer over the bottom of the prepared pan.
  4. Bake for 25 to 30 minutes, until it begins to brown.
  5. Place the pan on a wire rack and allow to cool completely.
For the Filling
  1. Reduce oven heat to 325 degrees F.
  2. In a medium mixing bowl, whisk together the pumpkin puree, heavy cream, vanilla extract, cinnamon, ginger, nutmeg, and salt until well combined.
  3. In the bowl of an electric mixer, using the paddle attachment, beat the cream cheese on medium low speed until creamy, about 2 minutes. Scrape down sides and bottom of bowl as necessary.
  4. Gradually add the sugars and beat until blended.
  5. Add the eggs, one at a time, mixing well after each addition. Scrape down sides of bowl as necessary.
  6. Add the pumpkin mixture and mix until blended.
  7. Add the cornstarch and mix until just combined.
  8. Pour the batter into the cooled crust.
  9. Place the pan in a large roasting pan. Fill the pan with enough water to reach 1 inch up the sides of the springform pan.
  10. Bake in the water bath for 70 to 80 minutes, or until the center of the cake is set but slightly wobbly (the cake will set completely as it cools).
  11. Remove the cake pan from the water bath. Place the pan on a wire rack. Remove the foil from the pan.
  12. Immediately run the tip of a paring knife around the sides of the pan, to prevent the top of the cheesecake from cracking. 
  13. Let the cake cool completely then refrigerate for at least 4 hours before serving.
  14. Top with sugared pumpkin seeds and whipped cream, serve and enjoy!
For the Sugared Pumpkin Seeds
  1. Position a rack in the center of the oven. Preheat oven to 325 degrees F. Lightly grease a baking sheet.
  2. Place the pumpkin seeds in a small mixing bowl.
  3. In another small bowl, whisk the egg white just until frothy.
  4. Add just enough of the egg white to the pumpkin seeds to coat them.
  5. Add the salt, sugar, and cinnamon, and toss well to coat the seeds.
  6. Spread the seeds evenly on the prepared baking sheet.
  7. Bake, tossing them occasionally with a spatula, for 15 to 20 minutes or until they begin to dry and color.
  8. Place the pan on a wire rack and cool completely.
  9. Separate the chunks of seeds with your fingers then top cheesecake with the seeds.
For the Whipped Cream
  1. In the chilled bowl of an electric mixer, using the whisk attachment, whip the cream on high speed just until it begins to thicken.
  2. Add the sugar and vanilla; beat until soft peaks form.
  3. Use immediately or cover and refrigerate.

Friday, November 18, 2011

Apple Pancakes with Cinnamon Syrup

**Don't forget to enter my giveaway HERE.**


Last week, before I posted the buttermilk pancakes, I asked my Facebook friends if they wanted me to post biscuits or pancakes.

Besides a little "biscuits for president!" thing, the majority of the votes were for pancakes.

One particular person asked for apple pancakes. This definitely intrigued me.

What was really weird, was that another friend randomly posted that she was craving pancakes with cinnamon apples on top. Now I was REALLY intrigued.

So, I did a little digging and combined a few recipes to come up with this delicious breakfast.

You know how I love my Sunday breakfast tradition, so I made these this past Sunday and there were none left by the time my family came around.

The pancake is fluffy while being soft and moist. Each bite studded with fresh apple chunks was heaven. Adding the toasted pecans for a crunchy texture made me super happy...I love texture in food! And pouring the cinnamon syrup atop this stack of melt in your mouth delightfulness was just sheer genius.

What is really great is that these pancakes are low in fat. AND, if you have some left over cinnamon syrup, you can pour it in your coffee for a cinnamon dolce flavor.

So gather your loved ones around your breakfast this Sunday and serve them a plate of these apple pancakes with cinnamon syrup. But beware, Sunday breakfast may become a tradition after a meal this good!

Let's get cooking!


For the syrup. Whisk together some sugars, corn starch and cinnamon.


Whisk in some water and vanilla. Heat it until thickened.


Remove from heat and whisk in some butter.


For the pancakes. Whisk together some flour, baking powder, salt, sugar, cinnamon, and nutmeg.


In a measuring cup, whisk together some yogurt, milk, vanilla and eggs.


Mix together the dry and wet ingredients.


Then stir in the apples.


On a hot, oiled skillet, drop the batter in 1/4 cup increments and cook it up.


Top with butter, toasted pecans, and cinnamon syrup.


Serve and enjoy!!


Apple Pancakes
Adapted from Smitten Kitchen and Allrecipes

Printer Friendly Version

Ingredients:

  • 2 cups unbleached all purpose flour
  • 1/4 cup granulated sugar
  • 1 teaspoon baking powder
  • 1/2 teaspoon salt
  • 1/2 teaspoon ground cinnamon
  • 1/8 teaspoon freshly grated nutmeg
  • 1 cup low fat apple yogurt
  • 3/4 cup fat free milk
  • 2 large eggs
  • 1 teaspoon pure vanilla extract
  • 3 medium gala apples, peeled and finely chopped
  • Vegetable oil
  • Butter (optional)
  • Toasted pecans (optional)
  • Cinnamon syrup (recipe follows)
Directions:
  1. In a large mixing bowl, whisk together the flour, sugar, baking powder, salt, cinnamon, and nutmeg.
  2. In a large glass measuring cup, whisk together the yogurt, milk, vanilla, and eggs.
  3. Whisk the wet ingredients into the dry ingredients until just combined.
  4. Stir in the apple.
  5. Heat an electric skillet or griddle to 325 degrees F. Pour a small amount of oil on the skillet. Using a 1/4 cup measurement, scoop the batter onto the heated and oiled pan and spread slightly with the 1/4 cup measurement to flatten. Let cook until the edges seem dry and bubbles form in the center of the pancake. Flip and cook the other side another minute or two until golden brown. Place finished pancakes in a 200 degree F oven and repeat until all batter is used.
  6. Top pancakes with batter, toasted pecans, and cinnamon syrup. Serve and enjoy!

Cinnamon Syrup
Adapted from Food.com and Allrecipes


Ingredients:
  • 1/2 cup granulated sugar
  • 1/2 cup light brown sugar
  • 2 Tablespoons corn starch
  • 1/8 teaspoon salt
  • 1 teaspoon ground cinnamon
  • 1 cup water
  • 1/2 teaspoon pure vanilla extract
  • 1 Tablespoon unsalted butter
Directions:
  1. In a small saucepan, whisk together the sugars, corn starch, salt, and cinnamon.
  2. Whisk in the water and vanilla.
  3. Heat mixture over medium high heat until it comes to a rolling boil.
  4. Reduce heat and allow to simmer, stirring occasionally, about 10 minutes or until desired thickness.
  5. Remove from heat and whisk in butter.
  6. Serve and enjoy!

Linked at: 

Tuesday, November 15, 2011

Snickerdoodle Croissant Cookies and a Giveaway - CLOSED


I believe I've mentioned this before, but I love snickerdoodles.

There is just something about these cookies that really do it for me.

I think maybe it's the tang from the cream of tartar??

Or the sweet and spicy combo of the cinnamon and sugar.

Who knows, but every time I see a new snickerdoodle recipe, I have to try it.

I was shopping at a hardware store recently and I ran across this book:


Once I started flipping through it, I landed on these snickerdoodle croissant cookies. Then the next page had snickerdoodle sandwich cookies! WHAT??? Yes, please!!

So I threw the book in my cart (check out the bottom of this post to see what that means for you).

I made these cookies within days of bringing home this book and I am definitely not disappointed in my purchase.

Though these cookies don't have the traditional snickerdoodle taste, that's okay. Each cookie is it's own being so I need not judge this one based on a childhood favorite.

I need to allow this cookie to become a favorite too!

The cookie had a soft crumb with a lovely texture from the nuts. And of course, the cinnamon and sugar. But hey, we one upped that and threw in brown sugar! I love brown sugar.

Okay, okay. I'll stop talking about how good these cookies were and just let you make them yourself.

Let's go.


Cream together the cream cheese and butter.


Toss in the brown sugar and vanilla, mix that up.


Add the flour until well combined.


Separate the dough into 3 portions and flatten them into disks. Cover and chill for an hour.


While the dough is chilling, have an impromptu photo session with your sous chef.


Preheat your oven. Then on a lightly floured surface, roll out your dough, sprinkle on the filling, then cut into 12 triangles.


From the widest edge, roll the cookies and place them on the cookie sheet. Bake them up then let them cool. Top with powdered sugar immediately before serving.


Serve and enjoy!!


Snickerdoodle Croissant Cookies
Adapted from Very Merry Cookies

Printer Friendly Version

Ingredients:

  • 1/2 cup unsalted butter, softened
  • 6 ounces low fat cream cheese, softened
  • 1/2 cup plus 2 Tablespoons packed light brown sugar
  • 1 teaspoon pure vanilla extract
  • 1/8 teaspoon salt
  • 1 2/3 cup unbleached all purpose flour
  • Fat free milk
  • 1/2 cup finely chopped pecans
  • 3/4 teaspoon ground cinnamon
  • 1/4 teaspoon ground nutmeg
  • Powdered sugar (optional)
Directions:
  1. In the bowl of an electric mixer, with the paddle attachment, on medium high speed, cream together the cream cheese and butter for 30 seconds.
  2. Add 1/2 cup brown sugar, the vanilla, and salt. Beat until combined, scraping down sides of bowl as necessary.
  3. Add the flour and mix until combined, scraping down the sides of the bowl as necessary.
  4. Divide dough into thirds. Flatten each dough portion into disks. Place between pieces of parchment paper and place in a large plastic zipper bag. Refrigerate for 1 hour or until easy to handle. 
  5. Preheat the oven to 350 degrees F.
  6. In a small mixing bowl, combine the 2 Tablespoons brown sugar, the cinnamon, nutmeg and pecans.
  7. On a lightly floured surface, roll out each disk of dough into 9 inches circles. 
  8. Lightly baste each dough circle with milk.
  9. Evenly sprinkle the pecan mixture over each disk of dough, coming about 1/2 an inch to the edge.
  10. Using a pizza cutter or sharp knife, slice each circle into 12 triangles.
  11. Starting from the wide end, roll each triangle into a croissant shape. 
  12. Place shaped dough onto an ungreased cookie sheet about an inch apart.
  13. Bake for 14 to 16 minutes or until lightly browned on the bottom of the cookies.
  14. Cool on cookie sheet for 2 minutes then transfer to a cooling rack to cool completely.
  15. Sift powdered sugar over the cookies immediately before serving (if desired).
  16. Serve and enjoy!!

Now it's time for the giveaway!! You know you want to try these cookies. Well, I want you to try these cookies. So what did I do?? I grabbed a copy of the cookbook for you as well as me! Aren't I just the bee's knees??


THIS GIVEAWAY IS CLOSED
How to enter:
(Leave a separate comment for each entry)

1. Answer this question: What is your favorite holiday treat? Include an email address in this comment.

2. Follow Jolts & Jollies through Google Friend Connect or RSS feed

3. Like Jolts & Jollies on Facebook

4. Follow @mannadonn on twitter

5. Tweet about this giveaway (can be done once per day). Include: a link to this blog post and @mannadonn in the tweet.

6. Post on Facebook about this giveaway (can be done once per day). Include: a link to this blog post and @Jolts & Jollies in the post.


This giveaway will end Monday, November, 28th at midnight (CST) and the winner will be announced on Tuesday, November, 29th. Good luck!!

So there you have it SEVEN ways to enter to win this giveaway! 

And don't forget to head over to My Camo Colored Life and enter my other giveaway for this GIVEAWAY TUESDAY!!

THE WINNER OF THE GIVEAWAY ACCORDING TO RANDOM.ORG IS NUMBER 34, KATHIA!! CONGRATULATIONS!!! PLEASE EMAIL ME YOUR MAILING ADDRESS.

Friday, November 11, 2011

Buttermilk Pancakes with Maple Syrup


I. Love. Breakfast.

But not the quick, cereal type breakfast.

I love sitting down for a nice, well made breakfast.

My favorite thing to do is on a Sunday morning, wake up and go out for breakfast. Mmmmm....breakfast.

This year, on Mother's Day, I decided to make a huge brunch for the mothers in my family. I invited my mother, my sisters, and my niece. It was a beautiful spread and I had made so much food that we ended up having to call the dads over as well to help us eat it all. LOL!

Now, Sunday breakfast has become a sort of tradition. My family will come over and I will make them breakfast. Right now we are stuck on eggs in a basket. But we were enjoying these pancakes pretty much every Sunday for a month or two.

When I ran across this recipe for buttermilk pancakes, I knew instantly that I needed to try them. And I did.

Seriously, it was every Sunday! I would make double, triple, and finally quadruple batches just so I could freeze the leftovers and have them available until the following Sunday. They are that good.

For JerBear and Little Butt I added some chocolate chips to part of the batter. They are very smitten with them, let me tell you.

And of course, what are pancakes without homemade syrup?? It just so happens that I had a copy of the syrup recipe my grandma used to use. So I made syrup.

You just can't get better than homemade buttermilk pancakes with hot syrup.

What really pleases and surprises me is that this recipe actually doesn't take very long.

So grab some buttermilk and your family together and let's have breakfast!


Get the syrup cooking so it can be done by the time the pancakes are done. Heat some water and sugar in a saucepan. Add some maple extract. Bring it to a boil then leave it alone so it can cook.


Whisk together your flour, sugar, salt, baking soda, and baking powder.


Whisk together the buttermilk and eggs then add that to the dry ingredients.


Mix in the butter then let it sit while the griddle heats.


In 1/4 cup increments, pour the batter onto the hot skillet and cook them up.


Top with some extra butter (for good measure) and some of your maple syrup.


Serve and enjoy!!


Buttermilk Pancakes
Retrieved from Liv Life

Printer Friendly Version

Ingredients:

  • 2 Tablespoons unsalted butter, melted and cooled; plus more for serving 
  • 2 cups unbleached all-purpose flour 
  • 1/4 cup granulated sugar
  • 2 1/2 teaspoon baking powder 
  • 1/2 teaspoon baking soda 
  • 1/2 teaspoon kosher salt 
  • 2 cups buttermilk 
  • 2 large eggs 
  • Vegetable oil for the griddle 
  • Maple syrup for serving (recipe follows)

Directions:

  1. In a large mixing bowl, whisk together the flour, sugar, baking powder, baking soda, and salt. 
  2. In a medium mixing bowl, whisk together the buttermilk and eggs. 
  3. Pour the wet ingredients into the dry ingredients. Whisk gently until the dry ingredients are almost incorporated; stop before the batter is evenly moistened. 
  4. Add the cooled melted butter and mix just until the batter is evenly moistened (there will be lumps). 
  5. Let the batter rest while you heat the griddle.
  6. Heat a griddle or a large skillet over medium heat (I set my electric skillet to 325 degrees F) until drops of water briefly dance on the surface before evaporating. Lightly oil the griddle. 
  7. Working in batches, pour 1/4 cup of the batter onto the griddle for each pancake, spacing them about 1 inch apart. 
  8. Let cook undisturbed until bubbles rise to the surface and the edges look dry, 1 to 2 minutes. Check the underside of each pancake to make sure it’s nicely browned; then flip. Cook until the second side is nicely browned, about 1 minute more. 
  9. Transfer the pancakes to a baking sheet and keep warm in the oven (set oven to 200 degrees F) while you repeat with the remaining batter.
  10. Serve with maple syrup and enjoy!!

Maple Syrup


Ingredients:
  • 2 cups granulated sugar
  • 1 1/2 cups water
  • 1 teaspoons maple extract
Directions:
  1. Combine water and sugar in medium saucepan over medium high heat. Stir frequently until sugar dissolves.
  2. Stir in maple extract and allow mixture to come to a boil. 
  3. Reduce heat to medium low and allow to simmer, undisturbed, for about 20 minutes. 
  4. Cool 10 minutes before serving.
Related Posts with Thumbnails