




Showing posts with label cheese. Show all posts

Monday, May 23, 2011

Sweet Apple and Onion Stuffed Pork Chops


I have to tell you something.

As a self proclaimed foodie I'm rather ashamed of this...

But I'm going to tell you anyway. Because you are my friends right??

Okay...here goes.

I'm a fairly timid cook.

I said it!

When I started this blog, I knew that I wasn't very creative. But that hasn't stopped me from being able to share great food with you all.

I have found many great dishes to share with my family and friends throughout this bloggy world.

However, I think that having this blog is making me more...adventurous? Creative? Something.

I want to be able to walk into a grocery store or market, pick up and item and come up with an amazing dish in my head that centers from this one ingredient.

When we moved here to Austin and I ventured into my first HEB Plus, I walked by the butcher and saw these gorgeous boneless pork tenderloin chops. I couldn't help but to purchase them. They were practically screaming at me!

So I chatted with the butcher a bit and secured my lovely chops into my cart.

I carried that brown paper wrapped package of meat as tenderly as a birthday present. And I pretty much thought of it as such.

I came home and started wracking my brain trying to figure out what I was going to do with these luscious chops.

It just so happened that my friend The Chef called that night and I was telling her how badly I wished she was here so she could help me figure out what to do with these bad boys. Her immediate response was "stuff 'em!! Anything that thick and lovely should be stuffed!"

My brain quickly went into overdrive and I started thinking about my favorite flavor combination with pork: onions and apples. But I also love sweet, red apples with Vermont Sharp White Cheddar cheese.

It sounded like a winner to me! But I was sure The Hubble would veto the idea...the man hates cheese! I know, I know...how have we stayed married this long? Well, I just figure that means more cheese for me!

Anyway. I digress. So I told The Hubble about my conversation with The Chef and my resulting idea. He thought it sounded like a winner too! So I set to work!

This is the first time I have ever stuffed meat that wasn't a Thanksgiving turkey. And let me tell you, it was fun! LOL!

I threw together a quick stuffing and crossed my fingers as they made their way to the grill.

At one point, some of the stuffing fell out onto the grill. Of course, The Hubble and I set upon it like vultures. After that nibble I knew dinner would be off the hook that night!

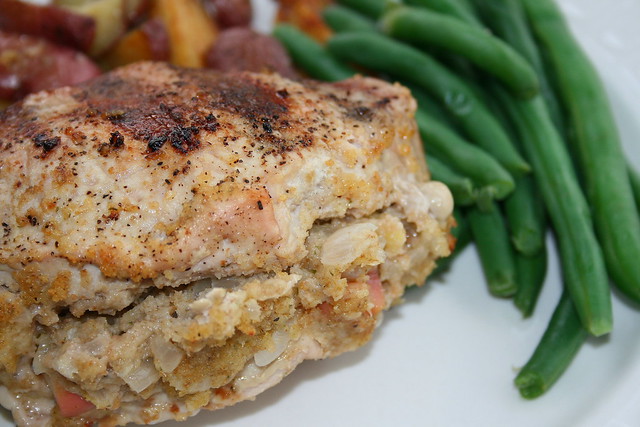
And I was right! These things were freaking amazing. They were juicy and tender. The stuffing was sweet and subtle. The perfect compliment to the lightly seasoned pork chop.

Seriously, looking at these pictures and talking about these pork chops is making me hungry all over again.

And! I'm pleased to say, I was inspired to create my own recipe! Maybe I'm on my way after all.

So now, it's up to you to go make these and love them as much as we did...because I know you will. You don't believe me?? Try it for yourself! Here's how:
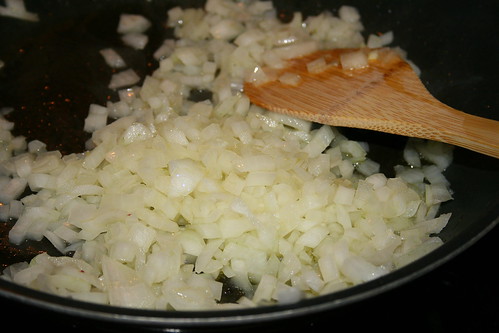

Let's start by sauteing up some onion...


And tossing in some apple. This is the delicious base to our stuffed pork chops!
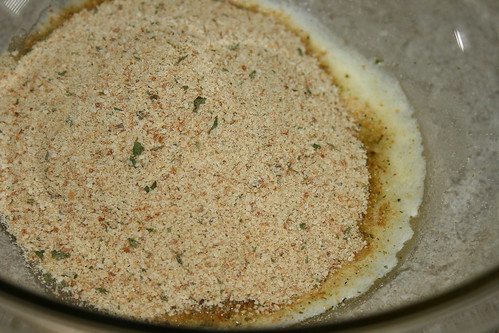

Melt some butter in a bowl and toss in the bread crumbs. Stir them up until the bread crumbs are well coated in butter.
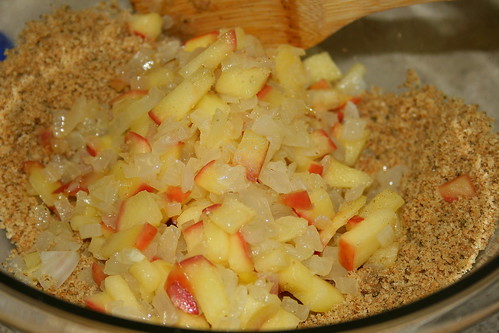

Now mix in the apple and onion.


And, of course, the cheese!
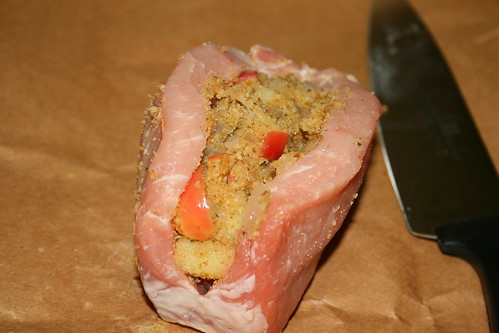

Now slice your chop, NOT all the way through...just create a sort of pocket. Then stuff those bad boys full of the bread crumb mixture.
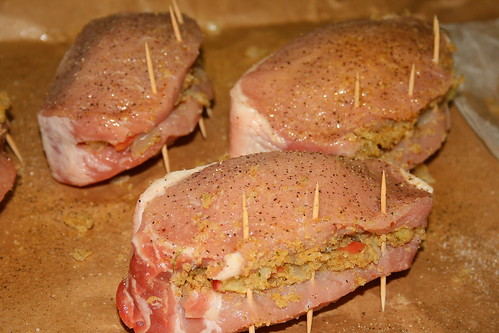

Now seal them up with toothpicks. Spray each side with nonstick cooking spray and season with salt and pepper.
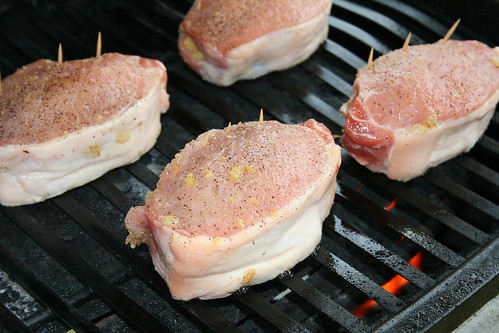

Toss them on the grill and cook them until the juices run clear, about 20-25 minutes.
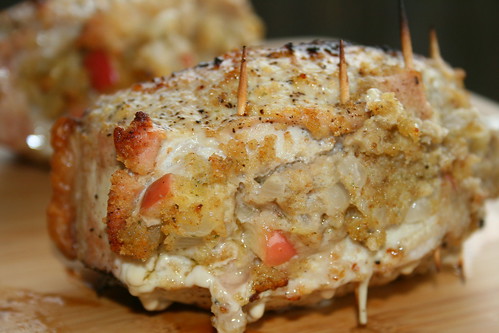

Once cooked, place the chops on a cutting board and let them rest for about 5 minutes. Remove the toothpicks.


Serve them up with some veggies of your choice and enjoy!!!

Sweet Apple and Onion Stuffed Pork Chops

Printer Friendly Version

Ingredients:

  • 6 boneless pork tenderloin chops, at least 1 1/2-2 inches thick
  • 1 medium onion, diced
  • 1 medium apple, diced (I used a red apple)
  • 2 Tablespoons butter, melted
  • 1 cup bread crumbs (I used Italian style)
  • 1/4 cup shredded cheese (I used Vermont Sharp Cheddar)
  • salt and pepper to taste
Directions:
  1. Heat a medium skillet over medium-high heat. Spray with nonstick cooking spray.
  2. Add the diced onion and saute until tender, about 5 minutes.
  3. Add the diced apple and saute until tender, about 3 minutes.
  4. In a medium mixing bowl, melt the butter then add the bread crumbs and toss to coat.
  5. To the bread crumb mixture, mix in the onion and apple.
  6. Add the shredded cheese and mix to thoroughly combine.
  7. Slice the pork chops lengthwise leaving about 1/2 an inch on one side still in tact. 
  8. Stuff pork chops with bread crumb mixture. Secure with toothpicks
  9. Spray each side of the pork chops with nonstick cooking spray and season with salt and pepper.
  10. Grill the pork chops (or cook on a skillet) until the juices run clear, about 20-25 minutes.
  11. Remove from the grill and let rest about 5 minutes. 
  12. Remove toothpicks.
  13. Serve and enjoy!!

Wednesday, November 17, 2010

Crab and Artichoke Souffle


Okay. Here we are again with another souffle. This one did NOT cave in like the pumpkin souffle did.

I was really excited to try another souffle, and a savory one at that.

Originally I had wanted to have a souffle night where I would make this one and another one for dessert, but they are too much work for that.

However, I did conquer the souffle (I think). Aren't you proud of me??? I sure am! LOL!!

I have some other news to share with you. This is Jolts & Jollies 101st post. That means, I've shared 100 food type things.

That's pretty cool.

I always thought I'd do something incredibly special for the 100th post...but it came and went without my even realizing it.

Sad.

Oh well.

I will tell you all that I've been toying with the idea of changing things up around here. The more I learn and change through this blog, the more I want to change about the look. Maybe even the name.

But Jolts & Jollies is special to me. Maybe just adding "cafe" at the end of it?? Jolts & Jollies Cafe? Or just leave it the same? Who knows.

When I first started posting about food, I never knew how important this site and concept would be for me.

I have met some of the most amazing people through this blog. I may even meet one of them in person next month! How fun would that be???

Anyway. I want to say thank you.

Thank you for allowing me to learn.

Thank you for allowing me to grow.

Thank you for being there and moving through the journey with me.

Especially, thanks to those of you who have been there since the VERY beginning when I didn't even have a clue what this blog was about.

And thank you for letting me talk about souffles again!

Let's move on to this souffle. I'm so glad I did it!

Here we go.


Ingredients: unbleached all purpose flour, flaked crab, Gruyere cheese (I found an apple smoked Gruyere that was delicious!), tarragon (or chives), ground white pepper, cream of tartar, artichoke hearts, salt, milk, eggs, bread crumbs and non-stick cooking spray.

Please pay no attention to the cornstarch. I think I'm slowly losing my mind. That definitely has no part in this recipe.


Spray one large or 6 small ramekins with the cooking spray.


Coat each ramekin with bread crumbs. Place the prepared ramekins on a parchment lined baking sheet.


In a medium saucepan, melt the butter then whisk in the flour to make a roux, or paste. While stirring continuously slowly work in the milk. Add the herbs.


Then add the cheese. Continue to stir until the cheese is good and melted and the mixture is thick and smooth. Remove from heat.

I don't have a picture of this step but in a small bowl, beat the egg yolks. Then take a bit of the cheese sauce and slowly add it to the egg yolks while continuously stirring so as not to cook the eggs. You just want to warm them. Then slowly add the egg mixture into the pan with the rest of the cheese sauce.


Now add the diced artichoke hearts and crab meat. Mix until combined.


In a mixing bowl, beat your egg whites (I added a pinch of cream of tartar to them to help them firm up) until stiff peaks form.


Working in 3 batches, gently fold the egg whites into the crab and artichoke mixture.


Evenly distribute the batter into the prepared ramekins. Place them in the prepared oven.


And bake until richly brown, about 25 minutes for the small ramekins.


Serve and enjoy!!

And rejoice that you made a souffle that didn't cave in before it was served! Woohoo!

Crab and Artichoke Souffle
Retrieved from The Daring Kitchen

Printer Friendly Version

Ingredients:

  • 1 cup (4 oz) crab meat, flaked and lightly-packed
  • ½ cup finely chopped cooked artichoke hearts (frozen, fresh or from a jar is OK, but please don’t use the marinated-in-oil style), Alternatively, lightly sautéed leeks would be nice here too.
  • 2 large egg yolks
  • 3 large egg whites, room temperature
  • ½ teaspoon salt
  • ¼ teaspoon cream of tartar
  • 1 cup (2 ½ oz) Gruyere cheese, shredded
  • ½ teaspoon white pepper
  • 1 Tablespoon butter
  • 1 Tablespoon flour
  • 1 teaspoon dried chives or tarragon
  • 1 cup milk
  • Salt and pepper to taste
  • Additional butter and bread crumbs for preparing the dishes

Directions:

  1. Preheat oven to moderate 375 ˚F
  2. Prepare dishes – you can use one 2-quart six 1-cup/240 ml soufflé dishes – by buttering the dish, then coating with bread crumbs. (You may have some left over soufflé mixture if you go with the smaller soufflé dishes.)
  3. Chop the artichoke hearts into ¼ inch dice. If you use frozen or from a jar, then there’s no need to cook them. If you are using fresh, then steam gently until just softened, about 5 minutes or sauté over low heat until just ever so lightly browned.
  4. In a medium saucepan, melt the butter, then stir in the flour to make a roux. – you just want to get the flour evenly blended to a paste, not cook the roux for any length of time. 
  5. Gradually stir in the milk, mixing all the time. 
  6. Add herbs, then the cheese. Stir until the cheese is melted and you have a thick sauce. Remove from heat.
  7. Beat the egg yolks well and gently warm them by adding some of the cheese sauce. Gradually stir the egg yolks into the cheese sauce until well blended.
  8. Add the artichoke and flaked crab meat to the cheese sauce.
  9. Beat the egg whites until at the stiff peak stage.
  10. Fold the whites in thirds into the sauce.
  11. Bake for 40 min if you’re using a large soufflé dish or 25 min if using smaller dishes – the soufflé should be richly browned.
  12. Serve and enjoy!!

Wednesday, September 29, 2010

Rustic Tomato Tart


I have a confession to make.

Okay....breathe...you can do this...

Here goes....

I love garlic.

There! I said it! And you heard me!
I.

Love.

Garlic.

I can't help myself. I don't care how many dates I may have ruined in the past. And anyway, I done caught my man so I can eat as much garlic as I want to and there's nothing he can do about it. He has to love me anyway.

Phew. I feel so much better that I got that off my chest.

You are probably wondering where all this came from. And if you aren't? I'm going to tell you anyway.

See...I've been trying to play catch up in my Google Reader. I have been so busy this past week that I just didn't have time to read anything. I barely eked out the posts for this blog, let alone my other one.

And let me tell you, when way behind on your friend's posts, it may not be a good idea to add more blogs to your already too long list. But sometimes, I run across a great new find and I have to stick around!

That's what has happened with Baking and Creating with Avril. This blog is new to me and I'm so glad I found it. Especially since I read her recent post about this dish I'm about to share with you. I literally ran out that day to get the finishing ingredients so I could make this meal that very night.

All I needed was the cheese so I'm telling you now...you probably already have most of the ingredients for this dish in your kitchen. It was easy and SO delicious.

I made this on a night that The Hubble had class because his usual response for things like this is "where's the meat??" However, I forgot that the meat was missing from this meal...it was THAT good.

I enjoyed this meal on my own with a glass of merlot and it was heaven.

However, as I said...I love garlic, so I often change the "salt and pepper" to "garlic salt and pepper." Why am I mentioning this now? Because I realized my obsession was a problem when I was making this dish. I realized that almost every time a recipe calls for "salt and pepper" I will change it to "garlic salt and pepper." See what I'm saying? It's a problem. And not everyone may share this love with me...but I don't care. It's GEWD!

Okay. Enough talking. Let's get cooking.


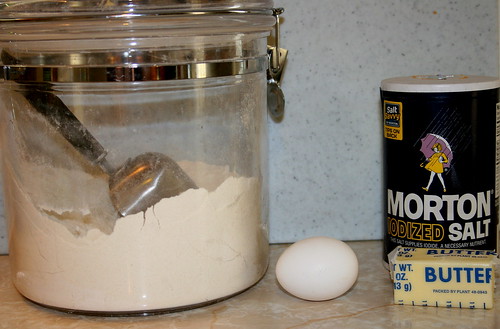
First, we start by making the crust. Grab some flour, salt, butter (cold) and an egg. I actually used salted butter for this but you can do either. I did not find it too salty either. And no...I did not change this one to garlic salt...silly!


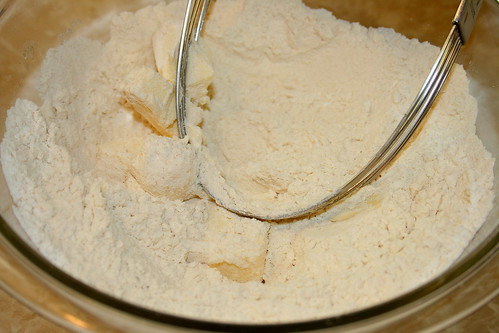
Take a pastry cutter (or two knives) and work the butter and flour together until it resembles a cornmeal type substance.


At this point you are supposed to take a separate bowl and dump in the egg and water, beat it lightly, make a well in the flour and butter mixture, then gently work it all together. Unfortunately, I didn't do that. I cracked the egg into the flour mix then dumped in the water. THEN I read the directions and realized my mistake. So I took the pastry cutter and kind of blended the egg and water in the center of the flour...it was salvaged.


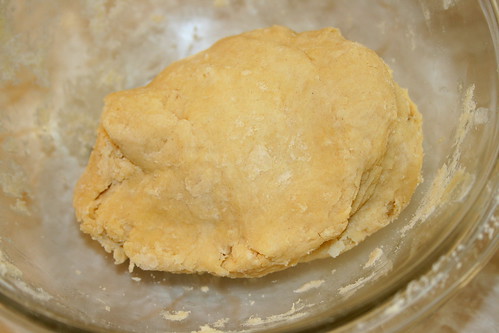
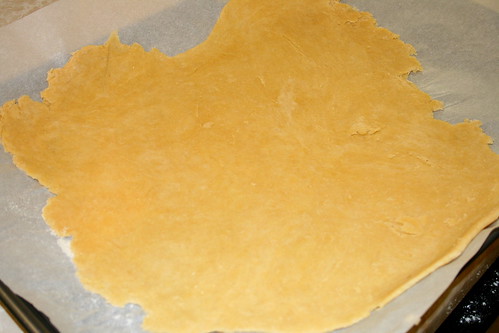
See??? You mix the egg into the flour then I ended up kneading a bit with my hands to make a ball of dough.


I then rolled the ball into a 14 inch "circle" onto a piece of parchment paper. When the dough was rolled out I transferred the whole thing (parchment and all) onto a baking sheet.


Now for the innards! You will need 2-3 large tomatoes (I used 2 1/2), some olive oil, mozzarella cheese (the good kind), stone ground and dijon mustards (sorry the dijon isn't in the picture), some basil (or other herbs of your choosing), pepper and...you guessed it! Garlic salt!


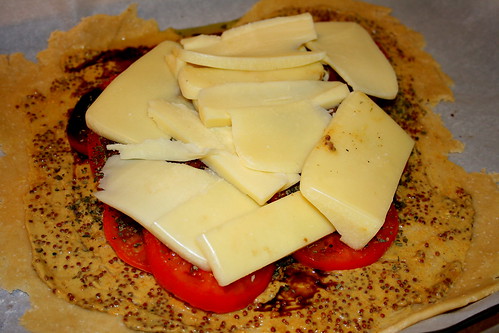
For this part I was planning on just using the stone ground mustard but I found out I didn't have enough. So I made a mix of dijon and stone ground mustard. Spread the mustard onto the unbaked tart shell.


Now slice the tomato and pile it up in the center of the shell.


At this point I decided I wanted to add a little balsamic vinegar because it's SO good with basil and tomato.


So you drizzle a little olive oil and balsamic vinegar over the tomatoes.


Then sprinkle on some garlic salt, pepper and basil.


Slice up the cheese and place it on top of the tomatoes.


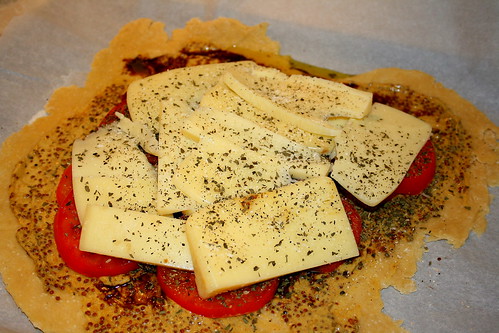
Add a bit more garlic salt, pepper and basil.


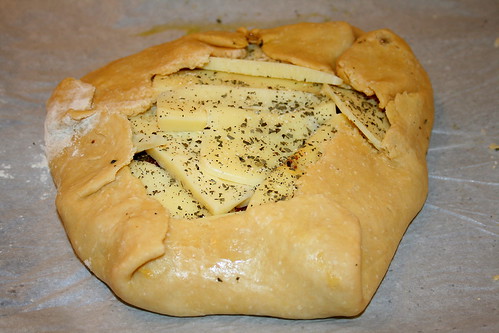
Fold up the edges of the crust over the sides of the tomatoes and cheese. At this point I considered using an egg wash because I was worried about the crust. But, I followed the directions and just left it like this.


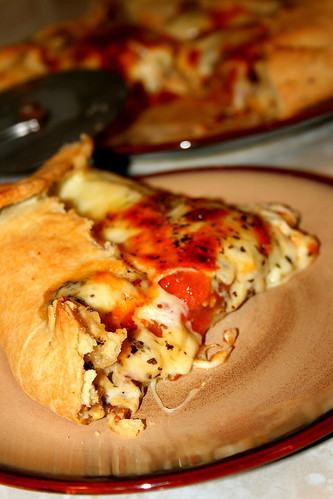
Toss it in the oven for 30 minutes. The crust becomes golden brown and the cheese gets all gooey, brown and bubbly. Oh my!


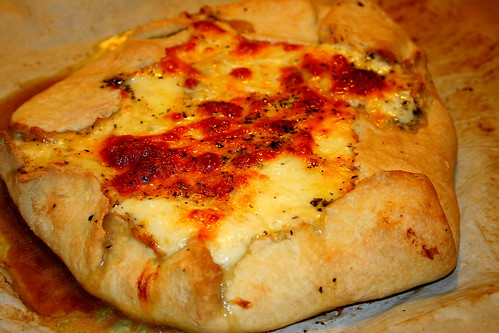
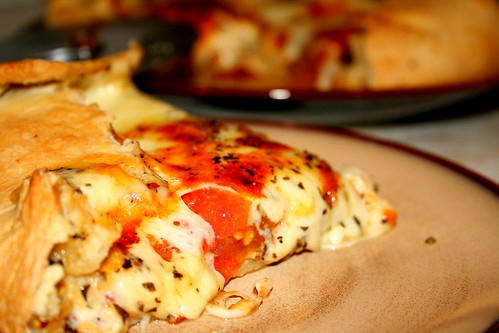
Let it cool for a bit, then slice it with a pizza cutter. Serve and enjoy!

Please, please, please go out and get the stuff to make this tonight. I promise you will hear the angels sing upon your first bite and you will find yourself exclaiming "who needs meat!!!". I know I did! Yum!

Linked with:


Rustic Tomato Tart
Slightly adapted from Baking and Creating with Avril

Printer Friendly Version

Ingredients:

For the crust:

  • 1 1/2 cups all purpose flour
  • 4 Tablespoons chilled butter, cut into cubes
  • 1/2 teaspoon salt
  • 1 large egg
  • 2-3 Tablespoons cold water
For the Filling:
  • 3 Tablespoons stone ground or dijon mustard (use a mix of both if desired)
  • 2-3 large fresh tomatoes
  • 2 Tablespoons Extra Virgin Olive Oil
  • 2 Tablespoons Balsamic Vinegar
  • 2 teaspoons dried basil
  • 8 ounces good quality mozzarella cheese
  • garlic salt and pepper (to taste)
Directions:
  1. Preheat oven to 425 degrees F.
For crust:
  1. Mix salt and flour in medium bowl. With pastry cutter (or using two knives) cut in chilled butter until mixture has a cornmeal consistency.
  2. In separate bowl, lightly beat egg; add 2 Tablespoons water.
  3. Make a well in center of flour mixture and pour egg mixture in the well; mix until well incorporated and a non-sticky dough forms. (During this process, if dough is still too dry, add third Tablespoon of water).
  4. Knead dough into a ball, transfer to parchment paper; roll out into a 14 inch circle. Transfer parchment paper and dough to a baking sheet.
For Filling:
  1. Spread mustard over the unbaked crust until well covered.
  2. Slice tomato and arrange in center of crust circle.
  3. Drizzle tomatoes with olive oil and balsamic vinegar; sprinkle with garlic salt, pepper and basil.
  4. Top with sliced mozzarella; sprinkle with a bit more garlic salt, pepper and basil.
  5. Bring edges of crust up over the edges of tomato and cheese.
  6. Bake in oven for 30 minutes until crust is golden brown and cheese is brown and bubbly.
  7. Allow to cool about 10 minutes, slice with pizza cutter.
  8. Serve and enjoy!

Friday, September 24, 2010

Green Chile Chicken Enchilada Casserole


Have you ever made one of those meals that people ask for time and time again? The kind of meal that you often take to potlucks because it's just that good?

For me, it would be this dish.

Many years back...don't ask me how many because I really don't remember now...I learned how to make these enchiladas from my mother-in-law. I then proceeded to take them to one potluck at work and that was all she wrote!

There was no turning back!

These were requested at many potlucks after that first one. Then, even when I moved from state to state, I would make them for more potlucks.

It got so bad at one point that The Hubble and I had to come up with a vegetarian version of these. Which, we somehow did...and I was told that they were still quite delicious.

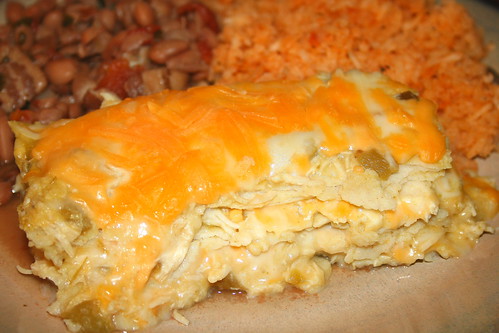
So, if you need a potluck or dinner party dish at some point, I suggest you give these a try. The recipe makes quite a bit. If you serve the enchiladas with rice and beans your meal is sure to be a hit!

Ready to learn how to make them? Let's go:


Grab your ingredients: Shredded cheese, chicken, cream of chicken soup, chopped green chiles, green chile enchilada sauce, corn tortillas. You can also add an onion, as my mother-in-law would do, but The Hubble wanted this sans onions this time.


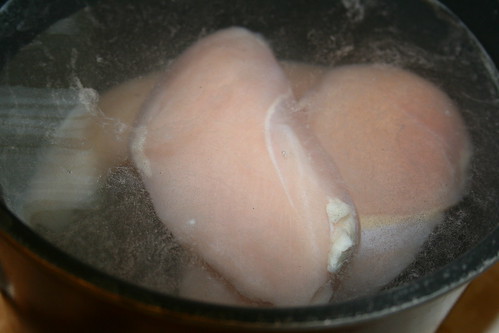
Throw the chicken in a pot full of water and bring it to a boil...


Cook the chicken in the boiling water until the chicken turns white, about 20 minutes. Remove from the water and place on a cutting board.


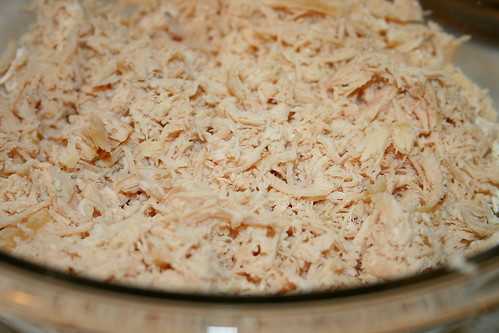
Take a couple forks or use your hands and shred up the chicken. Put the shredded chicken in a large bowl.


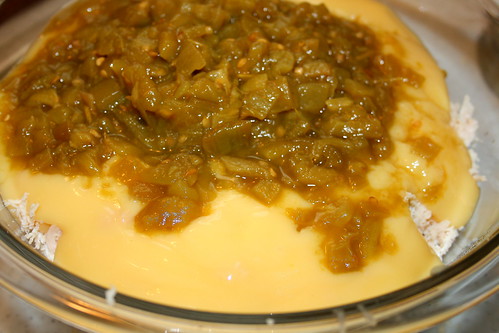
Dump in the cream of chicken soup and the green chiles. If you are using the onion, you want to dice it up and add it at this point as well.


And mix it all up until well combined. This is your "filling."


Pour your enchilada sauce into a shallow bowl and dunk your corn tortillas in the sauce making sure the tortillas are well covered.


Lay six sauce covered tortillas in a layer at the bottom of a 13x9 inch baking dish or pan. You can also spoon a bit more enchilada sauce over the tortillas at this point if you would like.


Take 1/3 of the filling and spread it over the tortillas in an even layer.


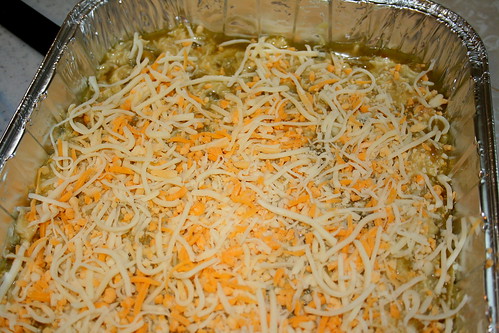
Now take 1/3 of the cheese and sprinkle it over the filling in an even layer.


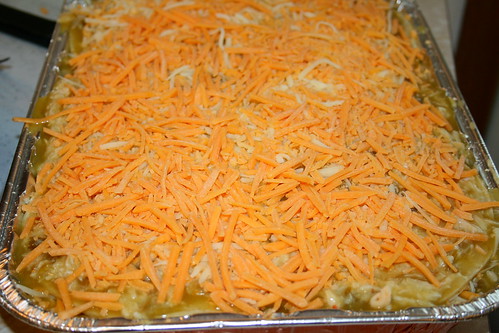
Repeat this process of tortillas, filling, cheese until you have 3 layers in the pan. The top should be the last cheese layer. Now toss it in a 350 degree F oven and cook for about 45 minutes or until the cheese is melted and bubbly.


Serve with rice and beans and great company. Enjoy!

Linked up at Mommie Cooks.

Green Chile Chicken Enchilada Casserole

Printer Friendly Version

Ingredients:
  • 3 boneless, skinless chicken breasts
  • 2 cans cream of chicken soup
  • 3 cans chopped green chiles
  • 1 can Las Palmas green enchilada sauce
  • 4 cups shredded cheese
  • 18 corn tortillas
  • onion, diced (optional)
Directions:
  1. Preheat oven to 350 degrees F.
  2. Cook chicken in boiling water until white all the way through; about 20 minutes. 
  3. Shred chicken; add cream of chicken soup, green chiles and onion (optional)
  4. Pour enchilada sauce into shallow bowl; coat tortillas.
  5. Layer sauce smothered tortillas in even layer covering the bottom of a 13x9 inch pan.
  6. Cover tortillas evenly with 1/3 of chicken mixture; sprinkle 1/3 shredded cheese evenly over chicken mixture. Repeat process until you have 3 layers; ending with cheese layer.
  7. Cook in oven for 45 minutes or until cheese is melted and bubbling.
  8. Serve and enjoy!
Related Posts with Thumbnails