Wednesday, August 31, 2011

Asian Marinated Salmon with Grilled Pineapple


I feel like all I've been doing lately is rushing around.

With Little Butt starting Pre-K last week and having a new baby with his own appointments, I kind of have been running around constantly.

So please forgive me for this amazingly short post today!

Also, these pictures aren't the best...but I couldn't NOT share this salmon.

I actually don't eat a lot of fish, but my mother in law was really craving seafood so I decided to throw this together for her.

This was actually the first time I had ever grilled salmon. Luckily, it turned out amazing. My mother in law even went back for more. AND she said I need to give my father in law this recipe. LOL!

Sorry I didn't get more pictures, I was in a hurry. LOL!

But even though this may not look the best and I don't have a ton of snapshots, you should still make this dish!


This dish is super easy. You mix up your marinade ingredients, toss in the salmon and let it marinate in the fridge for about an hour.

Remove the salmon and toss it on the grill. Grill up the pineapple. Take the remaining marinade and throw it in a saucepan and heat over medium high heat until it is reduced to a glaze.


Serve it up and enjoy!!! I think the only thing that would make this even better is if you took that grilled pineapple and made a salsa out of it! YUM!

Asian Marinated Salmon with Grilled Pineapple

Printer Friendly Version

Ingredients:

  • 1 1/2 pound salmon
  • 1 (20 oz) can pineapple slices in 100% juice, juice drained and reserved
  • 1/2 cup brown sugar
  • 1/4 cup soy sauce
  • 1/2 teaspoon ground ginger
Directions:

  1. In a small mixing bowl, combine pineapple juice, brown sugar, soy sauce and ground ginger until well combined.
  2. Place salmon in sealable container, pour marinade over fish. Refrigerate for about an hour.
  3. Place salmon onto hot grill, grill pan or skillet, skin side down (reserve remaining marinade). Cook until the edges of the fish become a whitish color. Flip salmon and cook until done.
  4. Place reserved marinade into a small saucepan and heat over medium high heat for about 10 minutes or until the mixture is thickened into a glaze.
  5. Grill pineapple slices until heated and grill lines appear.
  6. Serve salmon topped with glaze and pineapple slices.
  7. Enjoy!

Thursday, August 25, 2011

Hungarian Coffee Cake (AKA: Monkey Bread)


Once upon a time I was the girl who was always on time. Not only was I always on time, but I was early. I found that being early allowed me to read before I was actually supposed to be...wherever I was going.

That all changed when I got pregnant with Little Butt. For some reason, my timing was off. It seemed that I was always late!

Now, I have TWO kids. I still can't get over it! It's crazy!! LOL!

But it seems that I'm even more late now than I ever have been!

Take this cake for example.

I baked this cake as part of the Cake Slice Bakers group. To be honest, this post was due to be up on the 20th. Hello there 5 days late!

But what can I do?? Surely I have a good excuse right?? I mean...I do have TWO kids now. ;-)

Either way, it may be late, but at least I did it (which is more than I can say for the poor Daring Kitchen challenges. Who knows when I completed one of those!)

I have been making monkey bread for years so I wasn't TOO thrilled to be making this recipe. However, the way I make it, I start with cans of biscuits, and this cake was from scratch. I also don't add walnuts or raisins to mine.

But I didn't want to be more of a rebel than I already have been, so I made this cake. And I'm actually glad I did! It was quite delicious and I quickly had to send the cake off to my mother's house so I wouldn't eat the whole thing on my own.

The cake itself was moist and buttery while the raisins gave each piece pockets of sweetness. I am a huge fan of texture so the nuts in the cake were divine!

Making the cake was a bit tedious though. Spooning little balls of dough by threes into the bag of cinnamon and sugar became tiresome after the first 20 balls. But hey, nothing good comes easy right??

All in all, I really enjoyed this cake.

And I'm pleased to say that I have been baking with the Cake Slice Bakers for almost a year! This is our next to last cake that we are baking from this book. The new book will be revealed soon. I'm excited!!

But for now...let's get some monkey bread action on!


Whisk together the brown sugar and melted butter until the brown sugar dissolves. Set aside.


In a large mixing bowl, whisk together the flour, baking powder, baking soda and salt.


Add the chilled butter and mix it on low until the mixture resembles coarse meal.


Stir in the buttermilk until just combined.


Mix together some cinnamon sugar in a large zipper top bag.


Using a small scoop or spoon, place balls of dough into the bag and shake to coat the dough with the cinnamon sugar.


Toss the coated dough into a prepared bundt pan while sprinkling the nuts and raisins over the dough as you go.


Pour the brown sugar and melted butter mixture over the dough. Bake until the dough is well risen and the caramel is melted. Immediately invert the cake onto a serving platter.


Serve and enjoy!!

Hungarian Coffee Cake (AKA: Monkey Bread)
Retrieved from Cake Keeper Cakes by Lauren Chattman

Printer Friendly Version

Ingredients:

Topping

  • 1/2 cup (1 stick) unsalted butter, melted
  • 3/4 cup light brown sugar
Cake
  • 1/2 cup granulated sugar
  • 1 teaspoon ground cinnamon
  • 9 Tablespoons unsalted butter, chilled
  • 3 cups unbleached, all purpose flour
  • 1 Tablespoon baking powder
  • 3/4 teaspoon baking soda
  • 3/4 teaspoon salt
  • 1 cup plus 2 Tablespoons buttermilk (plus more if necessary)
  • 1/4 cup walnuts, chopped
  • 1/4 cup raisins
Directions:
  1. Preheat oven to 350 degrees F. Spray a 12 cup bundt pan with baking spray.
  2. Make the topping: Whisk together the melted butter and brown sugar until brown sugar dissolves. Set aside.
  3. Dice the butter into 1/4 inch pieces. Place in small bowl and set in freezer. 
  4. Whisk together the flour, baking powder, baking soda, and salt in a large mixing bowl. 
  5. Add chilled butter and mix on low speed with an electric mixer until mixture resembles course meal. 
  6. Stir in the buttermilk until mixture just comes together (add extra Tablespoon or two of buttermilk if mixture is too dry).
  7. Combine cinnamon and sugar in a large zipper top bag.
  8. Using a small ice cream scoop or spoon, scoop balls of dough into the cinnamon sugar bag. Shake bag to coat dough. (I could only put 3 pieces at a time, otherwise the dough sticks together)
  9. Place the coated dough into the prepared pan, sprinkling the walnuts and raisins over them as you go.
  10. Pour the brown sugar and melted butter mixture over the dough when all the dough is in the pan.
  11. Bake until the cake is firm and well risen and caramel is melted, about 35 to 40 minutes.
  12. When cake is baked, immediately invert it onto a serving platter.
  13. Serve and enjoy!!

Monday, August 22, 2011

Bird's Eye Chef's Favorites Review


When I was little, I hated vegetables.

Oh, who am I kidding?? I still pretty much hate vegetables.

At least now though, I can force myself to eat them. But when I was little, man oh man!!

My mother and I used to get in the biggest struggles because of vegetables. She thought I should eat them, I thought otherwise. So I would sit at the dining room table for hours after everyone else was done because I refused to eat them.

Then, I got smart! I started finding ways to conceal the vegetables without having to eat them (sadly, we didn't have a dog). I used to put them back with the leftovers. Or I would wrap them in my napkin and throw them away. But I couldn't just toss them on the top of the trash can...my mom would check for that. So I wrapped them up and dug them down halfway into the bin. I think this was the most successful strategy.

Now that I'm an adult and I have a kiddo (OMG! I mean KiddoS!) of my own, I am facing the same struggles of trying to get her to eat vegetables.

So when Foodbuzz contacted me about trying these Bird's Eye Chef's Favorites Steamfresh veggies, I jumped at the chance. I keep trying different ways to get Little Butt (and myself) to eat veggies so I thought I would try these out.

I was sent four bags of veggies of three different types.


The first one we tried was the Roasted Red Potatoes & Green Beans in Parmesan Olive Oil Sauce. The Hubble tried it and ran far away. However, my Mother in Law, My Sister and My Self thought they were great! The potatoes were tender without falling apart. The green beans were still crunchy without being waxy. And the sauce was subtle and flavorful. I love Parmesan and the flavor was just right. The sauce wasn't heavy either. I expected a more creamy sauce, but it was nice and light. Loved this bag!


The second type we tried was the Creamed Spinach. Now...I love spinach. However, when I got pregnant with Baby N, I realized the one taste aversion I had was my beloved spinach. But I gave this a try anyway. I was not thrilled. I don't know if it's still leftover pregnancy taste buds or if I just didn't like it. My Mother in Law thought it was decent (though she said it needed a little salt). She ended up stirring hers into her spaghetti and she thought it was splendid that way. I wish I had done that because I love adding spinach to pasta dishes. Sadly, I was beige about this bag.


The final flavor I tried was the Mushroom & Green Bean Risotto. I had high hopes for this one because I love mushrooms and I love risotto. I'm glad to say that it didn't disappoint (though I didn't heat it enough). The only critique I have about this was that I felt like the green beans were throw aways. You couldn't even tell they were there. But maybe that's a good thing for veggie dislikers like me?? The taste was pretty heavy on the mushroom flavor so you would definitely need to be a mushroom lover to enjoy this side. But I ate it all by myself. I definitely loved this bag!

What I really enjoy about this product is that each bag heats in the microwave for about 5 minutes. It's incredibly quick and easy to get a healthy side dish on the table now that school has started. However, don't run out to buy these today...they don't come out until September! But when you see them, I think you should definitely give them a try...except maybe the spinach...but that's probably just me. LOL! I've read other reviews where it was really loved. So it probably really is just me.

Anyway. I hope you enjoyed this review! Feel free to ask any questions you may have! I will answer what I can!

As part of the Foodbuzz Tastemaker Program, I was sent four free bags of Bird's Eye Chef's Favorites Steamfresh bags to try. The thoughts provided are my own.

Wednesday, August 17, 2011

Chocolate Peanut Butter Pie


There are so many things I want to say for this post...but I'm not sure I can fully express everything that I am feeling. But I will try.

Being a military spouse, I am constantly faced with the fear, and sometimes the reality, of having no tomorrow.

My husband is often in danger and every random and unexpected knock at the door sends my heart straight into my feet.

I often wonder how it is "on the other side."

What is civilian life like? Why do we do this? Why does he have this job? Wouldn't it be easier if we didn't always have to worry??

Spending this past weekend with The Hubble was fantastic! Seeing him meet his little baby was such a blessing. But watching him have to leave 3 short days later broke my heart.

Civilians don't have to deal with this right??

The husband's get to stay home. They get to come home for dinner every night. They get to watch their children grow up.

At the end of last week, I continuously saw all kinds of twitter activity about this thing called #apieformikey. Having Baby N, being in the hospital, coming home, then welcoming home The Hubble, I didn't look into it too far.

Until, finally, things settled a bit and I realized this thing wasn't going to go away.

On Friday, I finally clicked a link and that link shattered my rose colored thinking about civilian life.

The link took me over to In Jennie's Kitchen where Jennie tells us about the 
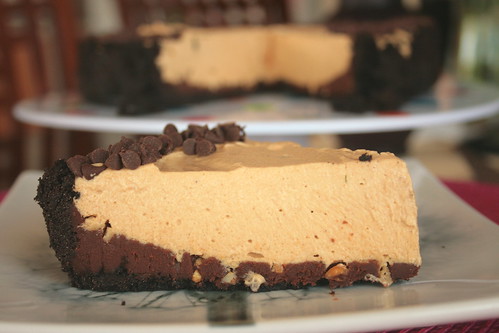
sudden and untimely death of her husband. Mikey's favorite pie was a chocolate peanut butter pie and Jennie kept telling herself that she would make it for him tomorrow, tomorrow, tomorrow. And now tomorrow no longer exists for them.

Her one wish for support from this food community of ours was for everyone to make #apieformikey (a chocolate peanut butter pie) and share it with loved ones this past Friday.

I made the mistake that Jennie made and started telling myself that maybe I would make it "tomorrow." Then I stopped.

I looked at my TWO children. I looked at The Hubble. I thought about tomorrow and how it may not come for us.

Then I made a chocolate peanut butter pie.

Then I called my family over and we shared this "love pie."

I know my pie was late. Jennie wanted us to share it on Friday and mine was shared on Sunday. But I'm sure Jennie and Mikey won't mind my tardiness. I figure it's better late than never right??

And if you hadn't heard about #apieformikey, I suggest you make a chocolate peanut butter pie to share with the ones you love.

And try to remember to cherish every moment with your loved ones, because sometimes tomorrow never comes.


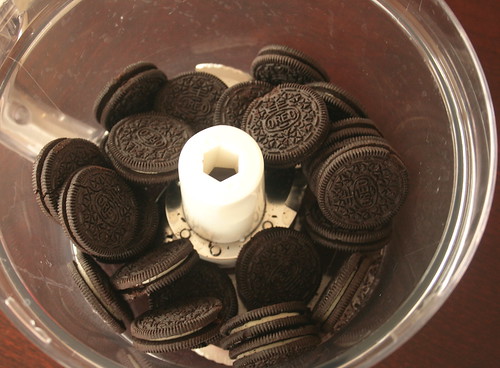
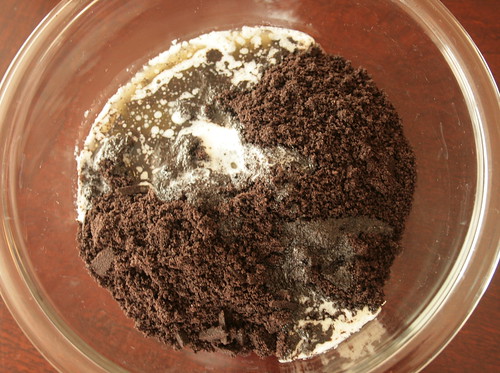
Place your cookies in a food processor and grind them up until they are fine crumbs.


Dump those cookie crumbs in a bowl and add the melted butter. Stir it up until the mixture is well moistened. Press the mixture into the bottom and a little up the sides of a springform pan.

At this point, you can either continue on with a no-bake crust or pop it in the oven for a few minutes to make it crispy. The choice is yours. I baked mine.


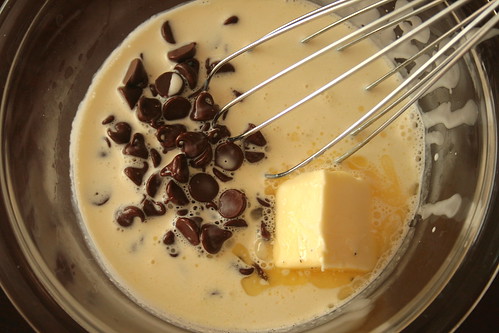
Throw together your ganache. Place the chocolate chips in a bowl with the butter. Heat up the heavy cream then pour that hot stuff over the chocolate and butter. Let them sit for a few seconds then whisk away until smooth.


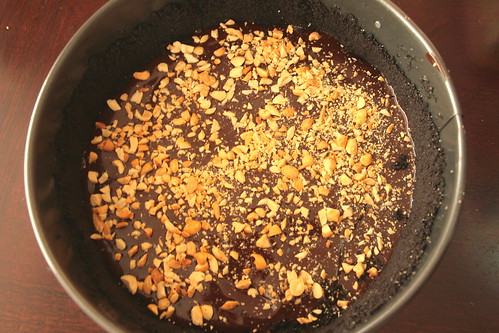
Pour the ganache into the crust and spread it out. Then sprinkle with the chopped peanuts. Throw that in the fridge while you make the filling.


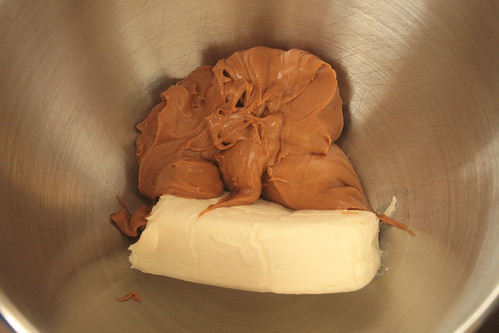
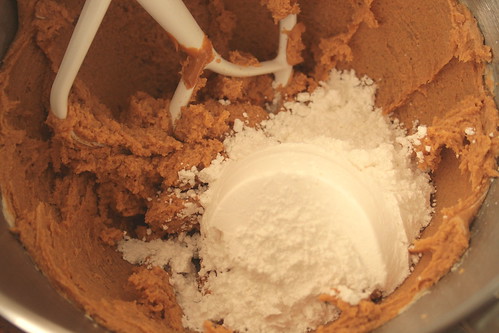
Next up! Filling! Cream together the peanut butter and cream cheese.


Mix in the powdered sugar and vanilla.
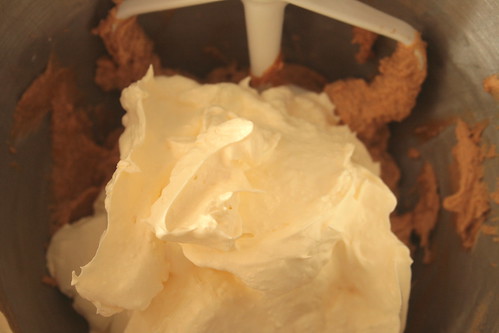

Then the cool whip.


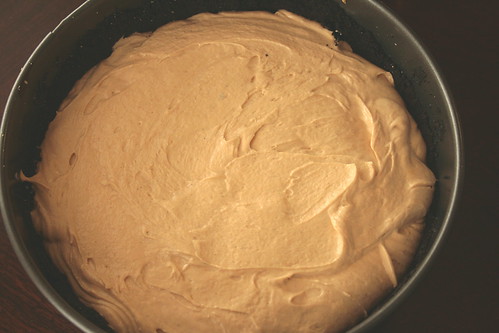
Pour it all into the crust and spread it out. Refrigerate for 3 hours or overnight.


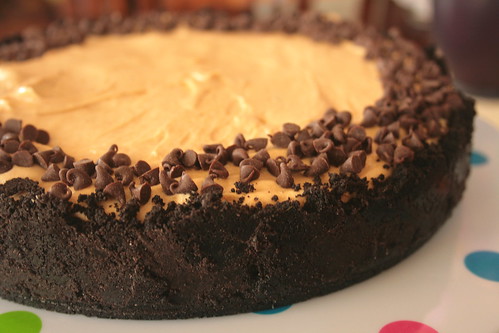
Remove the pie from the pan, garnish with mini chocolate chips.


Slice, serve and enjoy with your loved ones!!

Chocolate Peanut Butter Pie

Printer Friendly Version

Ingredients:

Crust

  • 25 Oreo cookies
  • 4 Tablespoons unsalted butter, melted
Ganache
  • 3/4 cup semi-sweet chocolate chips
  • 2 Tablespoons unsalted butter
  • 1/2 cup heavy cream
  • 1/2 cup peanuts, chopped
Filling
  • 8 ounce cream cheese, softened
  • 1 cup creamy peanut butter
  • 1 cup powdered sugar
  • 1 teaspoon vanilla
  • 8 ounces cool whip, thawed
Directions:
  1. Preheat oven to 350 degrees F. Butter a 9 inch springform pan.
  2. Place the cookies in a food processor and process until they are fine crumbs (if you don't have a food processor, place the cookies in a large zipper bag and roll with a rolling pin until fine crumbs form).
  3. Place the cookie crumbs in a medium mixing bowl and add the melted butter. Stir with a fork until all the crumbs are well moistened. 
  4. Press crumb mixture into the bottom and up the sides of the springform pan. 
  5. Bake for 5-7 minutes to set. Remove from oven and allow to cool completely. (This step is optional. The crust can be pressed into the springform pan and used without baking. I just like the crispiness the baking time provides)
  6. While crust is cooling, make the ganache. Place the chocolate chips and butter in a small mixing bowl. Heat the heavy cream over medium heat until just boiling. Pour the cream over the chocolate and butter; allow to sit about 30 seconds then whisk until smooth.
  7. Pour the ganache into the bottom of the crust and spread with a rubber spatula until evenly distributed.
  8. Sprinkle the chopped peanuts evenly over the ganache.
  9. Place the pan in the fridge while you prepare the filling. 
  10. In a large mixing bowl, cream together the peanut butter and cream cheese until light and fluffy, about 2-3 minutes.
  11. Mix in the cool whip until no white streaks are seen.
  12. Pour the filling into the pan atop the crust, ganache and chopped peanuts. Spread with a rubber spatula until even.
  13. Place pie in refrigerator at least 3 hours or overnight.
  14. Immediately before serving, remove from fridge and garnish with mini chocolate chips or ganache.
  15. To remove from the pan, run a knife along the edge of the crust to release from the sides of the pan. Open and remove the sides of the springform pan. Use a cake lifter or large spatula to remove the pie from the bottom of the pan.
  16. Slice, serve and enjoy with loved ones.

Saturday, August 13, 2011

Introducing Baby N

I copied this from my other blog so if you follow both, I apologize for the repeat. But he's too cute not to share in both places!


Well. It's official. I have a son!!


On Monday, August 8th at 3:50pm our little boy graced us with his presence. He was 8 pounds, 1 ounce and 20 inches long.


To say that I'm already head over heels in love with this little guy is putting things far too lightly. He is amazing.


And big sister can't get enough of him!!


The Hubble is here this weekend and we are definitely enjoying our time as a family of four.

Thanks to my dear friend Monica for the impromptu photo shoot at the hospital. You are amazing my dear!! These pictures are stunning!

Wednesday, August 3, 2011

Pistachio Almond Ice Cream Bread


Today I want to share with you one of the most versatile, easy and awesome recipes I've found to date!

I'm all about the easy stuff lately since I'm ready to pop pretty much any day now.

I still have this need to bake, but I can't be on my feet for too long or I get way tired.

So easy recipes like this are freaking awesome! 

I made my first ice cream bread about a month or two ago and I absolutely fell in love.

See...ice cream bread has 2 required ingredients. Ice cream and self rising flour. Yup...that's it!

The flavors are absolutely endless! 

The first time I made it, I used vanilla ice cream and threw in cinnamon chips, coconut and a praline topping. Yes. It was as delicious as it sounds.

My niece has made pumpkin with white chocolate chips and pecans. She also recently made butter pecan ice cream bread.

I think my next ice cream bread will be with coffee ice cream, chocolate chunks and almonds. But I have to have this baby first. LOL!!

Today I'm sharing my current favorite ice cream. Pistachio almond! I love how the bread is green because of the ice cream. However, I forgot I had wanted to sprinkle the top of the bread with cinnamon sugar because I love getting this ice cream in the cinnamon sugar waffle cones. YUM!

So. What kind of ice cream do you love? What are your ideas for making your own ice cream bread? 

Let me show you how easy it is:


Put your flour, semi melted ice cream and any mix ins in a medium mixing bowl. Stir it up until just incorporated.


Pour the "batter" into a prepared 8x4 inch (I only had a 9x5 inch) loaf pan. Bake it up until a toothpick inserted in the center comes out clean.


Let it cool then slice it up and enjoy!! 

Now go forth and create!!! 


Ice Cream Bread


Ingredients:
  • 1 pint (2 cups) semi melted ice cream (any flavor of choice)
  • 1 1/2 cups self rising flour
  • Assorted mix ins of your choice
Directions:
  1. Preheat oven to 350 degrees F. Spray an 8x4 or 9x5 inch loaf pan with baking spray.
  2. Stir together flour, ice cream and mix ins in a medium mixing bowl until just combined.
  3. Pour batter into prepared loaf pan.
  4. Bake until a toothpick inserted in the center comes out clean (there may be a few crumbs), about 40-45 minutes.
  5. Allow to cool in the pan about 10 minutes. Transfer to a cooling rack and cool completely.
  6. Slice, serve and enjoy!
Related Posts with Thumbnails