Tuesday, December 27, 2011

Buffalo Chicken Enchiladas


Hi there!

Did you have a nice Christmas? I did!

I took last week off from blogging to spend some time with my family.

It was wonderful.

Did you get any great presents?? I got an ice cream maker!! I'm so excited! Now I just need to get a recipe book for it.

So what was your favorite present this year???

Now that we are looking to the New Year, I've started thinking a lot about my health and losing weight again now that Baby N is a little older and gives me some time to do anything but feed him.

I've also been thinking about this blog a lot. I had a friend tell me that she doesn't look at my blog anymore because she was trying to lose weight and everything I was posting was so unhealthy.

When did this happen? When did I let go of the healthy, fitness crazed person I was?

No matter when it happened, it's time to get it back.

So that is your warning. I'm looking to overhaul this blog and try to make it more health minded.

Sure, I will have cakes. After all, I love to bake. But they may not be every day anymore.

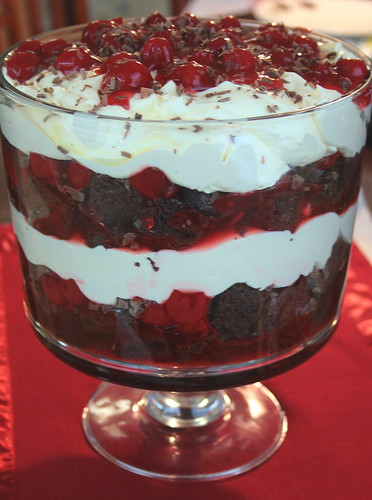
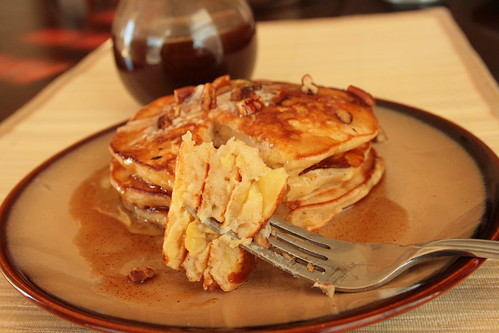
With that being said, I do still have a few treats to post still. Including the most obnoxious cake in all of the land.

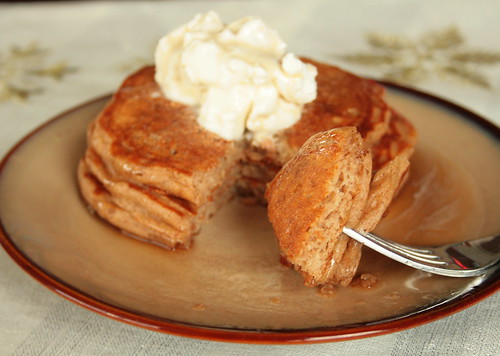
Today though, I'm bringing you something a bit more healthy. I figure you all are either tired of turkey and ready to move on, or you can use any leftover turkey you have in this recipe if you so desire.

A while back I made these buffalo chicken enchiladas. I love that whole wheat tortillas were used in the making of this dish.

I never post about the healthy changes I make to the recipes I create. But luckily, this one I had to change nothing, except the cheese. The original recipe calls for gorgonzola on top but I don't dig on that so I used more monterey jack cheese.

These were the perfect combination of two of my favorite foods. Enchiladas. And buffalo wings.

They were spicy and cheesy. The cilantro gave a fresh flavor. They were gooey and delicious. Don't believe me? Go make them yourself!


Mix together your enchilada and buffalo wing sauces. Then add together the chicken, some cheese, the onions, and some of the sauce mixture.


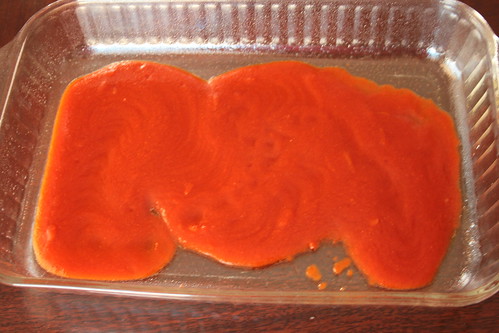
Drizzle some sauce into the bottom of your baking dish.


Fill each tortilla with the chicken mixture and place in the baking dish, seam side down. Finish filling the tortillas until the mixture and tortillas are all used up.


Top the enchiladas with some sauce and cheese then bake it up baby!


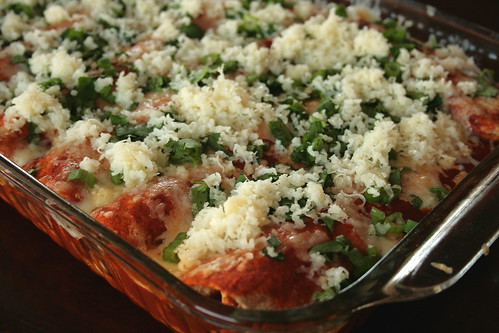
Immediately after removing from the oven, top with the remaining cheese and cilantro. Let stand about 10 minutes.
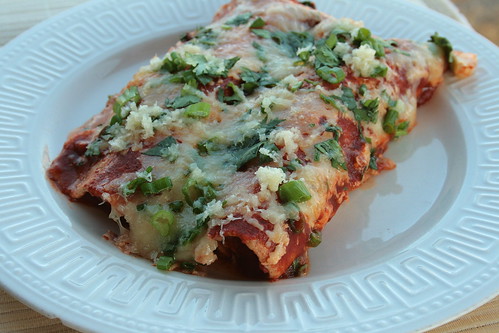

Serve and enjoy!!


Buffalo Chicken Enchiladas
Adapted from How Sweet It Is

Printer Friendly Version

Ingredients:

  • 8 large whole wheat tortillas
  • 3 boneless skinless chicken breasts, cooked and shredded
  • 1 (28 ounce) can red enchilada sauce
  • 1/2 cup buffalo wing sauce (or more, depending on desired heat)
  • 1 1/2 cups shredded monterey jack cheese, divided
  • 5 green onions, chopped
  • 1/2 cup fresh cilantro, coarsely chopped
Directions:
  1. Preheat oven to 375 degrees F. Spray a 9x13 inch baking dish with cooking spray.
  2. In a small mixing bowl, whisk together the enchilada and buffalo wing sauces. Start with 1/4 cup of the buffalo wing sauce, taste, and add until desired taste and heat are achieved.
  3. In a large mixing bowl, combine chicken, green onions, 1/2 cup cheese, and 1/2 cup of the sauce mixture. Mix until well coated and fully combined.
  4. Drizzle a bit of the sauce mixture into the bottom of the baking sheet.
  5. Place a few heaping tablespoons of the chicken mixture into each tortilla. Roll the tortilla over the filling and place in the baking dish, seam side down. Repeat until all tortillas and filling are used.
  6. Pour another 1/2 cup of the sauce mixture over the enchiladas. 
  7. Top with another 1/2 cup of the shredded cheese.
  8. Bake for 20-25 minutes or until the cheese is melted and bubbly.
  9. Immediately after removing from the oven, top with the remaining cheese and the cilantro.
  10. Let stand about 10 minutes.
  11. Serve and enjoy!!

Tuesday, December 13, 2011

Whole Wheat Gingerbread Pancakes with Brown Sugar Whipped Cream


I don't know about you, but I'm ready for this holiday season to be over!

I have been so insanely busy that I can barely think straight anymore.

However, I think it's all down hill from here. I have one more Christmas gift to find and I'm done. But I do still have to finish wrapping everything.

How are you doing with your holiday shopping??

One of the great (or maybe not so great) things about the holidays is all the food!

I had my first annual Christmas Cookie Club meeting last night. It was a fabulous time and I have a ton of amazing cookies to enjoy!

AND! I get to make things like gingerbread pancakes! You can't go wrong there!

What I liked about this recipe is that it is a bit healthier than other pancake recipes. The whole wheat flour did not take anything away from the taste of these pancakes. In fact, I think it added to their enjoyment.

The brown sugar whipped cream was just sweet enough to really enhance the spicy flavor of the gingerbread pancake. The whole breakfast was amazing!

Let's do this!


Whisk together your flour with a few choice spices.


In a separate bowl, whisk together the butter, milk, egg, and yogurt.


Combine the wet and dry ingredients and mix until just incorporated.


Cook up your pancakes.


Toss your heavy cream, brown sugar, and vanilla in a chilled mixing bowl and whisk the heck out of it until soft peaks form.


Serve your pancakes with a dollop of the whipped cream and some maple syrup if you desire.


Enjoy!!

Whole Wheat Gingerbread Pancakes
Adapted from One Ordinary Day

Printer Friendly Version

Ingredients:

  • 1 cup whole wheat flour
  • 1 teaspoon baking powder
  • 1/2 teaspoon baking soda
  • 1 teaspoon cinnamon
  • 1 teaspoon ground ginger
  • 1/2 teaspoon kosher salt
  • 1/4 teaspoon ground cloves
  • 1/8 teaspoon nutmeg
  • 2 Tablespoons light brown sugar
  • 2 Tablespoons unsalted butter, melted
  • 1 (8 ounce) container Greek yogurt
  • 1/2 cup skim milk
  • 1 large egg
Directions:
  1. In a large mixing bowl, whisk together the flour, baking powder, baking soda, cinnamon, ginger, salt, cloves, nutmeg, and brown sugar. 
  2. In a separate, medium mixing bowl, combine the egg, melted butter, yogurt, and milk.  
  3. Combine the wet ingredients and the dry ingredients and mix until just combined.  
  4. Heat a griddle or a large skillet over medium heat (I set my electric skillet to 325 degrees F) until drops of water briefly dance on the surface before evaporating. Lightly oil the griddle. 
  5. Working in batches, pour 1/4 cup of the batter onto the griddle for each pancake, spacing them about 1 inch apart. 
  6. Let cook undisturbed until bubbles rise to the surface and the edges look dry, 1 to 2 minutes. Check the underside of each pancake to make sure it’s nicely browned; then flip. Cook until the second side is nicely browned, about 1 minute more. 
  7. Transfer the pancakes to a baking sheet and keep warm in the oven (set oven to 200 degrees F) while you repeat with the remaining batter.
  8. Serve with brown sugar whipped cream and maple syrup. Enjoy!!
Brown Sugar Whipped Cream
Adapted from The Cake Book


Ingredients:
  • 1 cup chilled heavy cream
  • 2 Tablespoons firmly packed light brown sugar
  • 3/4 teaspoon pure vanilla extract
Directions:
  1. In the chilled bowl of an electric mixer, using the whisk attachment, whip the cream, brown sugar, and vanilla on high speed until soft peaks form. 

Tuesday, December 6, 2011

Easy Buttermilk Drop Biscuits and Giveaway Winners


Hello there!

I am writing to you from my spanking new computer!!

Do you feel different?? I do! It's so sleek and pretty.

In case you are wondering, I got an HP Envy14 with an i5 processor. His name is Zelos and we were made for each other!

He came all the way from Shanghai China just to be with me. It was meant to be.

Anyway, enough about me and my new beloved.

Let's talk about you. Let's talk about the giveaway I recently hosted. This giveaway was pretty easy to figure out the winners. Only 2 people entered in the giveaway correctly so those are the 2 winners!

Amy Beth Marantino and Avril!! 

Please send me your addresses ladies. You can email me at mannadonn[AT]msn[DOT]com

Now, onto the biscuits!

My Baby Sis started staying with me recently and she loves breakfast. But what she REALLY loves for breakfast is savory foods. So, whereas I make pancakes, she makes eggs with sausage and veggies. 

She decided one day that it would be awesome for us to have some biscuits with our biscuits so I quickly set about to finding us a recipe.

My Baby Sis was doing great making the biscuits, until she started cutting the butter into the flour that is. I ended up taking over and making the biscuits myself. Now she teases me constantly and says I refuse to let her bake anything. (We won't mention how I took over the next thing she tried to bake either)

So we made biscuits. And they were good!

They were flaky and buttery yet dense and moist all at the same time.

The best part about these biscuits though?? Not having to wait for yeast to rise! These biscuits are quick and easy and can be whipped up any morning while you are making your savory breakfast. 

Let's bake!


Whisk together your dry ingredients.


Then mix up your butter and buttermilk. Combine with the dry ingredients.


Drop the biscuits onto a parchment lined baking sheet. At this point the recipe said to bake them THEN brush with butter...but I didn't read the recipe right so I brushed them with butter BEFORE I baked them.


Either way. Bake these babies up until they are golden brown and crispy.


Smother with jam, serve, and enjoy!!


Easy Buttermilk Drop Biscuits
Adapted from Lick The Bowl Good

Printer Friendly Version

Ingredients:

  • 2 cup unbleached, all purpose flour
  • 2 teaspoons baking powder
  • 1/2 teaspoon baking soda
  • 1 teaspoon granulated sugar
  • 3/4 teaspoon salt
  • 1 cup cold buttermilk
  • 8 Tablespoons unsalted butter, melted and cooled, plus 2 Tablespoons, melted, for brushing on biscuits
Directions:
  1. Preheat oven to 475 degrees F.
  2. In a large mixing bowl, whisk together flour, baking powder, baking soda, sugar, and salt.
  3. In a small mixing bowl, combine buttermilk and butter.
  4. Pour butter mixture over dry ingredients and mix with a rubber spoon until just combined and dough pulls away from the sides of the bowl.
  5. Using a greased 1/4 cup measurement, measure and drop dough onto a parchment lined baking sheet. Space dough about 1 1/2 inches apart.
  6. Bake biscuits until tops are golden brown and crisp, about 12 to 14 minutes.
  7. Brush biscuits with remaining 2 Tablespoons melted butter (I did this step before baking), remove biscuits to wire rack and allow to cool completely.
  8. Serve and enjoy!

Tuesday, November 29, 2011

Black Forest Trifle with Duncan Hines and Comstock-Wilderness {Giveaway Closed}


Hi! How was your Thanksgiving??

Mine was good. My Baby Sis, the kids, and I drove 13 hours to Alabama to spend the holiday with my Dad. It was really nice and we had a great time. And, of course, the food was amazing!

Before I took off to the deep South, I was lucky enough to snag a couple cans of some cherry pie filling and some brownie mix to make this trifle.

Being part of the Foodbuzz Tastemaker program has given me so many opportunities to stretch my creativity in the kitchen and this time was no exception.

Through this program I was gifted with coupons for a Duncan Hines product and a can of Comstock-Wilderness fruit filling.

The BEST part about this program is that now, I get to give TWO lucky blog readers TWO coupons for Duncan Hines products! Check out the end of this post to find out how to enter to win!

Now, on to the good stuff.

I love trifles.

I think they are so easy to put together but that they transport your dessert into something spectacular. Most people think it takes me hours to make these desserts. But that isn't the case.

These flavors are perfect for a holiday dessert. And what's really cool about trifles is that you can also use the dessert as a centerpiece for your holiday table!

Let me show you how easy this is to make:


Bake up your brownies according to the package.


Mix up your cherry pie filling with the almond extract, set aside a 1/2 cup of the mixture. Mix the juice into the bowl.


Cut up your brownies into small cubes.


And chop up the majority of your chocolate bars.


Whisk together the pudding mix and milk until thick.


Then fold in the whipped topping.

Assemble your trifle.


Serve and enjoy!!


As part of the Foodbuzz Tastemaker Program, I received coupons from Duncan Hines and Comstock-Wilderness

Black Forest Trifle
Adapted from The Pampered Chef

Printer Friendly Version

Ingredients:

  • 1 (18-21 ounce) package brownie mix (plus ingredients to make cake-like brownies)
  • 2 (1.55 ounce each) milk chocolate candy bars
  • 2 (21 ounce) cans cherry pie filling
  • 1 1/2 teaspoons almond extract
  • 1/2 cup cranberry-cherry juice
  • 2 cups fat free milk
  • 2 (3.4 ounce each) packages vanilla instant pudding and pie filling mix
  • 1 (8 ounce) container frozen whipped topping, thawed
Directions:
  1. Preheat oven to 350 degrees F. Spray a 13 x 9 inch baking pan with baking spray.
  2. Make brownie mix according to package for cake like brownies. Spread into baking pan and bake 18-20 minutes or until a toothpick inserted into the center comes out clean. Allow to cool completely.
  3. Invert brownies onto large cutting board and cut into 1 inch cubes. Place in refrigerator.
  4. Roughly chop 1 1/2 of the chocolate bars. Reserve the other 1/2 for garnish.
  5. In a medium mixing bowl, combine the cherry pie filling and almond extract. Remove 1/2 cup to use for garnish.
  6. Stir the juice into remaining pie filling mixture.
  7. In a separate medium mixing bowl, whisk together the milk and pudding mix until thickened.
  8. Fold in the whipped topping until no white streaks are left.
  9. Assemble the trifle: place half of the brownie cubes into the bottom of a trifle bowl. Top with half the cherry pie filling mixture. Top with half the whipped topping mixture. Repeat for another layer. Top trifle with the reserved 1/2 cup of the cherry pie mixture. Using a vegetable peeler, peel off chocolate shavings onto the top of the trifle. 
  10. Refrigerate trifle for 30-60 minutes before serving.
  11. Serve and enjoy!
THIS GIVEAWAY IS NOW CLOSED
THE GIVEAWAY

TWO winners will EACH win TWO coupons from Dunan Hines

To Enter:

1. Go to Duncan Hines website and tell me what you will make with your winnings.

2. "Like" Duncan Hines on Facebook

3. Follow @RealDuncanHines on Twitter

4. Follow Jolts & Jollies through Google Friend Connect or RSS Feed.

5. "Like" Jolts & Jollies on Facebook

6. Follow @mannadonn on Twitter

7. Tweet the following: "I entered to win a giveaway with @mannadonn and @RealDuncanHines" and include a link of this post.

That's it! SEVEN ways to enter!! This giveaway will end on Monday, December 5th at midnight CST and the winner will be announced Tuesday, December 6th. Good Luck!!

Tuesday, November 22, 2011

Pumpkin Cheesecake with Ginger Pecan Crust

**Don't forget to enter my giveaway HERE.**


When I was little, I would never swallow something that I didn't like. What was even more awesome than this was that I would never spit it out either.

I would stand there, holding whatever it was in my mouth until it started seeping out from between my lips.

One of the things that I've always disliked is cheesecake.

I also have this weird habit of continuing to try things that I don't like just to make sure I don't like it.

One year, The Hubble gave me a bite of his New York cheesecake (The Hubble loves cheesecake). I took the bite and a few seconds after putting the bite in my mouth I realized that I was holding it there. Not swallowing, not spitting it out.

At that point I figured since I was an adult, I should force myself to swallow it.

The one exception to this dislike of cheesecake is the pumpkin cheesecake.

When I worked at the Barnes & Noble in Las Cruces, NM my boss there convinced me to try a piece of pumpkin cheesecake. I fell head over heels in love!

Pumpkin cheesecake is like a smooth, creamy pumpkin pie. Ten times better than regular pumpkin pie. I was hooked!

When The Cake Slice Bakers voted on this pumpkin cheesecake for the month of November, I was a bit hesitant but also excited. See, I already have a pumpkin cheesecake recipe that I like. BUT, I was definitely willing to give this one a try. Especially when I realized the crust was made of ground pecans and crystallized ginger!

This cheesecake did NOT disappoint. In fact, it may replace my other recipe. It is smooth and creamy. This is the first cheesecake I've made that didn't crack. And the crust. Oh the crust. I am a sucker for all things ginger, and when it's crystallized ginger?? Be still my heart!

This recipe is definitely a keeper. Do youself a favor...run out and get the ingredients to make this and serve it at your Thanksgiving Day feast. Your loved ones will thank you!

Let's bake!


Let's make the crust first. Throw all the ingredients in the bowl of a food processor. Process that stuff until the pecans are finely ground and the whole thing starts to come together as a dough.


Press the mixture into a greased, foil wrapped springform pan.


Then bake it up until the edges start to brown. Place it on a wire rack and let it cool completely.


While that's cooling, we can make the filling. Whisk together the pumpkin, cream and some spices.


Then cream the cream cheese until it's fluffy.


Add the granulated...


And brown sugar gradually.


Then add the eggs, one at a time. Make sure you mix well and scrape the bowl in between each addition.


Now mix in the pumpkin mixture.


And the cornstarch.


Pour the filling onto the cooled crust. Place the whole thing in a water bath and bake it up until the top is set but still a bit wobbly.


Place the pan on a wire rack, remove the foil and immediately run a paring knife along the edges to prevent the top of the cake from cracking.

Make your pumpkin seeds and whipped cream if you are going to.


Slice the cake, dollop with whipped cream, sprinkle with the pumpkin seeds, serve, and enjoy!!


Pumpkin Cheesecake with Ginger Pecan Crust
Adapted from The Cake Book

Printer Friendly Version

Ingredients:

For the Crust

  • 1 cup unbleached all purpose flour
  • 1/4 cup firmly packed light brown sugar
  • 1/8 teaspoon salt
  • 1/3 cup pecans
  • 1/4 cup chopped crystallized ginger
  • 1/2 cup (1 stick) cold, unsalted butter, cut into 1/2 inch cubes
  • 1 Tablespoon cold water
For the Filling
  • 1 cup pumpkin puree
  • 1/2 cup heavy cream
  • 2 teaspoons pure vanilla extract
  • 1 teaspoon ground cinnamon
  • 1/2 teaspoon ground ginger
  • 1/4 teaspoon freshly grated nutmeg
  • 1/4 teaspoon salt
  • 1 1/4 pounds (2 1/2-8 ounce blocks) lower fat cream cheese, softened
  • 1/2 cup granulated sugar
  • 1/2 cup firmly packed light brown sugar
  • 1 Tablespoon cornstarch
  • 4 large eggs
For the Sugared Pumpkin Seeds
  • 1/2 cup hulled raw pumpkin seeds
  • 1 large egg white
  • Pinch of salt
  • 2 Tablespoons granulated sugar
  • 1/8 teaspoon ground cinnamon
For the Whipped Cream
  • 1 1/2 cups heavy cream
  • 3 Tablespoons powdered sugar
  • 1 1/2 teaspoons pure vanilla extract
Directions:

For the Crust
  1. Position a rack in the center of the oven. Preheat oven to 350 degrees F. Spray a 9x3 inch springform pan with baking spray. Cut an 18 inch square of heavy duty aluminum foil and wrap the foil around the outside of the pan.
  2. Place the ingredients for the crust in the bowl of a food processor. Process until the pecans are finely ground and the dough comes together.
  3. Press dough into an even layer over the bottom of the prepared pan.
  4. Bake for 25 to 30 minutes, until it begins to brown.
  5. Place the pan on a wire rack and allow to cool completely.
For the Filling
  1. Reduce oven heat to 325 degrees F.
  2. In a medium mixing bowl, whisk together the pumpkin puree, heavy cream, vanilla extract, cinnamon, ginger, nutmeg, and salt until well combined.
  3. In the bowl of an electric mixer, using the paddle attachment, beat the cream cheese on medium low speed until creamy, about 2 minutes. Scrape down sides and bottom of bowl as necessary.
  4. Gradually add the sugars and beat until blended.
  5. Add the eggs, one at a time, mixing well after each addition. Scrape down sides of bowl as necessary.
  6. Add the pumpkin mixture and mix until blended.
  7. Add the cornstarch and mix until just combined.
  8. Pour the batter into the cooled crust.
  9. Place the pan in a large roasting pan. Fill the pan with enough water to reach 1 inch up the sides of the springform pan.
  10. Bake in the water bath for 70 to 80 minutes, or until the center of the cake is set but slightly wobbly (the cake will set completely as it cools).
  11. Remove the cake pan from the water bath. Place the pan on a wire rack. Remove the foil from the pan.
  12. Immediately run the tip of a paring knife around the sides of the pan, to prevent the top of the cheesecake from cracking. 
  13. Let the cake cool completely then refrigerate for at least 4 hours before serving.
  14. Top with sugared pumpkin seeds and whipped cream, serve and enjoy!
For the Sugared Pumpkin Seeds
  1. Position a rack in the center of the oven. Preheat oven to 325 degrees F. Lightly grease a baking sheet.
  2. Place the pumpkin seeds in a small mixing bowl.
  3. In another small bowl, whisk the egg white just until frothy.
  4. Add just enough of the egg white to the pumpkin seeds to coat them.
  5. Add the salt, sugar, and cinnamon, and toss well to coat the seeds.
  6. Spread the seeds evenly on the prepared baking sheet.
  7. Bake, tossing them occasionally with a spatula, for 15 to 20 minutes or until they begin to dry and color.
  8. Place the pan on a wire rack and cool completely.
  9. Separate the chunks of seeds with your fingers then top cheesecake with the seeds.
For the Whipped Cream
  1. In the chilled bowl of an electric mixer, using the whisk attachment, whip the cream on high speed just until it begins to thicken.
  2. Add the sugar and vanilla; beat until soft peaks form.
  3. Use immediately or cover and refrigerate.

Friday, November 18, 2011

Apple Pancakes with Cinnamon Syrup

**Don't forget to enter my giveaway HERE.**


Last week, before I posted the buttermilk pancakes, I asked my Facebook friends if they wanted me to post biscuits or pancakes.

Besides a little "biscuits for president!" thing, the majority of the votes were for pancakes.

One particular person asked for apple pancakes. This definitely intrigued me.

What was really weird, was that another friend randomly posted that she was craving pancakes with cinnamon apples on top. Now I was REALLY intrigued.

So, I did a little digging and combined a few recipes to come up with this delicious breakfast.

You know how I love my Sunday breakfast tradition, so I made these this past Sunday and there were none left by the time my family came around.

The pancake is fluffy while being soft and moist. Each bite studded with fresh apple chunks was heaven. Adding the toasted pecans for a crunchy texture made me super happy...I love texture in food! And pouring the cinnamon syrup atop this stack of melt in your mouth delightfulness was just sheer genius.

What is really great is that these pancakes are low in fat. AND, if you have some left over cinnamon syrup, you can pour it in your coffee for a cinnamon dolce flavor.

So gather your loved ones around your breakfast this Sunday and serve them a plate of these apple pancakes with cinnamon syrup. But beware, Sunday breakfast may become a tradition after a meal this good!

Let's get cooking!


For the syrup. Whisk together some sugars, corn starch and cinnamon.


Whisk in some water and vanilla. Heat it until thickened.


Remove from heat and whisk in some butter.


For the pancakes. Whisk together some flour, baking powder, salt, sugar, cinnamon, and nutmeg.


In a measuring cup, whisk together some yogurt, milk, vanilla and eggs.


Mix together the dry and wet ingredients.


Then stir in the apples.


On a hot, oiled skillet, drop the batter in 1/4 cup increments and cook it up.


Top with butter, toasted pecans, and cinnamon syrup.


Serve and enjoy!!


Apple Pancakes
Adapted from Smitten Kitchen and Allrecipes

Printer Friendly Version

Ingredients:

  • 2 cups unbleached all purpose flour
  • 1/4 cup granulated sugar
  • 1 teaspoon baking powder
  • 1/2 teaspoon salt
  • 1/2 teaspoon ground cinnamon
  • 1/8 teaspoon freshly grated nutmeg
  • 1 cup low fat apple yogurt
  • 3/4 cup fat free milk
  • 2 large eggs
  • 1 teaspoon pure vanilla extract
  • 3 medium gala apples, peeled and finely chopped
  • Vegetable oil
  • Butter (optional)
  • Toasted pecans (optional)
  • Cinnamon syrup (recipe follows)
Directions:
  1. In a large mixing bowl, whisk together the flour, sugar, baking powder, salt, cinnamon, and nutmeg.
  2. In a large glass measuring cup, whisk together the yogurt, milk, vanilla, and eggs.
  3. Whisk the wet ingredients into the dry ingredients until just combined.
  4. Stir in the apple.
  5. Heat an electric skillet or griddle to 325 degrees F. Pour a small amount of oil on the skillet. Using a 1/4 cup measurement, scoop the batter onto the heated and oiled pan and spread slightly with the 1/4 cup measurement to flatten. Let cook until the edges seem dry and bubbles form in the center of the pancake. Flip and cook the other side another minute or two until golden brown. Place finished pancakes in a 200 degree F oven and repeat until all batter is used.
  6. Top pancakes with batter, toasted pecans, and cinnamon syrup. Serve and enjoy!

Cinnamon Syrup
Adapted from Food.com and Allrecipes


Ingredients:
  • 1/2 cup granulated sugar
  • 1/2 cup light brown sugar
  • 2 Tablespoons corn starch
  • 1/8 teaspoon salt
  • 1 teaspoon ground cinnamon
  • 1 cup water
  • 1/2 teaspoon pure vanilla extract
  • 1 Tablespoon unsalted butter
Directions:
  1. In a small saucepan, whisk together the sugars, corn starch, salt, and cinnamon.
  2. Whisk in the water and vanilla.
  3. Heat mixture over medium high heat until it comes to a rolling boil.
  4. Reduce heat and allow to simmer, stirring occasionally, about 10 minutes or until desired thickness.
  5. Remove from heat and whisk in butter.
  6. Serve and enjoy!

Linked at: 
Related Posts with Thumbnails