




Showing posts with label oreo. Show all posts

Friday, September 30, 2011

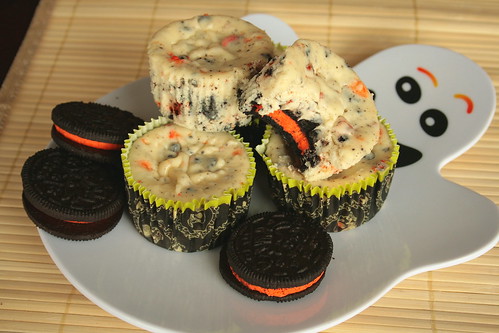
Individual Oreo Cheesecakes (Halloween Style)


I know I've said this before...but where has this year gone??

It seems like it is just flying by.

But I am BEYOND excited that tomorrow is the first day of October. October is probably my favorite month of the year.

Not only is Halloween in October, but the month marks the beginning of cooler weather, pumpkin season, and well...the fact that my birthday is in October doesn't hurt either.

This year October is especially exciting because The Hubble comes home for 2 weeks!! We haven't seen him for more than 2 days at a time since May and I'm so ready for him to be home...if only for 2 weeks.

October also marks Horror month for me. I tend to watch a ton of Horror movies and read Horror type books.

It's my favorite month. ;-)

A couple months ago, my Niece and I decided that we were going to bake our way through Martha Stewart's Cupcakes book.

So far, we have made 3 cupcakes from the book. LOL! We sure are over achievers aren't we???

My Nephew-in-Law chose the individual Oreo cheesecakes about a month ago and I kept putting them off. I had made them before and was not terribly impressed with them.

However, I got to thinking that if I just used the Double Stuffed Oreos that would push these over the edge of deliciousness.

Then I saw the Halloween Oreos! They were thicker than regular Oreos AND they were orange! (I love the color orange)

I quickly grabbed a package and the other needed ingredients and finally made these single serving cheesecakes.

I must say, I was reluctant to try them. I hadn't liked them in the past (I'm not a cheesecake person) so what made me think I would like them now?

Luckily, I did try them. Because they were amazing! I think the orange cream inside made these taste better than normal.

I ended up eating a half dozen of these on my own, and looking at the pictures makes me sad that I don't have them anymore.

I guess that means that I have to make more before the Halloween Oreos leave the shelves! Maybe I'll make them for The Hubble's homecoming.

Who knows...

What I do know, is that these are a MUST make! So drop what you are doing and go find these cookies!

Let's bake!
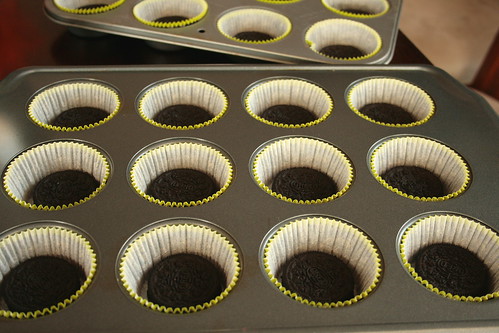

Line a couple muffin tins with cupcake liners then drop a whole cookie at the bottom of each.
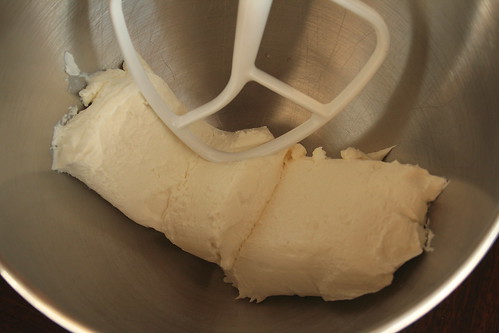

Beat your cream cheese until smooth.
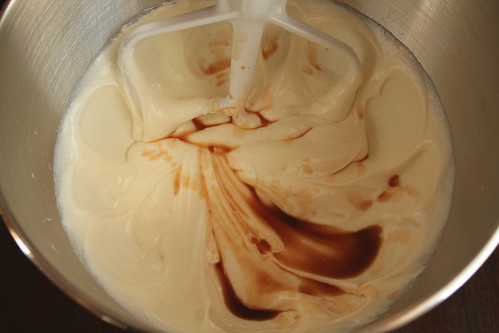

Gradually mix in the sugar. Then add the vanilla.
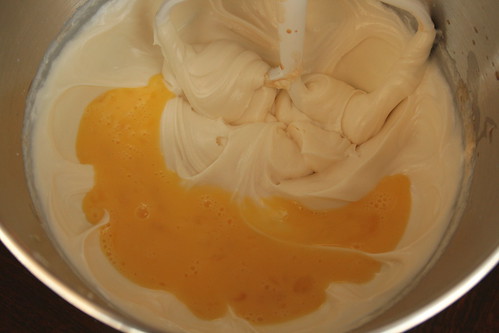

Beat in the eggs, a bit at a time.


Then add your sour cream and salt.
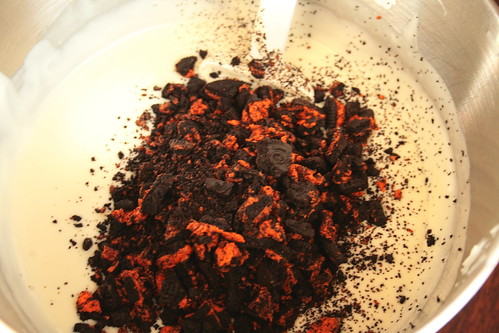

Grab the bowl off the mixer and stir in the cookie chunks by hand.


Fill up each cookie filled cup with batter. Don't be afraid to fill them to the top...they don't rise. Bake them up, cool them down then refrigerate for a good four hours, or up to overnight. (Leave them in the tins through the whole cooling and refrigerating process.


Remove from tins, serve and enjoy!!


Individual Oreo Cheesecakes


Ingredients:
  • 42 Oreo cookies, 30 left whole, 12 coarsely chopped (I used the Halloween Oreos: 18 left whole, 12 coarsely chopped)
  • 2 pounds lower fat cream cheese, room temperature
  • 1 cup sugar
  • 1 teaspoon pure vanilla extract
  • 4 large eggs, room temperature, lightly beaten
  • 1 cup light sour cream
  • Pinch of salt
Directions:
  1. Preheat oven to 275 degrees F. Line standard muffin pans with cupcake liners. Place one whole cookie in the bottom of each lined cup.
  2. In a large mixing bowl, on medium high speed, beat cream cheese until smooth, scraping down the sides of the bowl as necessary.
  3. Gradually add the sugar and beat until combined.
  4. Beat in vanilla.
  5. Add the eggs, a bit at a time, beating to combine. Scrape down the sides of the bowl as necessary.
  6. Beat in sour cream and salt.
  7. Remove bowl from mixer and stir in chopped cookies by hand.
  8. Divide batter evenly among cookie filled cups. Fill each liner almost to the top (don't be afraid, they don't rise).
  9. Bake until filling is set, about 22 minutes, rotating the tins halfway through.
  10. Transfer tins to wire rack to cool completely.
  11. Leave in tins and refrigerate 4 hours or up to overnight.
  12. Remove from tins immediately before serving, serve and enjoy!!

Wednesday, August 17, 2011

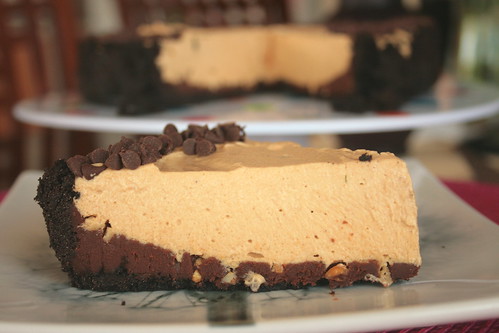
Chocolate Peanut Butter Pie


There are so many things I want to say for this post...but I'm not sure I can fully express everything that I am feeling. But I will try.

Being a military spouse, I am constantly faced with the fear, and sometimes the reality, of having no tomorrow.

My husband is often in danger and every random and unexpected knock at the door sends my heart straight into my feet.

I often wonder how it is "on the other side."

What is civilian life like? Why do we do this? Why does he have this job? Wouldn't it be easier if we didn't always have to worry??

Spending this past weekend with The Hubble was fantastic! Seeing him meet his little baby was such a blessing. But watching him have to leave 3 short days later broke my heart.

Civilians don't have to deal with this right??

The husband's get to stay home. They get to come home for dinner every night. They get to watch their children grow up.

At the end of last week, I continuously saw all kinds of twitter activity about this thing called #apieformikey. Having Baby N, being in the hospital, coming home, then welcoming home The Hubble, I didn't look into it too far.

Until, finally, things settled a bit and I realized this thing wasn't going to go away.

On Friday, I finally clicked a link and that link shattered my rose colored thinking about civilian life.

The link took me over to In Jennie's Kitchen where Jennie tells us about the sudden and untimely death of her husband. Mikey's favorite pie was a chocolate peanut butter pie and Jennie kept telling herself that she would make it for him tomorrow, tomorrow, tomorrow. And now tomorrow no longer exists for them.

Her one wish for support from this food community of ours was for everyone to make #apieformikey (a chocolate peanut butter pie) and share it with loved ones this past Friday.

I made the mistake that Jennie made and started telling myself that maybe I would make it "tomorrow." Then I stopped.

I looked at my TWO children. I looked at The Hubble. I thought about tomorrow and how it may not come for us.

Then I made a chocolate peanut butter pie.

Then I called my family over and we shared this "love pie."

I know my pie was late. Jennie wanted us to share it on Friday and mine was shared on Sunday. But I'm sure Jennie and Mikey won't mind my tardiness. I figure it's better late than never right??

And if you hadn't heard about #apieformikey, I suggest you make a chocolate peanut butter pie to share with the ones you love.

And try to remember to cherish every moment with your loved ones, because sometimes tomorrow never comes.


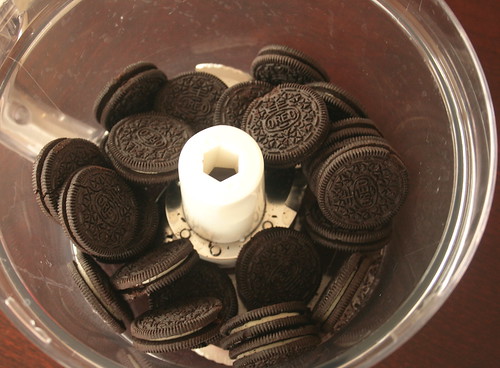
Place your cookies in a food processor and grind them up until they are fine crumbs.


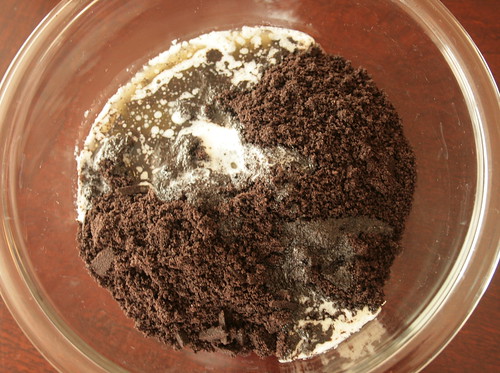
Dump those cookie crumbs in a bowl and add the melted butter. Stir it up until the mixture is well moistened. Press the mixture into the bottom and a little up the sides of a springform pan.

At this point, you can either continue on with a no-bake crust or pop it in the oven for a few minutes to make it crispy. The choice is yours. I baked mine.


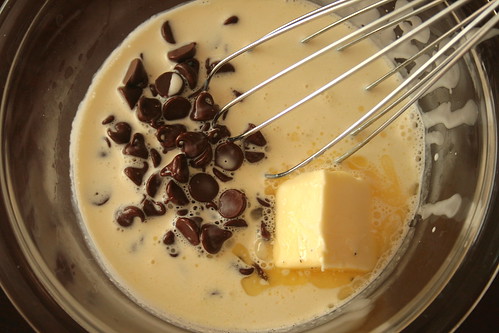
Throw together your ganache. Place the chocolate chips in a bowl with the butter. Heat up the heavy cream then pour that hot stuff over the chocolate and butter. Let them sit for a few seconds then whisk away until smooth.


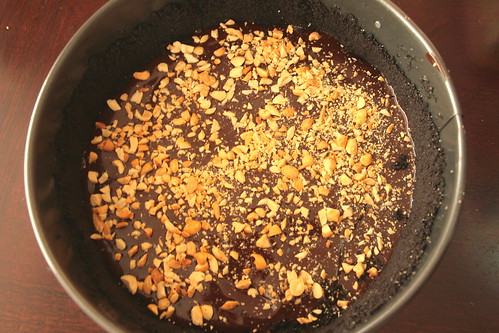
Pour the ganache into the crust and spread it out. Then sprinkle with the chopped peanuts. Throw that in the fridge while you make the filling.


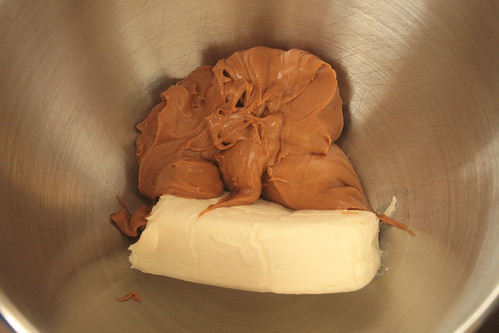
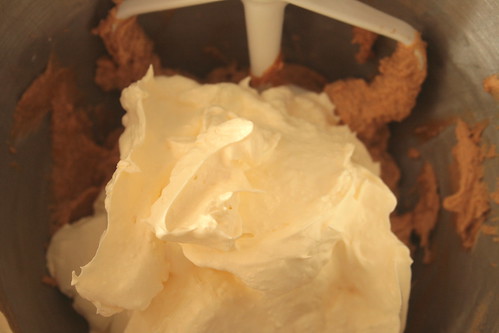
Next up! Filling! Cream together the peanut butter and cream cheese.


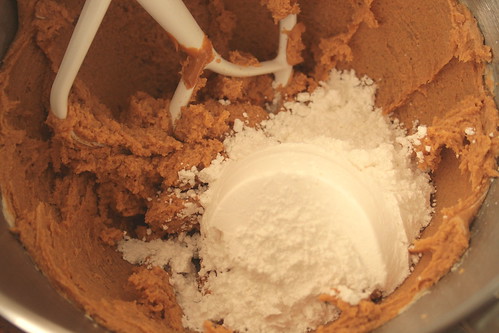
Mix in the powdered sugar and vanilla.


Then the cool whip.


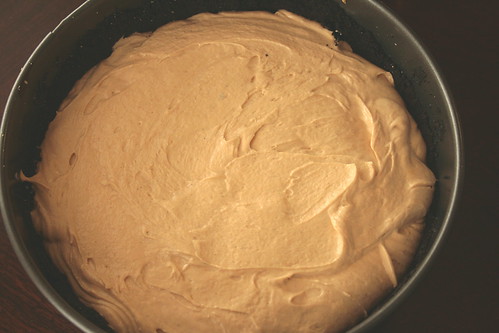
Pour it all into the crust and spread it out. Refrigerate for 3 hours or overnight.


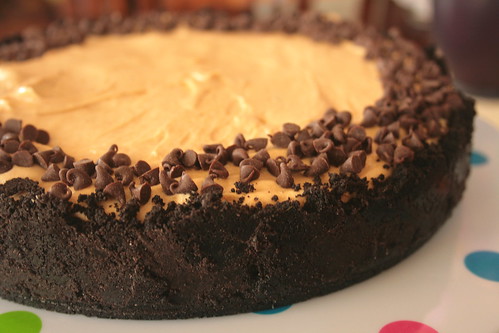
Remove the pie from the pan, garnish with mini chocolate chips.


Slice, serve and enjoy with your loved ones!!

Chocolate Peanut Butter Pie

Printer Friendly Version

Ingredients:

Crust

  • 25 Oreo cookies
  • 4 Tablespoons unsalted butter, melted
Ganache
  • 3/4 cup semi-sweet chocolate chips
  • 2 Tablespoons unsalted butter
  • 1/2 cup heavy cream
  • 1/2 cup peanuts, chopped
Filling
  • 8 ounce cream cheese, softened
  • 1 cup creamy peanut butter
  • 1 cup powdered sugar
  • 1 teaspoon vanilla
  • 8 ounces cool whip, thawed
Directions:
  1. Preheat oven to 350 degrees F. Butter a 9 inch springform pan.
  2. Place the cookies in a food processor and process until they are fine crumbs (if you don't have a food processor, place the cookies in a large zipper bag and roll with a rolling pin until fine crumbs form).
  3. Place the cookie crumbs in a medium mixing bowl and add the melted butter. Stir with a fork until all the crumbs are well moistened. 
  4. Press crumb mixture into the bottom and up the sides of the springform pan. 
  5. Bake for 5-7 minutes to set. Remove from oven and allow to cool completely. (This step is optional. The crust can be pressed into the springform pan and used without baking. I just like the crispiness the baking time provides)
  6. While crust is cooling, make the ganache. Place the chocolate chips and butter in a small mixing bowl. Heat the heavy cream over medium heat until just boiling. Pour the cream over the chocolate and butter; allow to sit about 30 seconds then whisk until smooth.
  7. Pour the ganache into the bottom of the crust and spread with a rubber spatula until evenly distributed.
  8. Sprinkle the chopped peanuts evenly over the ganache.
  9. Place the pan in the fridge while you prepare the filling. 
  10. In a large mixing bowl, cream together the peanut butter and cream cheese until light and fluffy, about 2-3 minutes.
  11. Mix in the cool whip until no white streaks are seen.
  12. Pour the filling into the pan atop the crust, ganache and chopped peanuts. Spread with a rubber spatula until even.
  13. Place pie in refrigerator at least 3 hours or overnight.
  14. Immediately before serving, remove from fridge and garnish with mini chocolate chips or ganache.
  15. To remove from the pan, run a knife along the edge of the crust to release from the sides of the pan. Open and remove the sides of the springform pan. Use a cake lifter or large spatula to remove the pie from the bottom of the pan.
  16. Slice, serve and enjoy with loved ones.

Monday, January 3, 2011

Guest Post: Uncork & Unwined

This is my first post for 2011!!!

Seriously. Where did 2010 go??

I know I've asked that before, but it seems no one can answer my question.

I am currently sitting in El Paso, TX at my in-laws house.

When we came into town it was snowing like crazy! Who knew they got snow in El Paso!!!

So while I'm continuing to be a complete internet and computer slacker, I am making other people do the work for me and keep my poor little blog company. LOL!

Today I present to you Kendra from Uncork & Unwined.

Kendra is another military spouse that I found through the blogosphere.

But let me tell you, her blog is one of the most awesome that I found in 2010.

Not only does Kendra live in Germany (picture chronicling her many travels through Europe) but she also talks about wine, coffee and shares recipes with her readers. I mean, come on...she won me over with the wine and coffee. The recipes are an added bonus. But I will admit I get incredibly slightly jealous when I see the pictures of the gorgeous European sites she visits.

To top off all those amazing qualities in Kendra's blog, she is also super sweet. Pretty much as sweet (if not sweeter) as these little balls of oreo heaven she has to share with us today!

Thanks for the recipe Kendra! Take it away!


Hi!
This is my first time guest blogging for the fabulous Maranda. I am a huge fan of her and her blogs. When she asked me to guest post for her I was so flattered. I love to cook and bake, though I mostly post dessert recipes on my own blog. This recipe is no exception. It has been a huge hit every time I've made it. It is super easy to make and so delicious. It also makes a ton so you can share (or not!).

Oreo Truffles
Courtesy of: Kraft

Ingredients:
1 pkg. of Oreos
1 pkg. of Baker's white chocolate baking squares
8 oz. cream cheese, softened

So, before I get started let me tell you that as with most good stories in my life, there is a back story here. The day before J's birthday party I spent the entire day baking. I had several treats to make that day and most required the use of a microwave. Our microwave was a loaner from the base, huge, loud, inefficient and without a precise timing function. In short, I wasnt a fan of it. It worked well enough until the day I really needed it to work. As I was in the middle of melting chocolates for this dessert the microwave stopped working. Completely. stopped. working. So I turned to my stovetop and attempted to melt the chocolate that way. Our stove heats quickly and gets extremely hot. So of course I burned the chocolate. Thankfully, I had a box of white chocolates in reserve and used those instead. I borrowed my neighbors microwave and was able to finish my treats. Ive made these truffles with semi-sweet chocolate and white chocolate and while they are good with both, I actually like them with white chocolate better. I might not have discovered that if my microwave hadnt broken, so I guess it was a blessing in disguise. (And we received a MUCH better microwave when I took the broken one back!)

Three simple ingredients

I took this picture prior to burning the semi-sweet chocolate. Ha!

1. Crush the Oreos in a medium bowl. I used a food processor, but you can use a freezer bag and a can of soup. 


2. Mix 3 cups of Oreos with the cream cheese. Reserve the rest of the crumbs for later.


3. Roll into 1 inch balls and place on wax paper lined cookie sheets.


4. Dip each truffle in white chocolate and place back on wax-paper lined cookie sheet. I used a fork to dip them into the chocolate.  


5. Sprinkle each truffle with remaining Oreo crumbs. 


6. Enjoy! 


Related Posts with Thumbnails