Showing posts with label peanut butter. Show all posts

Friday, October 12, 2012

Chocolate Peanut Butter Mousse Cake


As you all already know, I'm a bit obsessed with pumpkin.

If it were up to me I would talk about nothing but pumpkin all year long. But it's not always up to me.

Sometimes I have to put aside my one track mind and think of others. Especially when it's for a group thing. LOL!

The Cake Slice
This chocolate peanut butter mousse cake was the top voted cake for September for the Cake Slice Bakers.

Yes, I said September. I'm just slightly late.

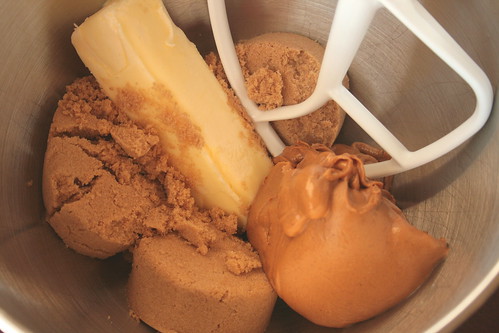
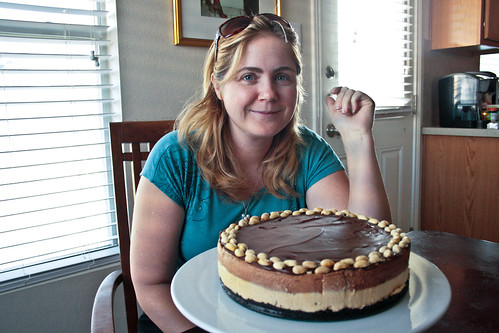
See...my older sister's most favoritest flavor combo is peanut butter and chocolate. If you ask her, she will say she has a lot of flavor combinations that she loves but this is one I truly associate with her.

On October 4th was the second anniversary of her 35th birthday and I knew this was just the cake for her celebration. And I wasn't wrong! This cake was perfect for her! I mean...I think she liked it...she looks happy with it right??


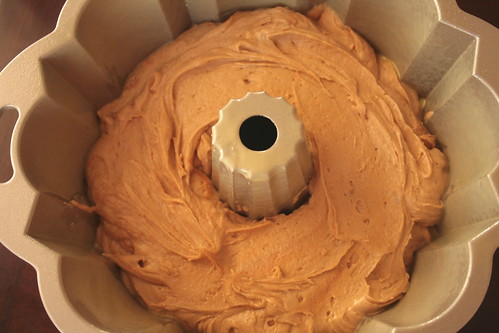
When I first read through the recipe, I was genuinely shocked that this isn't your typical "cake." Especially for a group called the Cake Slice Bakers. You don't actually bake this cake.


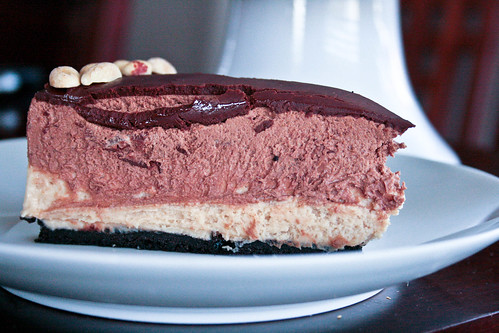
The cake is light, fluffy, and melt in your mouth good. It is a rich cake for sure.

The recipe looks a little intimidating. Yes, there are several parts to this cake. But each part is pretty straight forward and fairly easy. And what's better than a cake that can be thrown together without ever having to turn on the oven.

I made this cake in an afternoon and let it set overnight. My sister was very happy with it. :-)

And speaking of the Cake Slice Bakers, we are currently open for new members! Since I am so late with this, there are only a few more days to get into the group. If you are interested, please email Paloma at love.for.coffee@gmail.com and title the email NEW CAKE SLICE MEMBER. I hope to see some of you there! And don't forget to check out the other Cake Slice Members for this cake as well.

Until then, let's bake refrigerate!!


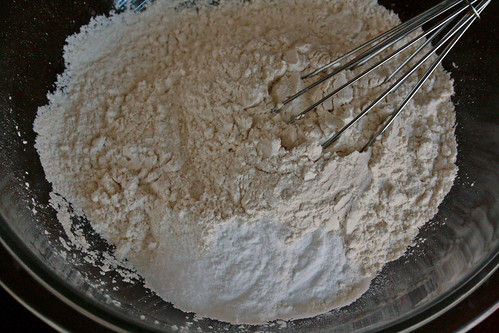
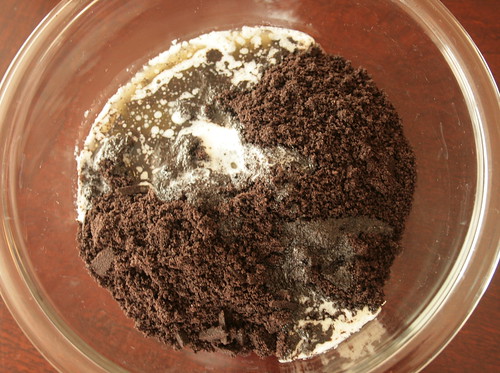
Mix together the cookie crumbs and melted butter until well coated.


Press the mixture into the bottom of a springform pan. Place in the refrigerator while you make the peanut butter mousse.


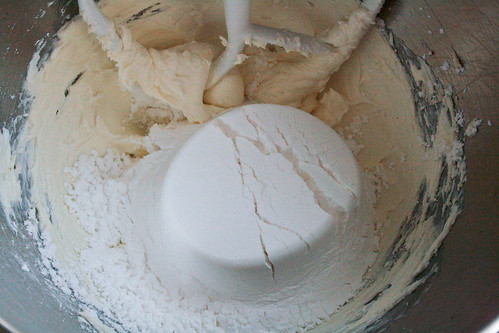
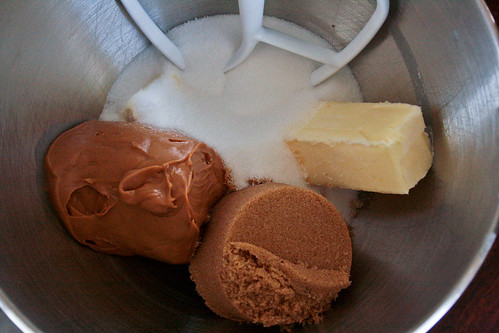
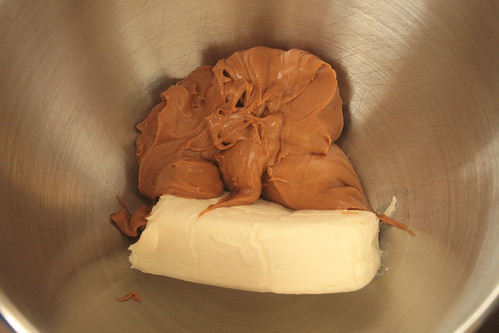
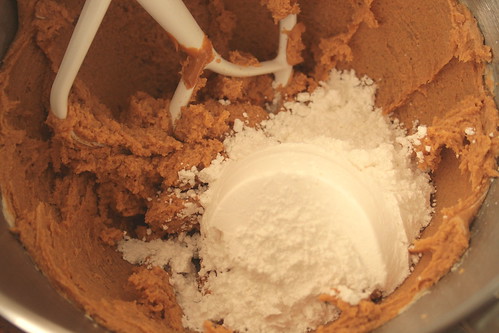
Cream together the cream cheese and butter then mix in the powdered sugar.


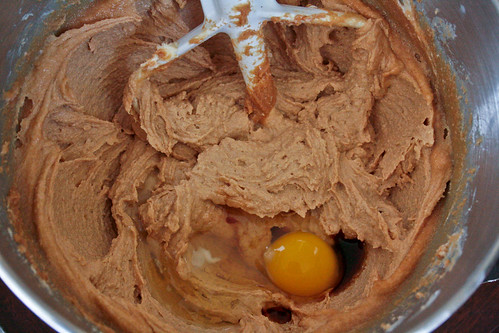
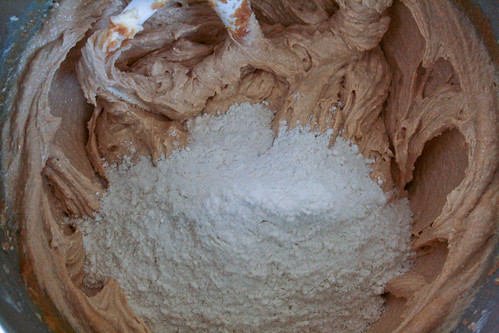
Add in the peanut butter and salt and mix until well combined.

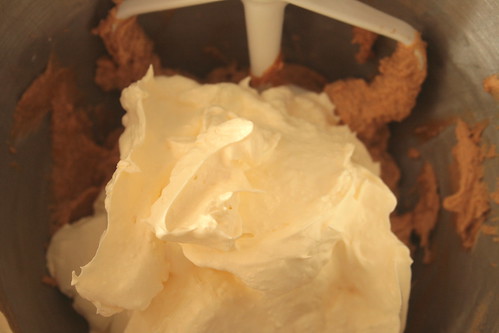
In a separate clean mixer bowl, beat the heavy cream until soft peaks form.


Fold 1 cup of the whipped cream into the peanut butter mixture until almost blended.


The gently fold another 1 1/2 cup whipped cream into the mixture until well blended. Place the remaining whipped cream in the fridge.


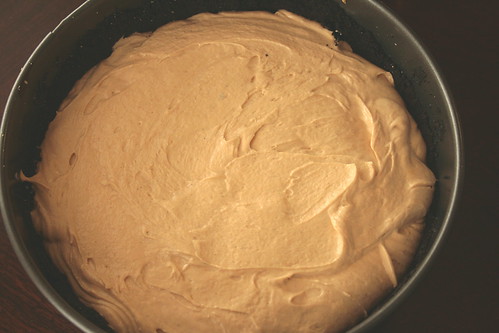
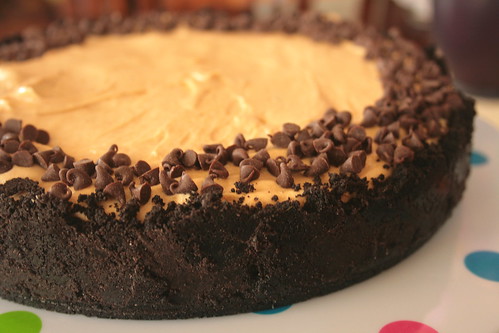
Spread the peanut butter mousse evenly over the crust. Place back in the fridge while you make the chocolate mousse.


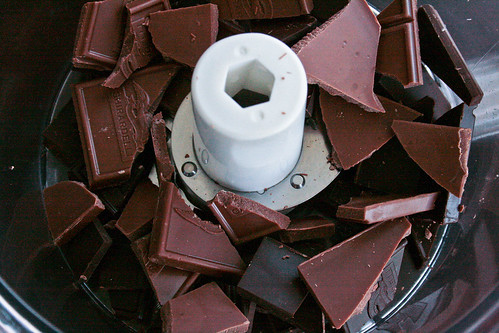
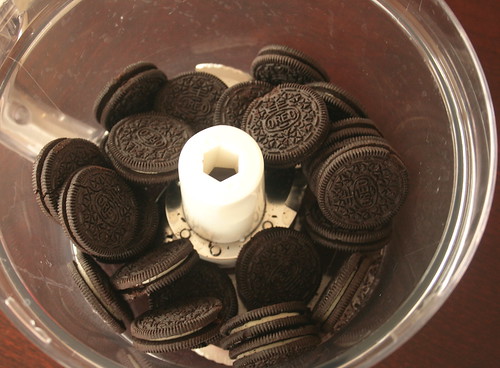
Place both types of chocolate into the bowl of a food processor and process until finely ground. Leave the chocolate in the processor.


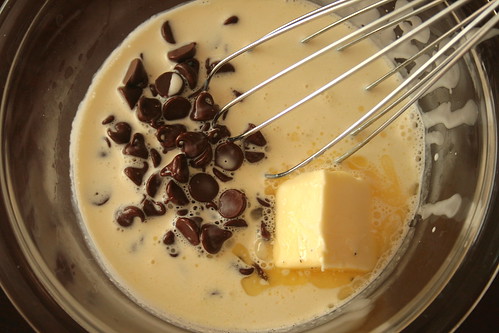
In a small saucepan, heat the sugar and half and half.


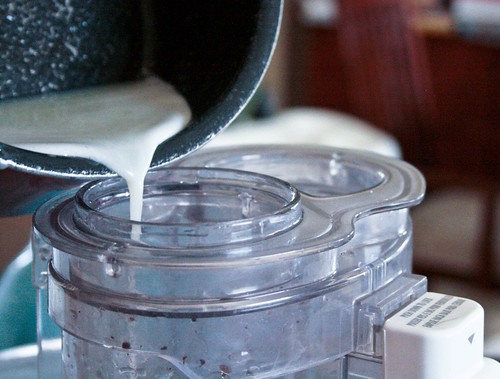
While the processor is running, pour the hot mixture into the feed tube and process until the chocolate is completely melted.


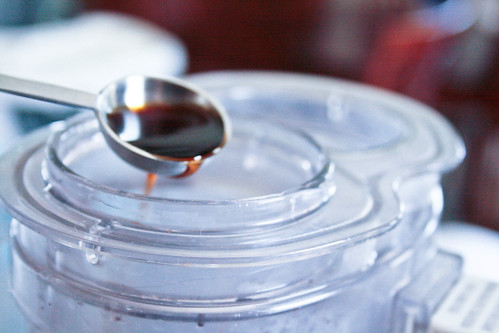
Scrape down the sides of the bowl then add the vanilla. Process until combined.


Scrape chocolate mixture into a large bowl. Gently fold 1/3 of the reserved whipped cream into the chocolate.


Then add the remaining whipped cream and fold until well combined.


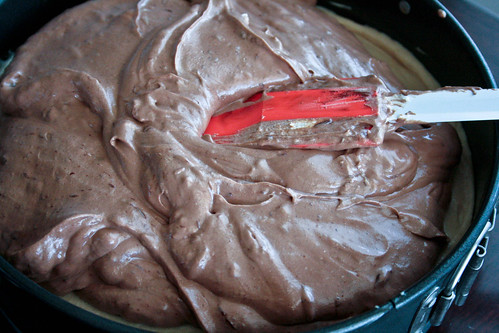
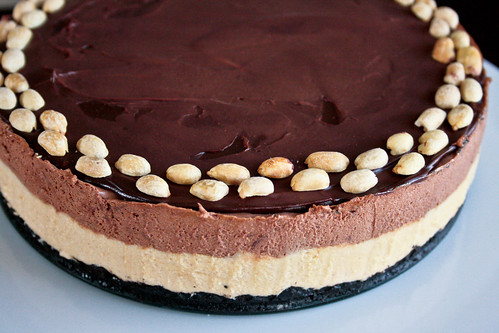
Evenly spread the chocolate mousse in a layer over the peanut butter mousse layer. Loosely cover with plastic wrap and freeze for about an hour.


Make your glaze. Place finely chopped chocolate into a bowl. Bring your cream to a boil, pour the hot cream over the chocolate and let it stand 30 to 60 seconds. Whisk until smooth. Stir in the vanilla. Place plastic wrap on the top of the glaze and let it sit for 10 minutes.

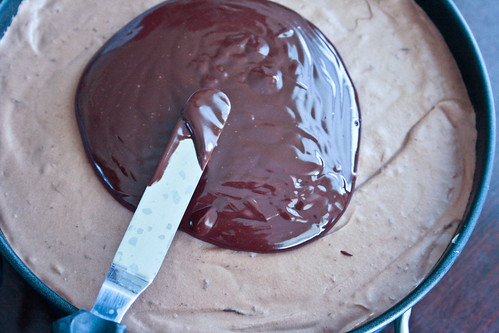
Pour the glaze into the center of the cake and spread almost to the edges. Place in the fridge overnight.


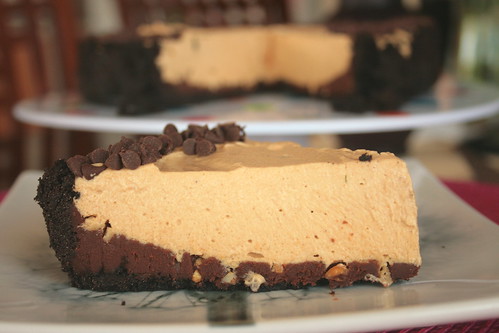
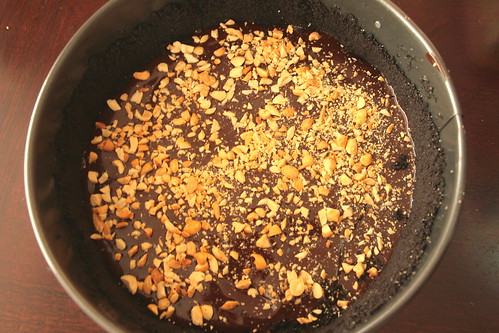
Garnish the top of the cake with peanuts.


Slice, serve, and enjoy!!


Chocolate Peanut Butter Mousse Cake
Adapted from The Cake Book


Ingredients:

For the Crust

  • 1 1/2 cups Nabisco Famous Chocolate Wafer cookie crumbs (I used about 22 Oreos, processed to crumbs)
  • 4 Tablespoons unsalted butter, melted
For the Peanut Butter Mousse
  • 5 ounces cream cheese, softened
  • 2 Tablespoons unsalted butter, softened
  • 1 1/4 cups powdered sugar
  • 3/4 cup natural creamy peanut butter
  • 1/4 teaspoon salt
  • 2 1/2 cups heavy cream
For the Chocolate Mousse
  • 5 ounces bittersweet chocolate, coarsely chopped
  • 3 1/2 ounces milk chocolate, coarsely chopped
  • 1/3 cup half and half
  • 1/3 cup granulated sugar
  • 1 teaspoon pure vanilla extract
For the Chocolate Glaze
  • 3 ounces bittersweet chocolate, finely chopped
  • 1/3 cup heavy cream
  • 1/2 teaspoon pure vanilla extract
Directions:

For the Crust
  1. Lightly grease or spray a 9 inch springform pan.
  2. In a medium mixing bowl, stir together the cookie crumbs and melted butter until well combined and crumbs are completely coated.
  3. Press the crumb mixture in an even layer into the bottom of the prepared springform pan.
  4. Place the crust in the refrigerator while you make the peanut butter mousse.
For the Peanut Butter Mousse
  1. In the bowl of an electric mixer, using the paddle attachment, on medium low speed, cream together the cream cheese and butter, about 1 minute.
  2. Add the powdered sugar and beat until well combined.
  3. Add the peanut butter and salt, beat until well mixed, scraping down the sides and bottom of the bowl as necessary. 
  4. Remove bowl from mixer and set aside.
  5. In a separate, clean, metal mixing bowl, using the whisk attachment, on high speed, beat the heavy cream until soft peaks form.
  6. Gently fold 1 cup of the whipped cream into the peanut butter mixture until almost combined.
  7. Fold in another 1 1/2 cups of the whipped cream into the peanut butter mixture until well blended (cover and refrigerate remaining whipped cream).
  8. Scrape the mousse into the prepared pan, over the crust, in an even layer.
  9. Place in the refrigerator while you make the chocolate mousse.
For the Chocolate Mousse
  1. Place both chocolates in the bowl of a food processor and process until finely ground. Leave the chocolate in the processor.
  2. In a small saucepan, combine the half and half and sugar. Over medium heat, bring to a boil, stirring frequently, until sugar dissolves.
  3. With the food processor running, put the hot milk through the feed tube and process until chocolate is completely melted.
  4. Scrape down sides of bowl and add the vanilla. Process until blended then scrape mixture into a large mixing bowl.
  5. Using a rubber spatula, gently fold 1/3 of the remaining whipped cream into the chocolate mixture. 
  6. Fold the remaining whipped cream into the mousse until well blended.
  7. Scrape mousse into an even layer over the peanut butter mousse layer. 
  8. Loosely cover with plastic wrap and freeze for about an hour, until firm.
For the Chocolate Glaze
  1. Place chocolate into a heat proof bowl.
  2. In a small saucepan, over medium heat, bring the cream to a boil.
  3. Pour the hot cream over the chocolate in the bowl and let sit about 30 to 60 seconds.
  4. Whisk until smooth.
  5. Stir in vanilla.
  6. Cover the surface of the glaze with plastic wrap and let stand for about 10 minutes.
  7. Pour glaze over the chocolate mousse layer and spread almost to the edges of the cake. 
  8. Allow cake to sit in the refrigerator for 4 hours or overnight. 
  9. Run a paring knife along the edges of the cake to release from the pan. Remove the sides of the springform pan.
  10. Garnish with peanuts. Slice, serve, and enjoy!!

Wednesday, August 29, 2012

Soft Peanut Butter Oatmeal Chocolate Chip Cookies


Here in the heat of Central Texas, it is back to school time!

I thought I was okay with this. Little Butt went to Pre-K last year and Baby N and I spent some time on our own during the days.

This year, Little Butt is in Kindergarten!!


Can you believe it??? I can't! She's my baby girl! She's not supposed to be so big that she's in Kindergarten.

This year, she's riding the bus. Ugh! I hate that I'm not in control of her getting to and from school. But I know that it's important for me to let her go off and be independent.


Actually, this kid has been independent since the day she was conceived. She's so strong willed and hard headed. She drives me absolutely bonkers. But I love her all the more for it.

The beginning of the school year is a time for celebration. Kids should be excited about school and learning. I'm trying to find little things to keep her excited about being in school. Her first day, we went out for Chinese for dinner (her favorite). This Friday, we are going to make pizza for dinner!

And what school year is complete without a fresh batch of cookies waiting when the little ones arrive home with their backpacks full and their tummies empty.

These cookies are a great after school snack. Packed full of nutrient rich oats, protein packed peanut butter, and well...you gotta have chocolate chips in cookies right???

Each cookie is large enough to fill a hungry belly and satisfy both kids and parents alike. The candy on the outside gives a nice crunch (we all know I love texture in my baked goods) and the cookies themselves are soft and chewy.

If you have kids beginning their school year, or even if you don't, these cookies are just what you need.

Let's bake!


In a medium bowl, whisk up some flour, baking soda, and salt.


Now cream together some butter, peanut butter, granulated, and brown sugars.


Add in the vanilla and eggs, one at a time.


Then gradually beat in the flour mixture.


Stir in the oats and chocolate chips. Now toss the dough in the fridge for about 15 minutes.


Scoop the chilled dough into the palm of your hand and roll into a ball. Place the ball of dough into a dish of candy then smush until the dough is kind of flat.


Place the dough, candy side up, on a cookie sheet lined with parchment. Bake them up then let them cool.


Serve and enjoy!!!


Soft Peanut Butter Oatmeal Chocolate Chip Cookies
Adapted from In Katrina's Kitchen

Printer Friendly Version

Ingredients:

  • 2 cups unbleached all purpose flour
  • 2 teaspoons baking soda
  • 1/2 teaspoon salt
  • 1 cup (2 sticks) unsalted butter, softened
  • 1 cup creamy peanut butter
  • 1 cup granulated sugar
  • 2/3 cup firmly packed light brown sugar
  • 2 large eggs
  • 1/2 teaspoon pure vanilla extract
  • 1/2 cup old fashioned oats
  • 1 cup milk or semi sweet chocolate chips
  • Reese's pieces (I used regular size and needed 2 bags)
Directions:
  1. Preheat oven to 350 degrees F. Line cookie sheets with parchment paper.
  2. In a medium mixing bowl, whisk together the flour, baking soda, and salt. Set aside.
  3. In the bowl of an electric mixer, using the paddle attachment, on medium speed, cream together the butter, peanut butter, and both sugars until creamy. About 3 minutes.
  4. Stir in vanilla.
  5. Add eggs, one at a time, incorporating well after each addition and scraping down the sides of the bowl as necessary.
  6. Reduce the mixer speed to low and gradually mix in the flour mixture.
  7. Stir in oats and chocolate chips.
  8. Place dough in refrigerator until slightly chilled, about 15 minutes.
  9. Using a medium cookie scoop (2 Tablespoons) scoop dough into hand, gently form into a ball and place into a dish of Reese's Pieces. Press the dough flat into the candies then place onto the prepared cookie sheet, candy side up.
  10. Bake cookies 8 to 10 minutes, tops will become slightly golden.
  11. Allow to cool on the pan about 5 minutes then carefully remove to a cooling rack to cool completely.
  12. Serve and enjoy!!

Tuesday, September 27, 2011

Peanut Butter Bundt Cake with Chocolate Butterfinger Ganache


There is something magical about the combination of chocolate and peanut butter.

Whenever I eat a Reese's peanut butter cup or a Butterfinger candy bar...I tend to feel giddy like a kid.

My favorite Blizzard is the Butterfinger Blizzard. I love it so much and, again...I get that giddy feeling whenever I have one in hand.

So, it should come as no surprise, when I was trying to decide on my last Cake Slice cake from Cake Keeper Cakes by Lauren Chattman (and my family demanded a chocolate option) that I would choose the one with the chocolate and the peanut butter.


But what really sealed this cake for me was the chopped Butterfinger on top! 


I mean, HELLO!! Who could resist that??


Not me!


This cake was super fun to make (I love bundt cakes and think they are an under appreciated dessert) and it was tasty too.


The only issue I had with this cake is that it seemed a bit dry. The ganache was mandatory when eating each bite. 


If you make this cake, I would suggest maybe upping the amount of sour cream in the recipe. Maybe by a 1/2 cup or so. 


But either way, the cake disappeared quickly and there were definitely no complaints from anyone besides me!


Let's bake!


In a large glass measuring cup, whisk together the eggs, sour cream and vanilla.


In a medium mixing bowl, whisk together the flour, baking powder, baking soda and salt.


Now cream together your butter, peanut butter and brown sugar.


Add 1/3 of the flour mixture and mix it up.


Then add 1/2 the sour cream mixture and mix that up. Now add the rest of the stuff in an alternating method, mixing in each addition: 1/3 flour mixture, remaining 1/2 sour cream mixture then remaining 1/3 flour mixture.


Pour the batter into the bundt pan and spread it evenly. Then bake that baby up! Let it cool...


Then toss some butter, chocolate chips and hot cream together to make a ganache.


Pour the ganache over the cake, letting it fall down the sides. Then top with the chopped Butterfinger.

Now slice, serve and enjoy!

Peanut Butter Bundt Cake with Chocolate Butterfinger Ganache
Adapted from Cake Keeper Cakes by Lauren Chattman


Printer Friendly Version


Ingredients:

For the Cake
  • 1 cup sour cream
  • 3 large eggs
  • 2 teaspoons pure vanilla extract
  • 2 1/4 unbleached all purpose flour
  • 1 teaspoon baking powder
  • 1/2 teaspoon baking soda
  • 1/2 teaspoon salt
  • 1/2 cup (1 stick) unsalted butter, softened
  • 1 cup creamy peanut butter
  • 1 1/2 cups packed light brown sugar
For the Ganache
  • 1 cup semi sweet chocolate chips
  • 2 Tablespoons unsalted butter
  • 3/4 cup heavy cream
  • 1 Butterfinger bar (60 grams), finely chopped
Directions:

For the Cake
  1. Preheat oven to 350 degrees F. Spray a 12-cup bundt pan with baking spray.
  2. Whisk together the sour cream, eggs and vanilla in a large glass measuring cup.
  3. In a medium mixing bowl, whisk together the flour, baking powder, baking soda and salt.
  4. In a large mixing bowl, on medium high speed, cream together the butter, peanut butter and brown sugar until fluffy, about 2 minutes; scrape down sides of the bowl once or twice as necessary.
  5. Turn the mixer to low and add 1/3 of the flour mixture and beat until incorporated. 
  6. Add 1/2 the sour cream mixture and beat until incorporated. Repeat; add 1/3 flour mixture, 1/2 sour cream mixture then remaining 1/3 flour mixture, beating until incorporated and scraping down sides of bowl after each addition. 
  7. Turn mixer back up to medium high speed and beat for 1 additional minute.
  8. Pour batter into prepared pan and smooth out with rubber spatula. 
  9. Bake until a toothpick inserted in the center comes out clean, about 40-45 minutes.
  10. Let cake cool in the pan for 5 minutes then invert onto a cooling rack to cool completely.
  11. Once cake is cool, make the ganache: place butter and chocolate in a medium heat proof bowl. Heat cream in a small saucepan until just boiling. Pour hot cream over butter and chocolate, let sit for 30 seconds then whisk the mixture until smooth. 
  12. Pour the warm glaze over the top of the cake, letting it drip down the sides.
  13. Sprinkle with chopped Butterfinger bar.
  14. Let stand until ganache is set, about 30 minutes.
  15. Slice, serve and enjoy!

Wednesday, August 17, 2011

Chocolate Peanut Butter Pie


There are so many things I want to say for this post...but I'm not sure I can fully express everything that I am feeling. But I will try.

Being a military spouse, I am constantly faced with the fear, and sometimes the reality, of having no tomorrow.

My husband is often in danger and every random and unexpected knock at the door sends my heart straight into my feet.

I often wonder how it is "on the other side."

What is civilian life like? Why do we do this? Why does he have this job? Wouldn't it be easier if we didn't always have to worry??

Spending this past weekend with The Hubble was fantastic! Seeing him meet his little baby was such a blessing. But watching him have to leave 3 short days later broke my heart.

Civilians don't have to deal with this right??

The husband's get to stay home. They get to come home for dinner every night. They get to watch their children grow up.

At the end of last week, I continuously saw all kinds of twitter activity about this thing called #apieformikey. Having Baby N, being in the hospital, coming home, then welcoming home The Hubble, I didn't look into it too far.

Until, finally, things settled a bit and I realized this thing wasn't going to go away.

On Friday, I finally clicked a link and that link shattered my rose colored thinking about civilian life.

The link took me over to In Jennie's Kitchen where Jennie tells us about the sudden and untimely death of her husband. Mikey's favorite pie was a chocolate peanut butter pie and Jennie kept telling herself that she would make it for him tomorrow, tomorrow, tomorrow. And now tomorrow no longer exists for them.

Her one wish for support from this food community of ours was for everyone to make #apieformikey (a chocolate peanut butter pie) and share it with loved ones this past Friday.

I made the mistake that Jennie made and started telling myself that maybe I would make it "tomorrow." Then I stopped.

I looked at my TWO children. I looked at The Hubble. I thought about tomorrow and how it may not come for us.

Then I made a chocolate peanut butter pie.

Then I called my family over and we shared this "love pie."

I know my pie was late. Jennie wanted us to share it on Friday and mine was shared on Sunday. But I'm sure Jennie and Mikey won't mind my tardiness. I figure it's better late than never right??

And if you hadn't heard about #apieformikey, I suggest you make a chocolate peanut butter pie to share with the ones you love.

And try to remember to cherish every moment with your loved ones, because sometimes tomorrow never comes.


Place your cookies in a food processor and grind them up until they are fine crumbs.


Dump those cookie crumbs in a bowl and add the melted butter. Stir it up until the mixture is well moistened. Press the mixture into the bottom and a little up the sides of a springform pan.

At this point, you can either continue on with a no-bake crust or pop it in the oven for a few minutes to make it crispy. The choice is yours. I baked mine.


Throw together your ganache. Place the chocolate chips in a bowl with the butter. Heat up the heavy cream then pour that hot stuff over the chocolate and butter. Let them sit for a few seconds then whisk away until smooth.


Pour the ganache into the crust and spread it out. Then sprinkle with the chopped peanuts. Throw that in the fridge while you make the filling.


Next up! Filling! Cream together the peanut butter and cream cheese.


Mix in the powdered sugar and vanilla.


Then the cool whip.


Pour it all into the crust and spread it out. Refrigerate for 3 hours or overnight.


Remove the pie from the pan, garnish with mini chocolate chips.


Slice, serve and enjoy with your loved ones!!

Chocolate Peanut Butter Pie

Printer Friendly Version

Ingredients:

Crust

  • 25 Oreo cookies
  • 4 Tablespoons unsalted butter, melted
Ganache
  • 3/4 cup semi-sweet chocolate chips
  • 2 Tablespoons unsalted butter
  • 1/2 cup heavy cream
  • 1/2 cup peanuts, chopped
Filling
  • 8 ounce cream cheese, softened
  • 1 cup creamy peanut butter
  • 1 cup powdered sugar
  • 1 teaspoon vanilla
  • 8 ounces cool whip, thawed
Directions:
  1. Preheat oven to 350 degrees F. Butter a 9 inch springform pan.
  2. Place the cookies in a food processor and process until they are fine crumbs (if you don't have a food processor, place the cookies in a large zipper bag and roll with a rolling pin until fine crumbs form).
  3. Place the cookie crumbs in a medium mixing bowl and add the melted butter. Stir with a fork until all the crumbs are well moistened. 
  4. Press crumb mixture into the bottom and up the sides of the springform pan. 
  5. Bake for 5-7 minutes to set. Remove from oven and allow to cool completely. (This step is optional. The crust can be pressed into the springform pan and used without baking. I just like the crispiness the baking time provides)
  6. While crust is cooling, make the ganache. Place the chocolate chips and butter in a small mixing bowl. Heat the heavy cream over medium heat until just boiling. Pour the cream over the chocolate and butter; allow to sit about 30 seconds then whisk until smooth.
  7. Pour the ganache into the bottom of the crust and spread with a rubber spatula until evenly distributed.
  8. Sprinkle the chopped peanuts evenly over the ganache.
  9. Place the pan in the fridge while you prepare the filling. 
  10. In a large mixing bowl, cream together the peanut butter and cream cheese until light and fluffy, about 2-3 minutes.
  11. Mix in the cool whip until no white streaks are seen.
  12. Pour the filling into the pan atop the crust, ganache and chopped peanuts. Spread with a rubber spatula until even.
  13. Place pie in refrigerator at least 3 hours or overnight.
  14. Immediately before serving, remove from fridge and garnish with mini chocolate chips or ganache.
  15. To remove from the pan, run a knife along the edge of the crust to release from the sides of the pan. Open and remove the sides of the springform pan. Use a cake lifter or large spatula to remove the pie from the bottom of the pan.
  16. Slice, serve and enjoy with loved ones.
Related Posts with Thumbnails