Showing posts with label easy. Show all posts

Wednesday, September 12, 2012

Buttery Skillet Rolls


Now that school has started my days are starting to get busier and busier.

Have you noticed that Summer is for being lazy, then all of a sudden your schedule is packed???

Nowadays we have school buses to catch, homework to get done, early dinner, bath time, and bedtimes.

This week, I started tennis lessons and Little Butt starts Tee Ball practices tonight.

I am in two different book groups, have joined the PTA (not that I've gone to a meeting), and am thinking about putting Little Butt into Girl Scouts.

Are you tired yet??? I like to stay busy...

I absolutely love these rolls because they are so low maintenance. You take some frozen, rolls, set them out to rise for a few hours and you are pretty much done! Love that!!

With life getting more hectic, low maintenance recipes are what I'm all about.

Not only are these easy, they are also so versatile. You can change up the seasonings and have a different flavored roll each time you make them! This time, I used some Italian Seasoning and some grated Parmesan cheese. The Italian Seasoning I use has some red pepper flakes in it so these had the perfect amount of spice! Love that!

So grab your frozen bag of dinner rolls, your choice of seasoning, and let's bake!


These are the dinner rolls I used. They are yeasted, unrisen, and frozen. Perfect!


Spray a cast iron skillet with tons of olive oil cooking spray. Or you can use actual olive oil if you are into that kind of thing. This skillet is 10 inches. You can use smaller if you want. Place some frozen dinner rolls into the skillet. Space them well so there's plenty of room for rising.

Now cover this bad boy with a dish towel, place it in a non-drafty place, and let them sit for a few hours.


Look how pretty! I love risen dough. I may be weird but whatever!


Now gently brush some melted butter onto the tops of the rolls. Be careful not to poke them or they will deflate (just ask my Baby Sister and the first batch she decided to poke while saying "what's this??").


Sprinkle with your seasoning and cheese if you are using it. Then gently brush some more butter on the tops.


Now sprinkle with some sea salt. Mmmmm...risen dough balls with seasoning, cheese, and salt. Delish!!

Now stick those babies into the oven and bake them until they get golden brown.


Serve the rolls hot, straight from the skillet, and enjoy!!!


Buttery Skillet Rolls
Adapted from The Pioneer Woman

Printer Friendly Version

Ingredients:

  • Frozen, unrisen dinner rolls
  • Salted butter, melted
  • Coarse sea salt
  • Italian seasoning (or seasoning or fresh herbs of your choice)
  • Grated Parmesan cheese (optional)
Directions:
  1. Spray a cast iron skillet with olive oil cooking spray until well coated (or use olive oil to coat).
  2. Place frozen dinner rolls into skillet leaving plenty of room for rising.
  3. Cover with a kitchen towel and set in a warm, non-drafty place and allow to rise for about 3 hours.
  4. After rolls have risen, gently brush melted butter atop the rolls (be careful not to press to heavily so as to not deflate the rolls).
  5. Sprinkle on the seasonings and Parmesan cheese.
  6. Gently brush the tops of the rolls and seasonings with more melted butter.
  7. Sprinkle with salt.
  8. Bake according to package directions. (Mine were 400 degrees F for 15 to 20 minutes) Tops of rolls will be golden brown.
  9. Serve hot fresh from the skillet.
  10. Enjoy!!

Wednesday, July 25, 2012

Lemon Pie Bars, a Review, and a Giveaway {CLOSED}


Note: The giveaway is at the end of this post. {GIVEAWAY IS NOW CLOSED}

Have you ever heard that some people are really good at one or two things and some other people are pretty good at a number of things?

Well...I'm the latter type. I have many, many different interests. Mostly, my interests reside on the creative side of things. I like drawing and doing makeup. I've taught myself to knit. I've made wreaths. I've toyed with the idea of writing but figure I'll leave that to people who enjoy it. I've considered interior design. I have a degree in Psychology.

Okay. That last one isn't so much creative. But is it not? I wanted to be a therapist for a very long time. Now I don't think it's for me.

The one thing I haven't swayed on is baking. I love to bake. Baking is in my soul, it's in my blood. It's my history, my heritage, my inheritance.

As a young child, I would sit at my grandma's aged, formica topped table and watch her roll pie crust and form apricot fried hand pies. I remember the smells, the tastes, everything. Thinking of that wonderful, simple time brings me a sense of joy that not much else can.


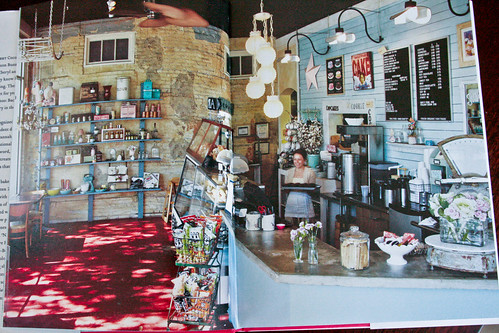
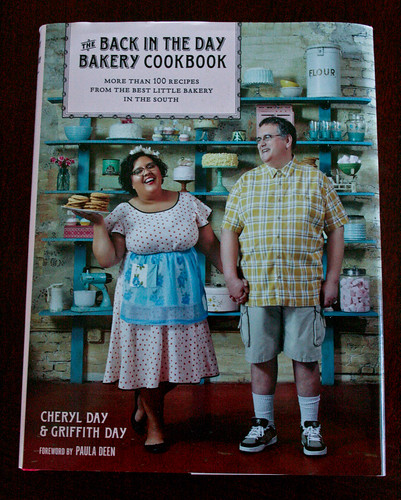
When I picked up a copy of The Back in the Day Bakery Cookbook I thought that it looked like a cute cookbook for which I could do a review and a giveaway. I had no idea what was really in store for me.

This cookbook brings back the thoughts of love and warmth that I used to feel at my grandma's kitchen table. The book provides a sense of love, family, community. I found myself on the verge of tears during the introduction.


This book pulls you in and makes you feel like you are home. At the beginning of each recipe are a few words by Cheryl about why the dish is special enough to be in the cookbook. There are stories of celebration and community hidden among the pages. Introductions to each section take you back into the childhood memories of Cheryl and Griff and make you nostalgic. There's even a poem written by a customer about a favorite cookie they sell in their shop.


The book is full of stunning, vintage like photos. The recipes are simple and easy to understand. There are no big words, the recipes are written as if you were explaining to a friend how to make a beloved recipe.

The book is broken down into 9 chapters:

  1. Breakfast
  2. Coffee Cakes, Quick Breads, and Sweet Yeast Breads
  3. Cupcakes and Cakes
  4. Pies, Cobblers, Crisps, and Tarts
  5. Puddings and Custards
  6. Cookies
  7. Brownies and Bars
  8. Confections
  9. Savories
I have so many recipes on my to make list from this book. Seriously. It's bad. I want to make just about everything in this book.

I will admit. I have tried a number of these recipes. So far I've tried the snickerdoodles, cinnamon biscones with vanilla glaze drizzle, the hummingbird cake with cream cheese frosting, and of course, these lemon pie bars. Not one thing on this list has disappointed. 
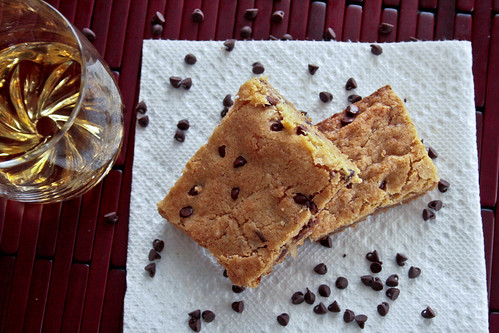


My dear friend Monica came over the day that I made these lemon pie bars. She decided to make the Drunk Blondies and we ended up trading bars with one another (so I've tried these too. That's 5 recipes so far!). I won't spend a lot of time on these bars because she is blogging about them today. After you are done here, you should pop over and read about these bars as well!!


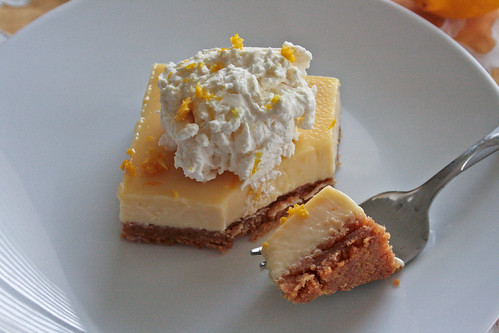
These lemon pie bars were absolutely amazing. The perfect amount of tang and sweet. The crust was buttery and felt like it melted in your mouth as it gently crumbled upon each bite. The first [few] bars I ate were just the bars by themselves. However, I made some whipped cream for the pictures and fell even more in love with the bars than when they were naked! And I don't even like whipped cream!! But the sweetness and cloud like texture of the whipped cream just enhanced the lemon pie bars and made them extra special.

So without further ado, let's bake!


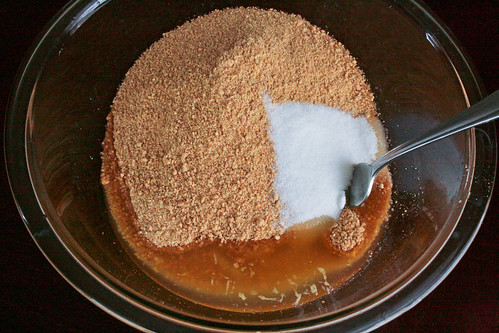
First, mix together some graham cracker crumbs, butter, and sugar.


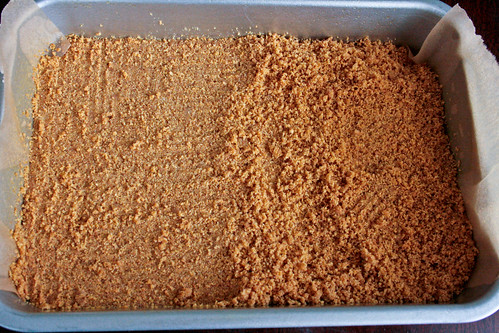
Press the mixture into a pan and bake it up. Take it out to cool.


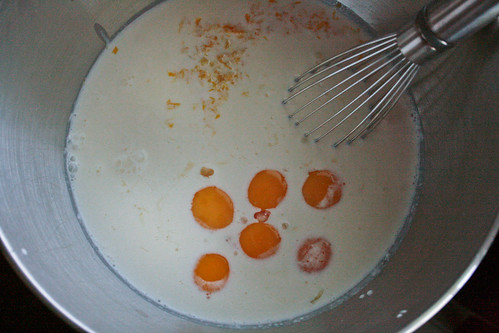
While the crust is cooling, whip up the filling. Toss together some cream, egg yolks, lemon zest, lemon juice, and sweetened condensed milk and whisk it until thoroughly combined.


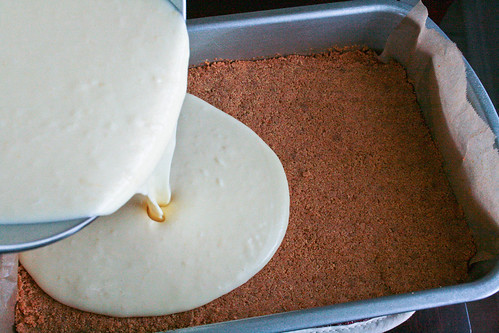
Pour the filling over the cooled crust.


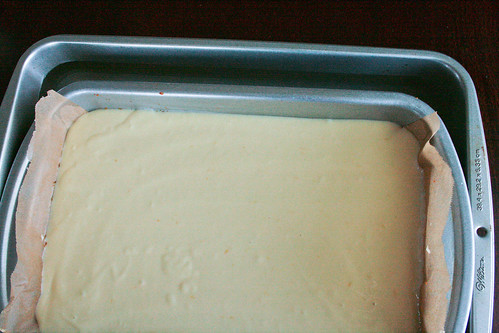
Place in a water bath and bake it until it no longer jiggles. After it has baked, remove the bars from the water bath and let cool to room temperature. Place the pan in the fridge and allow to get really cold.


Slice into bars and top with whipped cream if you are into that kind of thing.


Serve and enjoy!!


Lemon Pie Bars
Adapted from The Back in the Day Bakery Cookbook

Printer Friendly Version

Ingredients:

For the Crust

  • 3 cups graham cracker crumbs (about 24 crackers)
  • 12 Tablespoons (1 1/2 sticks) unsalted butter, melted
  • 2 Tablespoons sugar
For the Filling
  • 1 cup heavy cream
  • 2 teaspoons lemon zest
  • 1 cup fresh lemon juice
  • 2 (14 ounce) cans sweetened condensed milk
  • 6 large egg yolks
Directions:
  1. Position a rack in the center of the oven and preheat oven to 350 degrees F. Spray a 9x13 inch baking pan and line with parchment, allowing the ends of the paper to hang over two opposite sides of the pan.
  2. In a medium mixing bowl combine the graham cracker crumbs, melted butter, and sugar with a fork until evenly moistened. 
  3. Press the mixture firmly and evenly into the bottom of the prepared pan until level.
  4. Bake the crust for 8 minutes or until lightly golden. Let cool while preparing the filling.
  5. Reduce oven temperature to 325 degrees F.
  6. In a large mixing bowl, whisk together the heavy cream, lemon zest, lemon juice, sweetened condensed milk, and egg yolks until well combined.
  7. Pour filling over the cooled crust and level with a plastic spatula.
  8. Place the baking dish into a larger pan and pour water into the larger pan until the water reaches about halfway up the sides of the smaller pan.
  9. Bake about 20 to 25 minutes or until the center no longer jiggles and the edges are puffed.
  10. Remove pan from water bath and let cool to room temperature. Then refrigerate until cold.
  11. Cut bars into squares, top with whipped cream if desired.
  12. Serve and enjoy!


And what good is a cookbook review without a giveaway?? I loved this cookbook SO much that I want to share it with the world. Unfortunately, I can't afford that, so I'm giving one lucky person a copy of this wonderful cookbook. Here are the rules:

GIVEAWAY IS NOW CLOSED
To enter this giveaway you MUST answer THIS question in the comments:

1. What is your favorite food/baking memory from back in the day?

For additional entries please leave a comment for each entry:

2. Follow Jolts & Jollies through Google Friend Connect or RSS feed

3. "Like" Jolts & Jollies on Facebook

4. Leave a comment on Monica's drunk blondies saying I sent you (If you are here from Monica's blog, leave an extra comment saying so)

This giveaway is open to US residents only (sorry) and will close at 11:59pm CDT on Tuesday, July 31st.

The thoughts and opinions given in this review are strictly my own. I have not been compensated in any way for this review and am paying for the giveaway copy myself.

Friday, September 10, 2010

Serret's Infamous Crockpot Chicken


Do you ever have those days where you are just run down and don't want to stand in the kitchen for hours making an elaborate meal?? Yeah. Me too.

Eight years ago, The Hubble and I had wedding showers galore. During one of these wedding showers we received a big ol' crockpot. Over the years, the only thing I've ever used that crockpot for was to keep my queso warm after I cooked it. Nice right??

Well, one day I was on Facebook and my friend Serret polled her friends to see if anyone would be interested in a couple crockpot recipes she had thrown together. I immediately jumped on with a big "yes, please!"

Serret went on to explain that her infamous crockpot chicken has been served at several dinner parties. Her guests would devour the dish and ask for more.

When I looked at the recipe and saw how easy it was (that and the fact that it was a ton of cheese, with some chicken thrown in) I ran to the store to get the ingredients. Serret is not wrong. This dish was delicious! The Hubble, Little Butt and I really enjoyed it and now that I'm typing this, I'm thinking I'm going to have to make it again soon. Luckily the air is turning crisp and I can feel the chill coming so I will have yet another excuse to break out the crockpot again!

I asked Serret if I could share her recipe with you as well and she said yes! So here it is:


Ingredients: 2 packages chicken breast tenderloins, 2 cans nacho cheese soup, onion powder, garlic powder, salt, pepper, 1 box rotini pasta and 1 stick of butter. Easy right??


Start by laying out your chicken tenderloins and sprinkling them with salt, pepper, onion powder and garlic powder. You control how much you put on them. This is what mine looked like when I was done.

NOTE: I did not trim anything off these tenderloins but when they were finished cooking I realized I should have cut off the piece of white stuff at the top of the tenderloin. I think it's a fatty piece or gristle or something...but you should definitely cut them off. It's much easier at the end. Trust me.


After the chicken is seasoned to your liking, dump it in your crockpot.


Then dump in the cans of nacho cheese soup.


Stir it all up and make sure the chicken is well covered with the cheese soup. Now cover and cook on low for about 6-8 hours. 
I cooked mine on low for the 6 hours then turned it up for another 1/2 hour to hour. It looked like this when finished cooking.
When the chicken is nice and tender, take two forks and shred it. We wanted ours pretty chunky so I just broke up the chicken into pieces.


At this point you want to cook your rotini as per the directions on the package. When the pasta is done cooking, drain it and melt a stick of butter in the pasta.


Then sprinkle it with a bit of salt and pepper.
Serve the noodles in a bowl, topped with the cheesy chicken and you have yourself a darn good, super easy meal that everyone in the family will enjoy (even those who don't like cheese: i.e. The Hubble).

Serret's Infamous Crockpot Chicken
Ingredients:
  • 2 packages chicken breast tenderloins
  • 2 can nacho cheese soup
  • garlic powder, to taste
  • onion powder, to taste
  • salt, to taste
  • pepper, to taste
  • 1 package rotini pasta
  • 1 stick butter
Directions:
  1. Trim fat off chicken.
  2. Sprinkle chicken with salt, pepper, onion powder and garlic powder; place in crockpot.
  3. Add nacho cheese soup making sure chicken is well covered.
  4. Cover and cook in crockpot on low 6-8 hours until thoroughly cooked.
  5. When chicken is finished fully cooked, shred with two forks.
  6. Cook rotini as per directions on package; drain.
  7. Melt butter over rotini and coat well; sprinkle with salt and pepper to taste.
  8. Serve chicken mixture over rotini.
  9. Enjoy!
Related Posts with Thumbnails