Tuesday, November 30, 2010

Daring Bakers November 2010: Crostata


I'm baaaaaack!

Did you miss me??

Did you have a happy Thanksgiving??

Ours was a whirlwind.

Saturday: 12 hour drive to Alabama
Tuesday: 8 hour drive to Kentucky
Friday: 8 hour drive to Alabama
Sunday: 12 hour drive home

Phew!

But we did have a delicious Thanksgiving buffet in a restaurant in Kentucky. Then made our own Thanksgiving meal on Friday when we got back to my dad's house.

It was a blast but I'm glad to be home.

Before I left I conquered the crostata (kind of) with the Daring Bakers.

The 2010 November Daring Bakers’ challenge was hosted by Simona of briciole. She chose to challenge Daring Bakers’ to make pasta frolla for a crostata. She used her own experience as a source, as well as information from Pellegrino Artusi’s Science in the Kitchen and the Art of Eating Well.


I actually had to attempt the crostata twice.


The first time was just horrendous. 


I tried to get all creative and make a dessert for a friend who was coming for dinner. I decided I would try to combine the two types of crostata recipes given to us by making a raspberry and crema crostata. But it did NOT turn out well. 


I decided not to let that beat me and to try again. 


The second time was definitely much more successful than the first. 


I don't know what I did wrong with the first one. It may have been the fact that I cooked it in an oven with rosemary. I was in a crazy hurry. I realized to late that I have an 11 inch tart pan instead of the called for 9 inch pan. Or it could have been the fact that I don't like raspberry. Maybe it was a combination of all of these factors.


But one this is for certain, both times the pasta frolla (tart crust) was delicious. 


If you choose to make one of these tarts I highly recommend the pasta frolla. You can get creative and choose your own fillings. If you would like some inspiration and or ideas for fillings, check out the Daring Bakers Blogroll.


Ready to learn how to (and not to) make this crostata? Let's go:


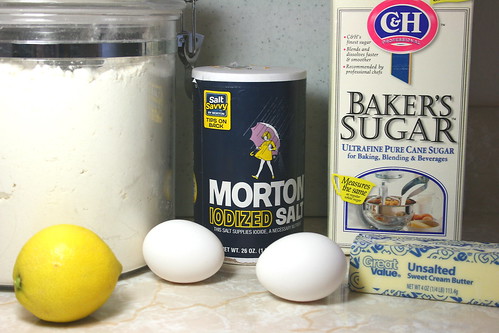
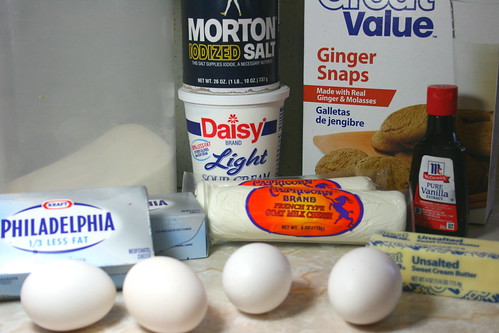
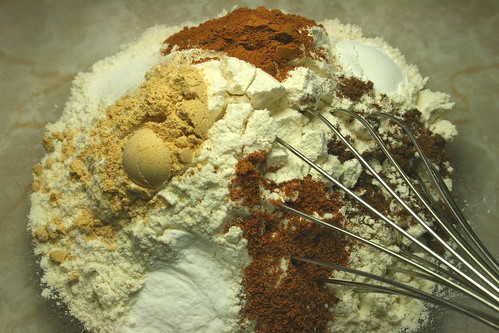
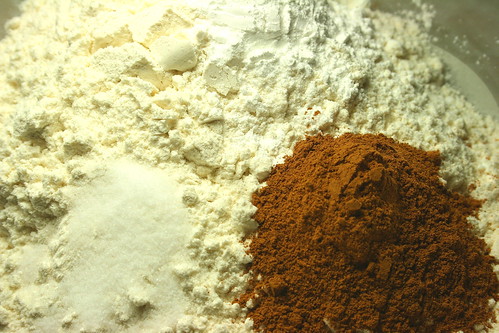
For the pasta frolla, grab your ingredients: unbleached all purpose flour, salt, an egg, an egg yolk, superfine (or baker's) sugar, lemon zest and butter.

These ingredients are only for the crust. You may also want to decide on what kind of filling you would like to use. I ended up using two 18 ounce jars of apricot preserves in my 11 inch tart pan. If using the larger tart pan, the pasta frolla recipe is enough to cover that pan with strips on top.


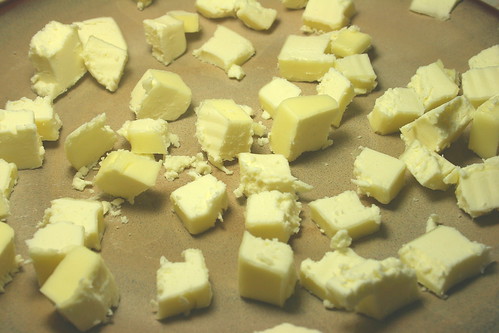
Dice the butter. After cutting it, I put it in the freezer for a few minutes while I got my flour mixture ready.


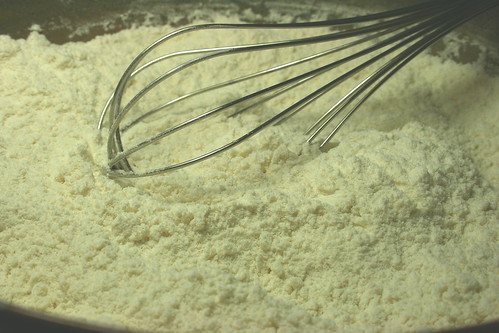
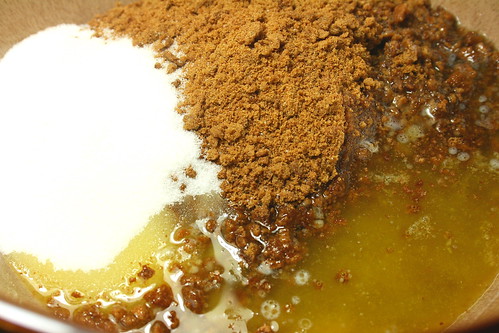
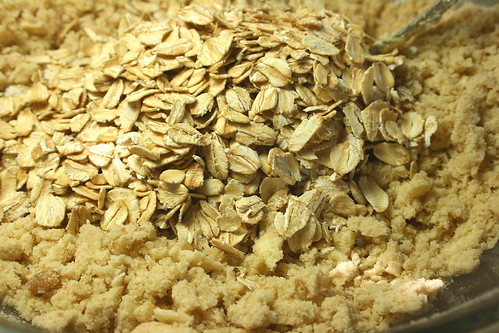
In a shallow bowl, or clean work surface, whisk together your flour, salt and sugar until combined.


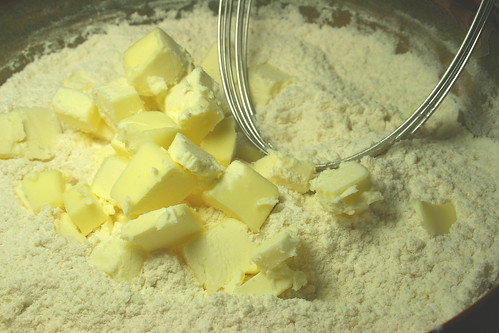
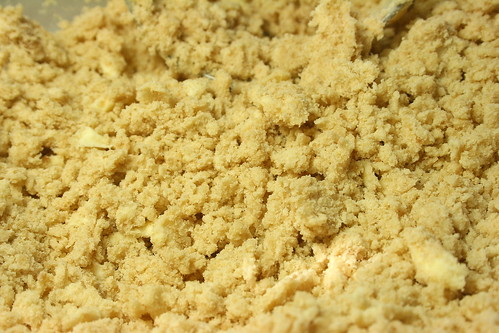
Using your fingers or a pastry cutter, rub or cut the butter into the flour mixture...


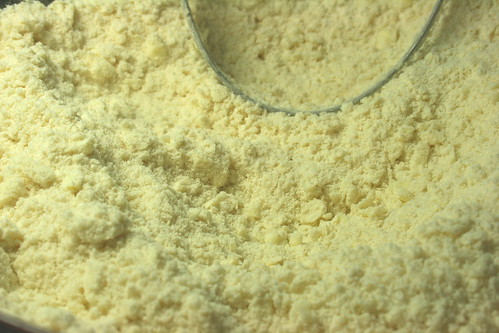
Until the mixture becomes crumbly.


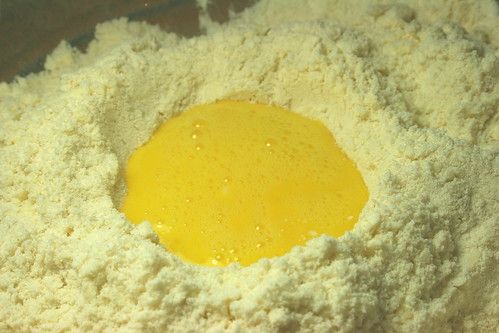
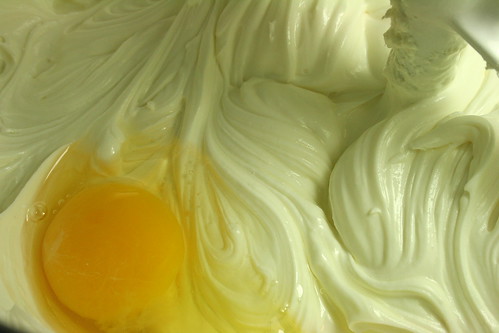
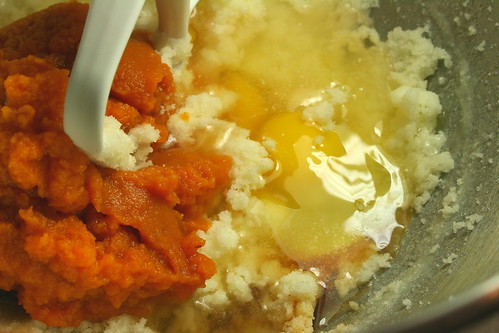
Form a well in the center of the flour and butter mixture. Pour the lightly beaten egg and egg yolk into the center of the well.

This is when you should reserve a tablespoon of the egg mixture for an egg wash later. I totally forgot this part and had to use another egg later.


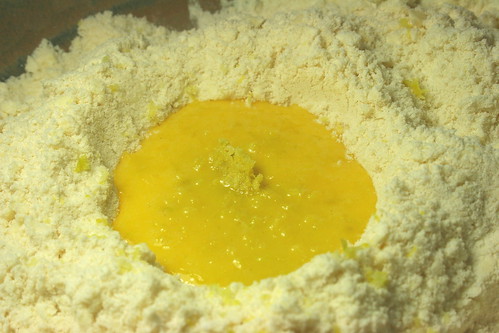
Add the lemon zest into the well with the egg.


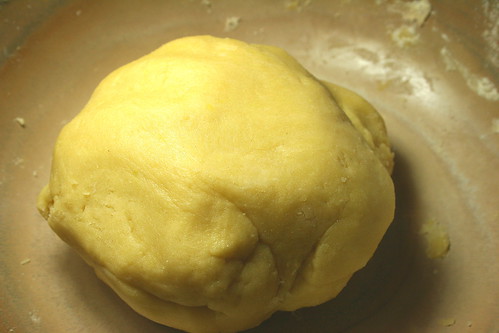
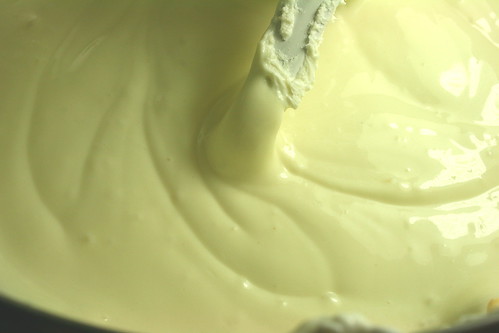
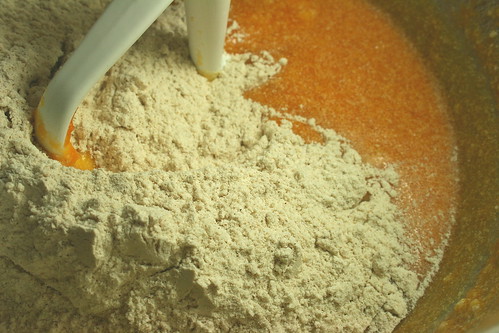
Using a fork, then your fingers, work the dry ingredients from the sides into the wet ingredients in the center until a dough forms.


Flatten the dough into a disk, cover with plastic wrap and place in the fridge for 2 hours or up to overnight.

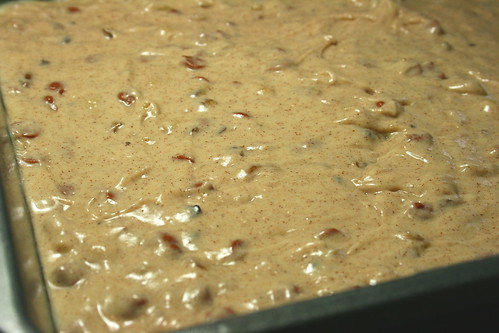
Once the dough is thoroughly chilled, it's time to fill it.

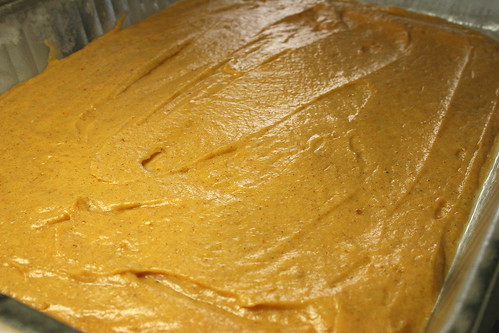
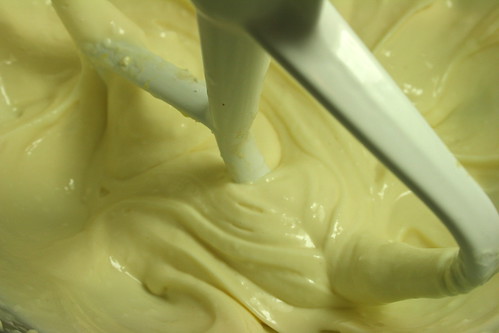
This is how mine turned out the first time, with a layer of raspberry preserves on the bottom and the crema on the top.


Oh it was bad. I did something horribly wrong with this. It wasn't even pretty. Oh well. It was time to move on and try again. 


This time I decided to enlist the help of my sous chef. If anyone could help me conquer this crostata...it would be her!

Start all over with the pasta frolla. Once it is thoroughly chilled, roll it out and press it into the tart pan cutting off the edges.


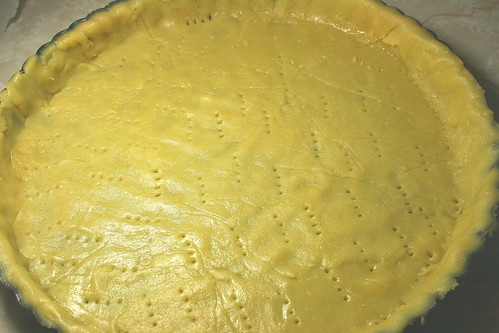
Once in the pan, poke the bottom of the crust with a fork to poke holes in it.


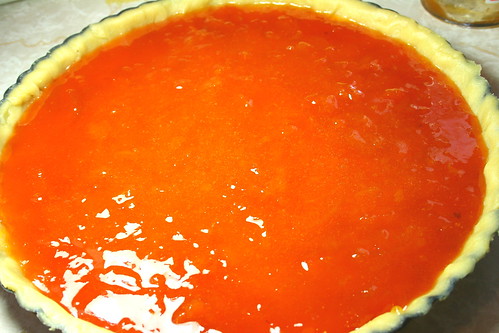
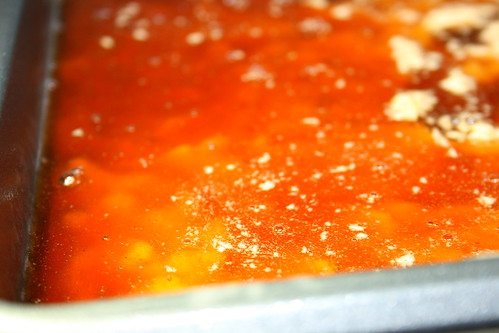
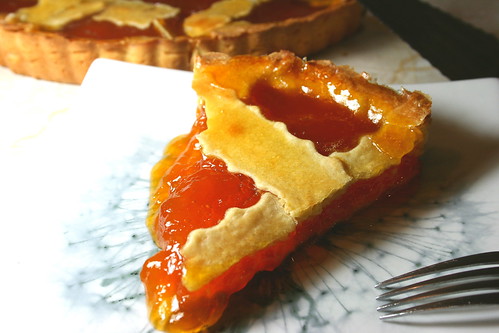
Pour in your filling. Which for me, the second time, was simple apricot preserves.


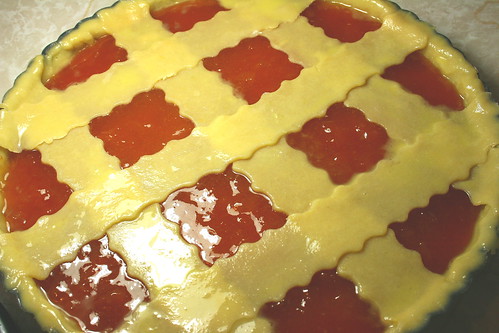
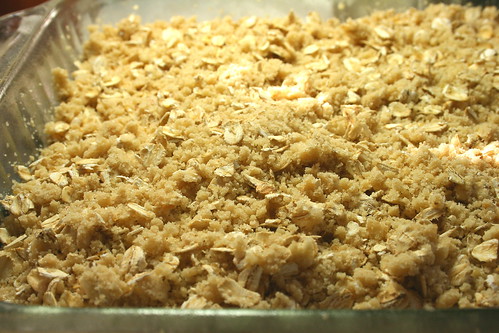
Roll out the dough into strips and lay 6 strips overlapping one another, 3 going one way, 3 going the other way. Trim off any edges. Brush the egg was over the exposed dough.


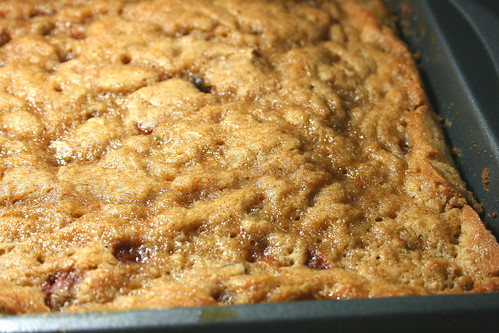
Bake in the oven for 25 minutes or until golden brown. Every oven is different and it may take longer than 25 minutes to brown. Just keep checking it until it is a nice golden brown color.


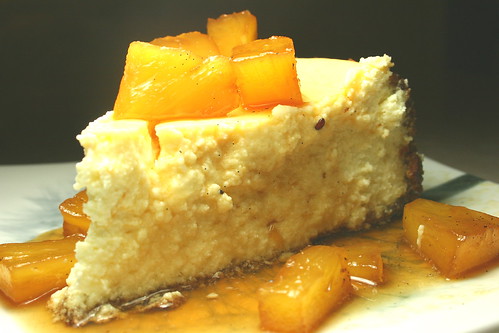
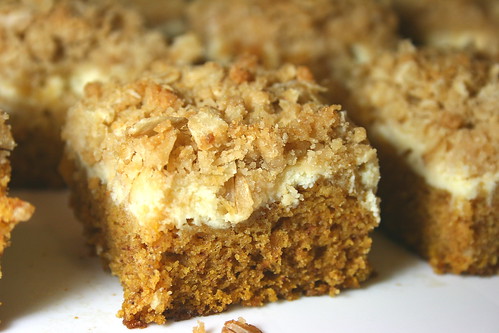
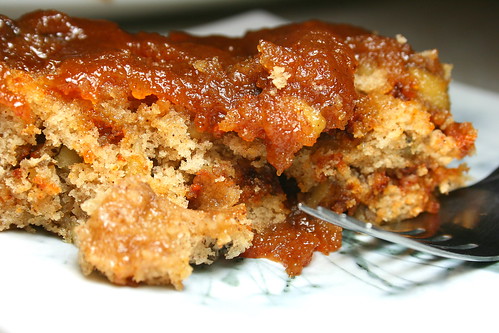
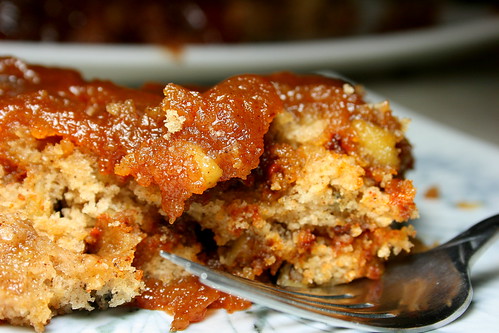
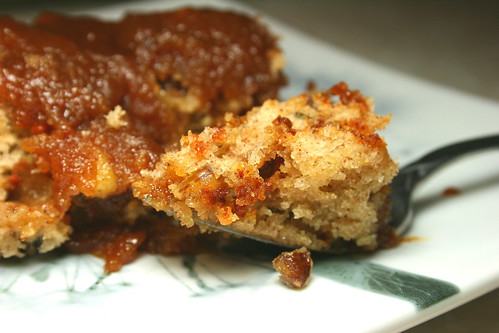
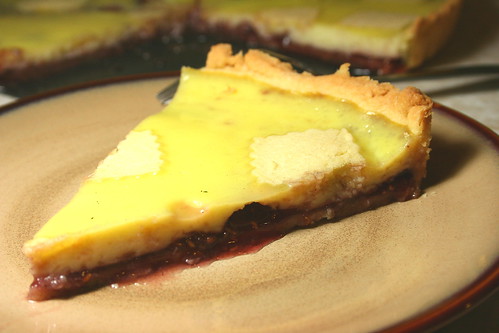
Allow to cool in the pan. If you have a removable bottomed pan, push the tart up through the pan. Cut a slice (as you can see mine was kind of runny, but no less tasty), serve and enjoy!!

Apricot Crostata
Retrieved from The Daring Kitchen

Printer Friendly Version

Ingredients:

  • 1/2 cup minus 1 tablespoon superfine sugar or a scant 3/4 cup of powdered sugar
  • 1 3/4 cup unbleached all-purpose flour
  • a pinch of salt
  • 1 stick (8 tablespoons) cold unsalted butter, cut into small pieces
  • grated zest of half a lemon
  • 1 large egg and 1 large egg yolk, lightly beaten in a small bowl
  • 1 3/4 cups (21 oz) of jam or fruit preserves, whatever flavor you like (for filling)
Directions:
  1. Whisk together sugar, flour and salt in a bowl.
  2. Rub or cut the butter into the flour until the mixture has the consistency of coarse crumbs. You can do this in the bowl or on your work surface, using your fingertips or an implement of choice.
  3. Make a well in the center of the mounded flour and butter mixture and pour the beaten eggs into it (reserve about a teaspoon of the egg mixture for glazing purposes later on – place in the refrigerator, covered, until ready to use).
  4. Add the lemon zest to your flour/butter/egg mixture.
  5. Use a fork to incorporate the liquid into the solid ingredients, and then use your fingertips.
  6. Knead lightly just until the dough comes together into a ball.
  7. Shape the dough into a flat disk and wrap in plastic wrap. Place the dough in the refrigerator and chill for at least two hours. You can refrigerate the dough overnight.
  8. Heat the oven to 375ºF.
  9. Take the pasta frolla out of the fridge, unwrap it and cut away ¼ of the dough. Reserve this dough to make the lattice top of the crostata. Refrigerate this dough while you work on the tart base.
  10. To help roll the crostata dough, keep the dough on top of the plastic wrap that you had it wrapped in. This can help rolling the dough and can also help when transferring the dough to your pan. You can also use parchment paper for this. However, you can also roll the dough directly on a work surface if you prefer.
  11. Lightly dust the top of the dough and your work surface (if you’re rolling directly on a work surface) with flour. Keep some flour handy to dust the dough as you go along.
  12. If the dough is very firm, start by pressing the dough with the rolling pin from the middle to each end, moving the rolling pin by a pin's width each time; turn the dough 180 degrees and repeat; when it softens, start rolling.
  13. Roll the dough into a circle about 1/8th inch thick.
  14. If you used the plastic wrap or parchment paper as rolling surface, flip dough over the pan, centering it, and delicately press it all around so the corners are well covered. Peel away the plastic wrap.
  15. Trim the excess dough hanging over the edges of the pan. Press the remaining dough around the border into the sides of the pan making sure the border is an even thickness all the way around.
  16. Prick the bottom of the dough with a fork in several places.
  17. Take out of the fridge the reserved pasta frolla you had cut away earlier. Roll it with your pin and cut into strips or use cookie cutters to make small shapes (this is not traditional, but it looks cute); or roll with your hands into ropes.
  18. Spread the jam or fruit preserves evenly over the bottom of the crostata.
  19. Use the prepared strips or rolls of dough to make a lattice over the surface, or decorate with the cut shapes. (Note: You can use dough scraps to make cookies: see the Additional Information section for some pointers)
  20. Brush the border and strips of dough with the reserved beaten eggs. You can add a drop or two of water to the beaten eggs if you don’t have enough liquid.
  21. Put the tart in the oven and bake for 25 minutes.
  22. After 25 minutes, check the tart and continue baking until the tart is of a nice golden hue. (Note: Every oven is different.)
  23. When done, remove the tart from the oven and let cool. If you have used a tart pan with a removable bottom, then release the tart base from the fluted tart ring. Make sure the tart is completely cool before slicing and serving.

Wednesday, November 24, 2010

Goat Cheese Cheesecake with Pineapple Vanilla Compote


Today we are in Kentucky for my stepbrother's graduation from basic training.

We are having a great trip so far but will not be enjoying our Thanksgiving meal until Friday. At least not the home cooked meal anyway.

But before Thanksgiving I thought I would share just one more idea for a Thanksgiving dessert.

Something that is a bit untraditional but absolutely amazing in every way.

I made this cheesecake for a dinner party (of course, what else do I make these things for??).

This cheesecake was chosen for my Facebook baking group for this month and I'm so glad I made it.

Not only was this the first (and so far only) cheesecake I've ever made, it was freaking good!

I will confess to you...I don't like cheesecake.

But I ate this cheesecake for dessert, breakfast and snack.

I was not the only person who dislikes cheesecake at that dinner party. And I also was not the only cheesecake hater that ate an entire piece of this cheesecake that night.

It was that delicious!

I seriously cannot say enough good things about this cheesecake. It was quick and easy to make. It was perfect for a special, or simple, dinner. It was still delicious the next day. And I am still dreaming of it. I may need to make it again when I get home.

I know some of you may be a bit leery of the idea of adding goat cheese to the cheesecake. But I swear, you can't even taste it. It actually reduces the tang of the cream cheese from the cake.

This cake is definitely going to become a staple of mine. I cannot wait to have it again.

So when you make this cheese cake, because at this point you pretty much have to, please invite me over so I can have some with you.

Here's how you can make this cake for me:


Grab your ingredients: granulated sugar, cream cheese, eggs, goat cheese, sour cream, vanilla extract, unsalted butter, salt and gingersnap cookies (or crumbs).


Process or crush the gingersnaps until they are crumbs. Mix the gingersnap crumbs with the melted butter, sugar, and salt until well combined.


Press the crumb mixture into the bottom and about 3/4 of the way up the sides of a buttered 9 inch springform pan.


In an stand mixer with a paddle attachment, beat together the cream cheese and goat cheese until light and fluffy.


Add eggs, one at a time, mixing well in between each addition.


Add the sugar and vanilla...


Mix until well combined.


Pour the cream cheese mixture into the prepared crust. Place the pan on a baking sheet and place in the preheated oven for 55-60 minutes, rotating the pan halfway through the cooking time.


About an hour before you are ready to serve the cheesecake, you should throw together the compote. You will need: pineapple, dark brown sugar, spiced rum, half a lemon and two vanilla beans.


Place the brown sugar, rum, vanilla beans and 1 1/2 cups of water in a large saucepan over medium low heat and mix it up. Squeeze the juice from half a lemon over the mixture and combine. Bring to a simmer.


Add the pineapple and stir to coat the pineapple with the rum mixture. Simmer over medium low heat until the liquid reduces by half and the pineapple is soft (we ate dinner while this cooked so it took around half an hour or so).


Once the cheesecake is sufficiently chilled remove the springform pan from around it. My poor little cake cracked big time. But that's okay. It still tasted good.


Slice the cheesecake, top with the pineapple vanilla compote (with plenty of the syrup), serve and enjoy!

Goat Cheese Cheesecake with Pineapple Vanilla Compote
Adapted from Food Network

Printer Friendly Version

Ingredients:


Crust:

  • 2 cups gingersnap crumbs (about 40 cookies)
  • 6 tablespoons melted butter, plus extra butter for pan
  • 1/4 cup sugar
  • Pinch salt

Filling:

  • 2 (8-ounce) packages cream cheese, room temperature
  • 12 ounce log goat cheese
  • 12 ounces sour cream
  • 4 eggs
  • 1 cup sugar
  • 2 teaspoons vanilla extract
  • Pineapple Vanilla Compote*

Directions

  1. Preheat the oven to 350 degrees F.

To make the crust:
  1. Stir together gingersnap crumbs, melted butter, sugar and salt in a large bowl. Butter a 9-inch springform pan. Press the crumb mixture onto the bottom and about 3/4 of the way up the sides of the pan.

To make the filling:
  1. Beat the cream and goat cheeses in the bowl of an electric stand mixer with the paddle attachment until light and fluffy. 
  2. Add the sour cream and beat to combine. 
  3. Add the eggs, 1 at a time, beating after each egg is added, until thoroughly combined. 
  4. Beat in the sugar and vanilla until just combined.
  5. Pour the filling into the prepared crust. 
  6. Put on a baking sheet in the preheated oven and bake for 55 to 60 minutes. Rotate the baking sheet halfway through the cooking process. If the cheesecake starts to color, tent the springform pan with aluminum foil.
  7. Remove the cheesecake from the oven and let it cool completely before serving, as it continues to set as it cools. It is best to refrigerate overnight before serving. 
  8. Cut the cake into wedges and serve with Pineapple Vanilla Compote.

Pineapple Vanilla Compote:


Ingredients:
  • 1 cup brown sugar
  • 1 1/2 cups water
  • 1 cup spiced rum
  • 2 vanilla beans, split, seeds scraped and reserved
  • 1/2 lemon, juiced
  • 1 ripe pineapple, top, skin and core removed, cut into bite-size wedges
Directions:
  1. Combine the brown sugar, water, rum, and seeds from vanilla beans in a saucepan over medium heat. Squeeze the lemon juice into the pan and stir to combine. 
  2. Bring to a simmer, add the pineapple and stir until well mixed. 
  3. Simmer until the liquid has reduced to a syrupy consistency and the pineapple is soft.
  4. Let cool and serve over goat cheese cheesecake!

Monday, November 22, 2010

Pumpkin Cream Cheese Bars with Oatmeal Struesel Topping


We made it.

I'm sitting here in my dad's house in Alabama.

We drove 12 hours yesterday.

It wasn't too bad actually. Except...I really like to read. Sadly, I get motion sick. So the only way I can read in the car is to take Dramamine. And even though I take the less drowsy formula, I am sensitive to medications and those things just wipe me out. It's crazy!

So i feel as though I've been drugged and I'm still trying to wake up. What can you do??

We talked about Thanksgiving today. We planned the menu. We went grocery shopping.

As our thoughts and discussions turn toward the upcoming holiday, my taste buds keep dreaming of pumpkin flavored desserts.

In past years I have made a pumpkin crumble cake. I don't have any picture and haven't posted the recipe because I haven't been blogging that long.

But I can share with you some delicious pumpkin cake bars with a cream cheese swirl and an oatmeal struesel topping. To me, that's just about as good as a pumpkin crumble cake.

I made these and ended up eating three bars on my own. Then I took them to a dinner party. That night, I whipped up a white chocolate amaretto fondue (the hostess asked me to make it since I'm so good at it) to go along with the assorted fruits and desserts she had laid out.

While I was dunking a juicy strawberry in the sweet chocolate sauce I remembered my pumpkin bars. I plopped the strawberry in my mouth, cut a pumpkin bar into bite sized pieces and dipped a bite of the bar in the fondue. And BAM! Dancing pallet, eyes rolling in the back on my head and a whisper of "Oh my God."

Yeah. I'd say it was a good call.

So, if you are looking for a last minute treat for Thanksgiving. One that is a bit different from the traditional pumpkin pie, I suggest you whip these up.

And don't forget the white chocolate amaretto fondue.

Here's how to make them:


Grab your ingredients: granulated sugar, golden brown sugar, vanilla extract, pumpkin puree, salt, baking soda, baking powder, unbleached all purpose flour, butter, eggs, cream cheese, old fashioned oats and pumpkin pie spice (if you don't have pumpkin pie spice you can instead use ground nutmeg, ground cinnamon, ground ginger and ground allspice).


Start by whisking together the flour, baking powder, baking soda, salt, and pumpkin pie spice (or nutmeg, cinnamon, ginger and allspice).


Melt the butter and toss it in a mixing bowl with the granulated sugar. Beat until creamy.


Add in the eggs, vanilla, water and pumpkin. Mix until well combined.


Add the flour mixture and mix until combined.


Pour the batter into a greased and floured 9x13 pan. Smooth with a rubber spatula.


Now for the cream cheese swirl. Put the cream cheese, sugar, vanilla and egg in a mixing bowl and mix until well combined. The mixture should be smooth.


Drop evenly spaced spoonfuls of cream cheese mixture atop the pumpkin batter in the pan. Then take a knife and swirl the cream cheese mixture through the pumpkin batter.


Next up, the struesel topping. Put the flour, brown sugar and butter in a large mixing bowl.


Cut the butter into the flour and sugar until the mixture is crumbly.


With your fingers, mix in the oatmeal until the mixture is well combined.


Top the pumpkin cream cheese batter with the struesel topping. Pop it in the oven and bake it up.


Once the bars are done, allow them to cool in the pan. Cut into 24 squares. Serve and enjoy!!


Pumpkin Cream Cheese Bars with Oatmeal Struesel 


Bar

  • 6 tablespoons melted unsalted butter
  • 1/4 teaspoon salt 
  • 1 1/2 cups granulated sugar 
  • 2 large eggs
  • 1 cup canned pumpkin puree
  • 1/3 cup water
  • 1 3/4 cups unbleached all-purpose flour
  • 1 tablespoon of pumpkin pie spice*
  • 1 teaspoon vanilla
  • 1 teaspoon baking soda
  • 1/2 teaspoon baking powder

Cream Cheese Layer

  • 8 oz cream cheese, softened 
  • 1/4 cup granulated sugar  
  • 1/2 teaspoon vanilla 
  • 1 large egg
Struesel Topping
  • 3/4 cup unbleached, all purpose flour
  • 3/4 cup golden brown sugar
  • 1 stick butter, slightly softened
  • 1 cup old fashioned oats

*Pumpkin Pie Spice mix, makes 1 tablespoon

  • 1 1/2 teaspoon ground cinnamon
  • 3/4 teaspoons ground ginger
  • 3/8 teaspoon ground nutmeg
  • 3/8 teaspoon ground allspice

Preparation
  1. Preheat oven to 350°. Spray a 9x13 inch baking pan with non-stick cooking spray. 
  2. In a bowl, with an electric mixer on medium speed, beat butter and sugar until smooth. 
  3. Beat in 2 eggs, pumpkin, 1 teaspoon of vanilla and 1/3 cup water until well blended, scraping down sides of bowl as needed. 
  4. In another bowl, mix flour, pumpkin pie spice, baking soda, baking powder, and salt. 
  5. Add the dry ingredients into the butter mixture and combine until well blended. 
  6. Spread batter evenly into the prepared pan 
  7. In a bowl, with an electric mixer on medium speed, beat cream cheese, egg, sugar, and vanilla until smooth. 
  8. Drop cream cheese mixture in evenly spaced portions over the pumpkin batter. Pull a knife tip through filling to swirl slightly into batter.
  9. Make struesel topping: in large mixing bowl, cut butter into brown sugar and flour until mixture is crumbly. Mix in oatmeal with fingers until combined. Sprinkle topping over uncooked batter in pan. 
  10. Bake in a 350° oven until center of the pumpkin batter (not cream cheese mixture) springs back when touched and struesel topping is golden brown, about 30 minutes. 
  11. Let cool completely in pan, then cut into 24 bars.
  12. Serve and enjoy!

Saturday, November 20, 2010

Cinnamon Walnut Pudding Cake


Can you believe it is almost Thanksgiving time???

I can't!

I cannot believe how quickly this year has flown by.

I remember when I was younger that time seemed to go by soooo sloooooowwwwwlllllllyyyyy.

When we were in school, it seemed summer break would never deliver us from the mundane days of classrooms, lectures and homework.

However, when summer rolled around and we had exhausted ourselves it seemed as though the new school year would never arrive. We were anxious to get back into the classroom. See our friends again. Even be assigned homework!

Now that I'm older, I sing a different tune!

The days fly by so rapidly that my head is often left spinning.

How on earth are we already in late November???

Today I am heading to Alabama to visit my father for Thanksgiving celebrations. My little family is taking a tour through Texas for the Christmas and New Year holidays and thought Thanksgiving with my father would be a nice relaxing time before the madness of Christmas hit.

Little did I know when I planned this trip that my stepbrother would be graduating basic training in Kentucky the day before Thanksgiving.

So not only are we hitting Alabama on this trip, but also Kentucky. But that's cool. I've never been there before. And it's for a good cause.

We won't be celebrating Thanksgiving (or at least not cooking a meal) until Friday. But that's okay too.

One good thing about already being well into November is that I get to share my second Cake Slice Bakers cake with you all.

I have been reading many mixed reviews on this cake. Several people have said it came out dry, the caramel topping was too thick, the cake wouldn't come out of the pan, etc. But I had no problems with this cake.

Maybe because I have worked with sticky cakes before? I don't know. But amidst the cake bashing I have found a new cake recipe to add to my arsenal.

I made this cake in anticipation of some friends coming over for dinner. The Hubble and I entertain quite a bit and I'm always searching for new dessert recipes to share (someone has to eat all these sweets!). We invited some friends over at the last minute and I knew this recipe would be quick.

I threw it together, popped it in the oven and sent The Hubble to the store for some wine to go with our baked penne that evening.

The cake finished baking shortly after he left. I turned it out of the pan and watched as the caramel slid down the sides of the cake. The sweet and spicy smell of cinnamon wafted from the gooey mess sitting on my serving platter.

At that moment, I had no choice.

I grabbed a fork...I took a small bite from the side of the cake thinking no one would notice. The moment I tasted that cake I was transported...to heaven I think. Or at least, that's what my heaven would taste like.

I couldn't stop! I took another bite...and another.

I knew in that instance I needed help.

I called my older sister hoping for a cake intervention...she didn't answer!

I didn't know what to do! I turned to twitter. I was hoping that someone would help me off the ledge. Surely someone would help me to not eat the entire cake before the guests arrived (yes, I totally could have done it!).

Luckily, that was the wake up call I needed. I covered the cake and stepped away.

It's unfortunate that my fellow Cake Slice Bakers were met with challenges with this cake. I wish they all could have experienced the taste bud explosion that I did. The addition of the walnuts also gave the cake a nice crunch to it as well. So there is a mixture of chewy, crunchy, gooey and sticky with the light texture of the cake.

Oh man. I think I'm going to need to make this again!

And here's how you can make it:


Grab your ingredients: unbleached all purpose flour, whole milk, salt, unsalted butter, vanilla extract, granulated sugar, light brown sugar, baking powder, ground cinnamon, cinnamon chips and chopped walnuts.


Spray a 9 inch baking pan generously with baking spray, I used this stuff.


In a medium saucepan, combine the brown sugar, water, butter and salt. Cook on medium heat, stirring occasionally, until butter melts. Bring to a boil. Allow to boil about 1-2 minutes. Remove from the heat and set aside to cool.


In a medium mixing bowl, combine flour, baking powder, ground cinnamon and salt.


In a large mixing bowl, beat together the butter and sugar until light and fluffy, about 3 minutes.


Mixing between each addition add: 1/3 of the flour mixture, 1/2 the milk and all of the vanilla, another 1/3 of the flour mixture, the rest of the milk, then the rest of the flour mixture. Scrape down the sides then mix on medium speed about 30 seconds more.


Stir in the cinnamon chips and walnuts by hand.


Scrape the batter into the prepared cake pan and smooth with a rubber spatula.


Gently pour the caramel topping (that was surprisingly more like a simple syrup than a caramel topping) over the batter in the pan. During the baking process the caramel sinks to the bottom of the pan, becoming the top once the cake is turned out of the pan.


Carefully place the pan in the preheated oven and bake until a toothpick inserted in the center comes out clean. When the time was up I thought for sure the cake wasn't baked enough. But I tried the tester anyway and it was clean. If you bake this cake too long it becomes dry.


Allow the cake to cool in the pan about 5-10 minutes then immediately turn the cake out of the pan onto a serving platter. You must do this while the pan is still hot. The caramel solidifies as it cools and will prevent the cake from turning out of the pan if left to cool too long.


Let the cake cool about 15-20 minutes more (I didn't do that and took a gooey hot bite right away and was transported to heaven). Then serve...


And enjoy!!!

Cinnamon Walnut Pudding Cake
Adapted from Cake Keeper Cakes

Printer Friendly Version

Ingredients:

Caramel Topping:

  • 1 cup plus 2 tablespoons packed light brown sugar
  • 3/4 cup water
  • 1 tablespoon unsalted butter
  • 1/2 teaspoon salt
Cake:
  • 2 cups unbleached all purpose flour
  • 2 teaspoons baking powder
  • 2 1/2 teaspoons ground cinnamon
  • 1/2 teaspoon salt
  • 2 tablespoons unsalted butter, softened
  • 1 cup granulated sugar
  • 1 cup whole milk
  • 1 teaspoon vanilla extract
  • 1 cup cinnamon chips
  • 1 cup chopped walnuts
Directions:
  1. Preheat oven to 350 degrees F.
  2. Generously spray a 9 inch square baking pan with non-stick cooking spray with flour (baking spray).
  3. Make caramel topping: Combine brown sugar, water, butter and salt in a medium saucepan. Heat on medium heat until butter melts, stirring occasionally. Allow to boil about 1 to 2 minutes. Remove from heat. Set aside to cool.
  4. In a medium mixing bowl, whisk together the flour, baking powder, ground cinnamon and salt.
  5. In a large mixing bowl, beat together the butter and sugar until light and fluffy, about 3 minutes.
  6. With the mixer on low, add a third of the flour mixture into the butter mixture, add half the milk and all of the vanilla. Mix to combine. Then add another third of the flour, followed by the remainder of the milk, then the last third of the flour. Mix until just combined. Scrape down the sides of the bowl and mix for about 30 seconds on medium speed.
  7. Stir in the cinnamon chips and walnuts by hand.
  8. Scrape the batter into the prepared cake pan and smooth the top with a rubber spatula.
  9. Gently pour the caramel topping onto the batter in the pan.
  10. Carefully place the pan into the preheated oven and bake 30-40 minutes or until a toothpick inserted in the center of the cake comes out clean (the cake may look like it is not done so make sure you test it even if you think it's not fully baked).
  11. When cake is done, allow to cool in the pan about 5-10 minutes then turn out of the pan onto a plate (the caramel sinks to the bottom of the cake during the baking process, if left in the pan too long it will solidify and become impossible to remove from the pan. You must turn out the cake while the pan is still hot).
  12. Allow to cool about 15-20 minutes more, serve and enjoy!!
Related Posts with Thumbnails