Showing posts with label The Daring Kitchen. Show all posts

Sunday, January 15, 2012

The Daring Cooks January 2012 Challenge: Tamales

Guess what!


Recently I was honored with the position of The Daring Cooks hostess!! Woohoo!!!


I had such a great time. I loved seeing the creativity amongst these Daring Cooks. The fillings were to die for and just looking at the different types of tamales made me hungry all over again.


Now it's time for me to share with you. Here is my post (I'll warn you now it's very detailed and picture heavy):


Hi! **waves enthusiastically** My name is Maranda and I blog over at Jolts & Jollies.

I am a stay at home mommy to 2 kiddos and an Army Brat turned Army Wife. My husband and I met in El Paso, Texas, which is right on the border of Mexico and New Mexico. Needless to say, Mexican food is at your fingertips throughout the city and beyond.
I LOVE Mexican food. There is something about tacos, enchiladas, green chiles and tamales that really do it for me. When my husband and I moved to Upstate New York we found that our beloved Mexican food was hard to come by. We met a similar culinary devastation when we moved to the Middle of Nowhere Missouri as well.
Luckily, we were able to find a small place in Upstate New York that had decent Mexican food. I was also able to find a lady selling tamales at the Farmer’s Market in Missouri.
One of our family traditions is to celebrate the new year with delicious tamales. Since the Army keeps moving us to places where tamales are difficult to find, I thought it was high time to learn how to make them myself. And since I hate to do things by myself, I figured that I would challenge you to hone your tamale making skills with me!
Tamales can be traced back as far 5000 B.C. Tamale making is usually a social event with the women in Hispanic families gathering together to spend an afternoon making dozens and dozens of tamales.
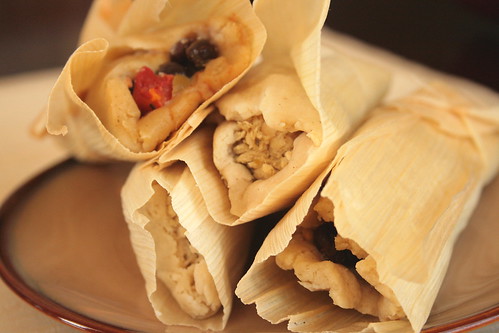
Tamales are made up of a masa (dough) usually made from a corn base and a filling. These are wrapped in corn husks, a large leaf, or some other wrapping and steamed to cook. The wrapper is discarded before eating.
Tamales are not so much about the food but about the memories created when making and eating them. So gather some friends and family together and get to making some tamales! I can’t wait to see what you come up with!!
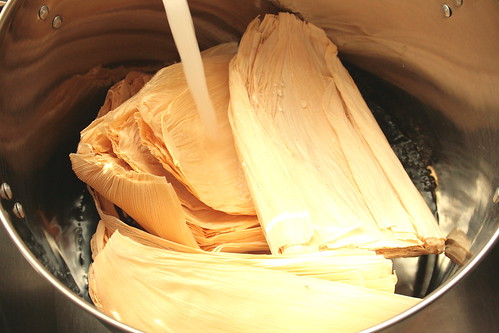
Place the dried corn husks in a large pot and cover with water.
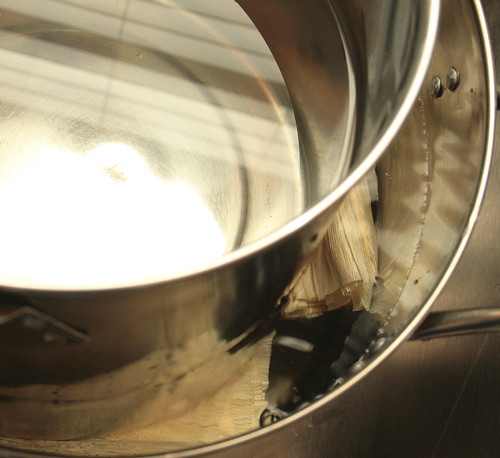
Place a heavy plate or a smaller pot full of water on top of husks to keep them in the water. Let soak for 3 hours or up to 1 day, flipping occasionally until husks are softened.
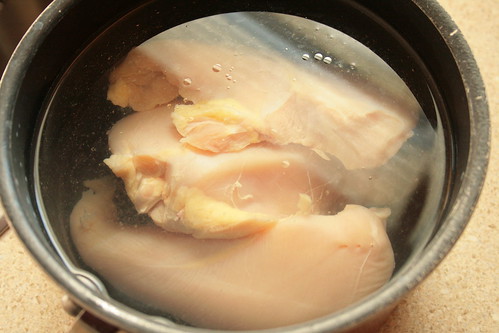
Once husks are softened, boil chicken about 20 minutes or until fully cooked.
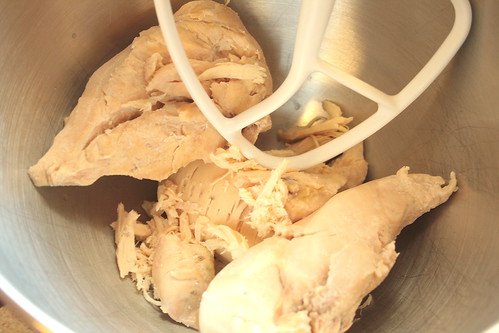
Immediately place hot chicken into the bowl of an electric mixer with the paddle attachment. Turn mixer on high to shred chicken (this takes about 3-5 seconds).
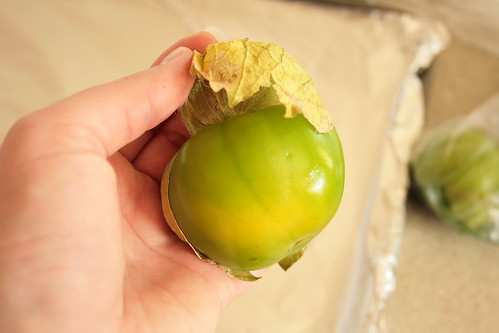
Place an oven rack on the top setting. Turn the oven on broil. Peel and rinse the tomatillos.
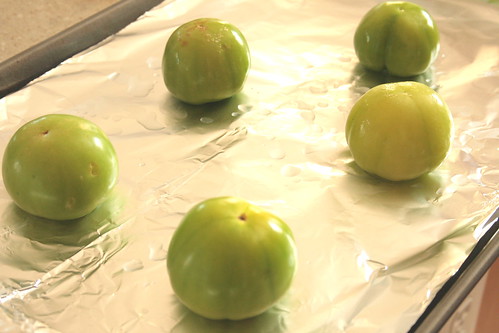
Line a heavy baking sheet with foil. Place tomatillos on baking sheet and place under broiler.
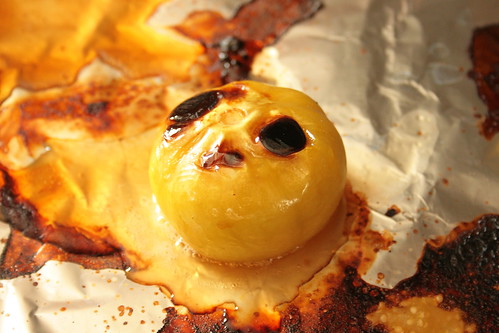
Broil (grill) until black spots form on tomatillos, then flip and broil (grill) other side. This takes about 5-10 minutes per side depending on the strength of the broiler.
Place roasted tomatillos and juices from the pan into a food processor and allow to cool about 5 minutes. Add the garlic and chopped Serrano chiles and process until smooth.
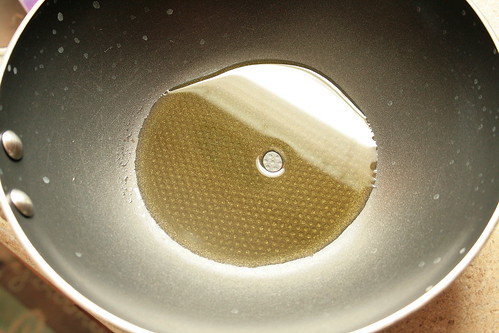
Heat the olive oil in a medium saucepan over medium high heat.
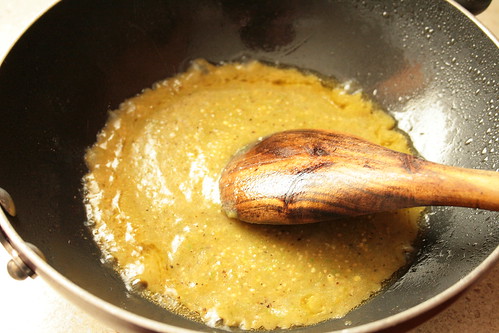
Add the tomatillo puree and boil, stirring continuously, for 5 minutes (it should turn thick like a paste).
Add in the chicken broth, stir to mix well. Reduce heat to medium low and allow to simmer, stirring occasionally until mixture coats the back of a spoon and is reduced to about a cup.
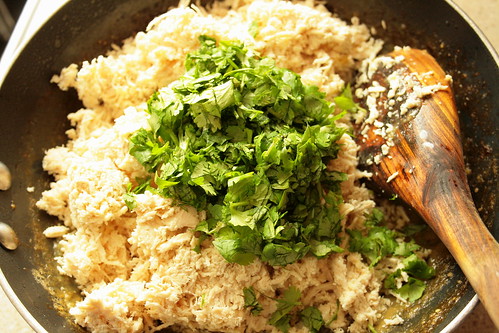
Stir in the chicken and cilantro. Salt to taste.
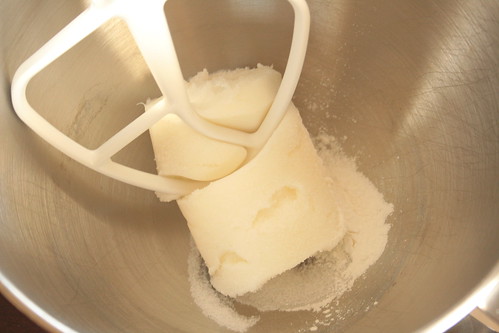
Prepare the dough. In the bowl of an electric mixer, on medium high heat, cream together the lard or vegetable shortening, baking powder and salt.
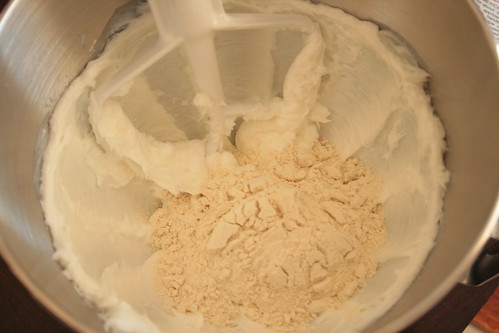
Mix in the masa harina, one cup at a time.
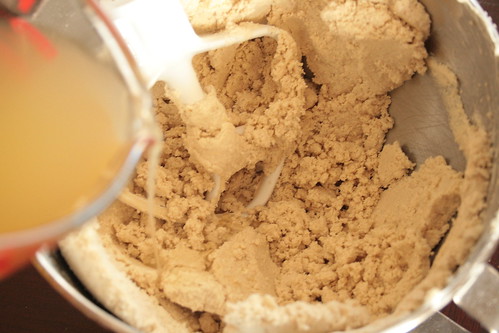
Reduce the mixer speed to low, gradually add in 1 ½ cups of the chicken broth.
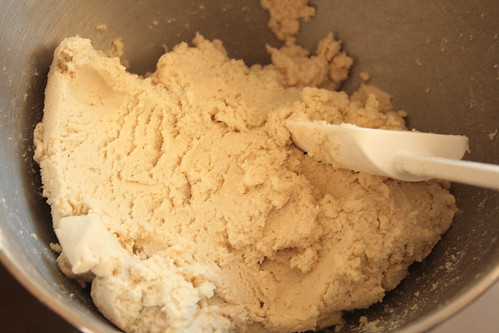
If the mixture seems too thick (you can taste it for moistness) add up to ½ cup more of the broth 2 tablespoons at a time. (The dough should be a cookie dough like texture).
Take 3 large corn husks and tear them into ¼ inch strips. (I would suggest you put these back in the water until use because they dry out and start breaking when you try to work with them.
Take a large pot with a steamer attachment. Pour about 2 inches of water into the bottom of the pot, or enough to touch the bottom of the steamer. Line the bottom of the steamer with corn husks.
Unfold 2 corn husks onto a work surface. Take ¼ cup of dough and, starting near the top of the husk, press it out into a 4 inch square, leaving 2-3 inches at the bottom of the husk. Place a heaping tablespoon of the filling in a line down the center of the dough square.
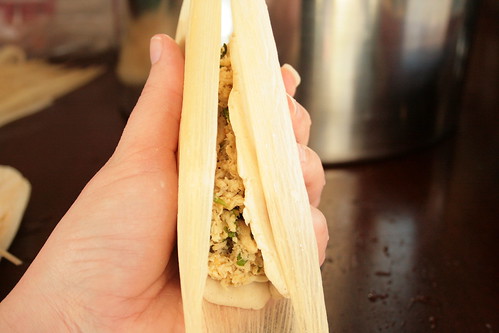
Fold the dough into the corn husk.
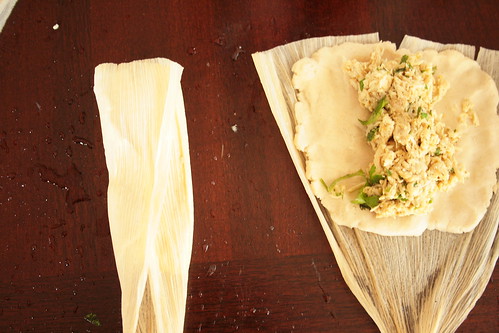
And wrap the husk around the dough.
Fold up the skinny bottom part of the husk.
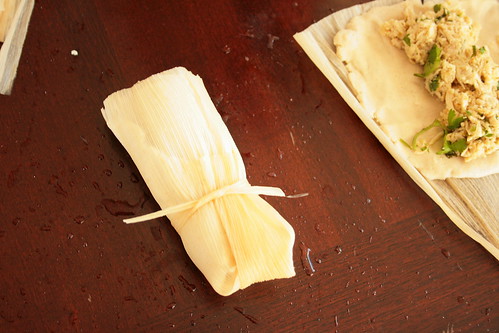
And secure it with one of the corn husk ties.
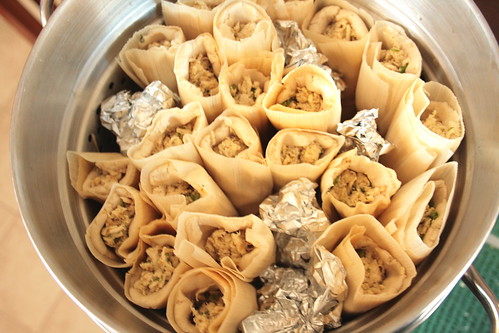
Stand them up in the steamer. If there aren’t enough tamales to tightly pack the steamer, place crumpled aluminum foil in the excess space.
Steam the tamales for about 40 minutes or until the dough deepens in color and easily pulls away from the husk.
For the black bean tamales: Follow the directions from the above recipe for soaking the corn husks.
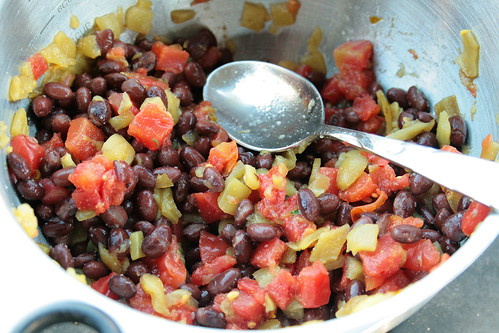
Make the filling. Combine all ingredients for the filling in a medium mixing bowl.
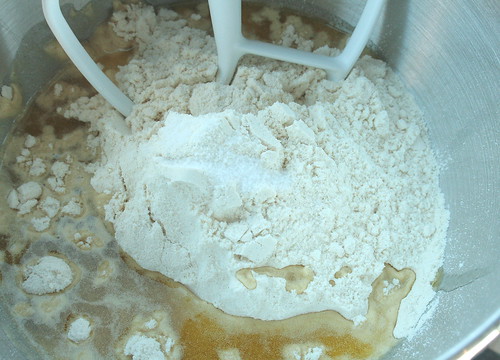

Make the masa dough. Combine the olive oil, salt and masa mix in the bowl of an electric mixer. Beat on medium speed until combined.
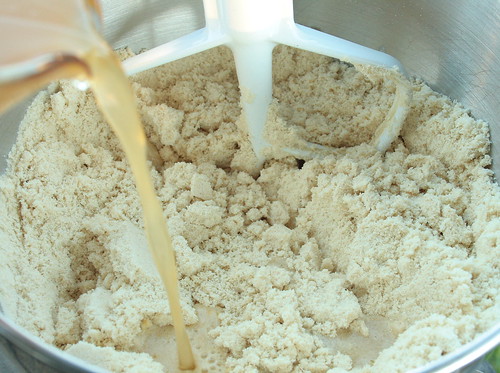
Reduce the mixer speed to low and gradually add 2 cups of vegetable broth. If the mixture seems to dry (you can taste it for moistness at this point) add more broth 2 tablespoons  at a time.
Follow the directions in the above recipe for filling and cooking instructions.

Serve and enjoy!!!!!!

Green Chile Chicken Tamales
Adapted from Epicurious
Ingredients:
1 – 8 ounce (225 gram) package dried corn husks (If you cannot find corn husks, you can use parchment paper or plastic wrap.)
For filling:
  • 1 pound tomatillos (can sub mild green chilies – canned or fresh)
  • 4 – 3 inch serrano chiles, stemmed and chopped (can sub jalapeno)
  • 4 large garlic cloves, chopped
  • 1 ½ tablespoons Extra Virgin Olive Oil
  • 2 cups low sodium chicken broth
  • 4 cups cooked and shredded chicken
  • 2/3 cup roughly chopped fresh cilantro (also known as coriander)

For the masa dough:
  • 1 1/3 cups lard or vegetable shortening
  • 1 ½ teaspoons salt (omit if already in masa mixture)
  • 1 ½ teaspoons baking powder (omit if already in masa mixture)
  • 4 cups masa harina (corn tortilla mix), I used instant masa mix
  • 1 ½-2 cups low sodium chicken broth


Directions:
  1.  Place the dried corn husks in a large pot and cover with water.
  2. Place a heavy plate or a smaller pot full of water on top of husks to keep them in the water. Let soak for 3 hours or up to 1 day, flipping occasionally until husks are softened.
  3. Once husks are softened, boil chicken about 20 minutes or until fully cooked.
  4.  Immediately place hot chicken into the bowl of an electric mixer with the paddle attachment. Turn mixer on high to shred chicken (this takes about 3-5 seconds).
  5. Place an oven rack on the top setting. Turn the oven on broil. Peel and rinse the tomatillos.
  6.  Line a heavy baking sheet with foil. Place tomatillos on baking sheet and place under broiler.
  7.  Broil (grill) until black spots form on tomatillos, then flip and broil (grill) other side. This takes about 5-10 minutes per side depending on the strength of the broiler.
  8.  Place roasted tomatillos and juices from the pan into a food processor and allow to cool about 5 minutes. Add the garlic and chopped Serrano chiles and process until smooth.
  9. Heat the olive oil in a medium saucepan over medium high heat.
  10. Add the tomatillo puree and boil, stirring continuously, for 5 minutes (it should turn thick like a paste).
  11. Add in the chicken broth, stir to mix well. Reduce heat to medium low and allow to simmer, stirring occasionally until mixture coats the back of a spoon and is reduced to about a cup.
  12. Stir in the chicken and cilantro. Salt to taste.
  13.  Prepare the dough. In the bowl of an electric mixer, on medium high heat, cream together the lard or vegetable shortening, baking powder and salt.
  14. Prepare the dough. In the bowl of an electric mixer, on medium high heat, cream together the lard or vegetable shortening, baking powder and salt.
  15. Mix in the masa harina, one cup at a time.
  16. Reduce the mixer speed to low, gradually add in 1 ½ cups of the chicken broth.
  17.  If the mixture seems too thick (you can taste it for moistness) add up to ½ cup  more of the broth 2 tablespoons at a time. (The dough should be a cookie dough like texture).
  18.  Take 3 large corn husks and tear them into ¼ inch strips. (I would suggest you put these back in the water until use because they dry out and start breaking when you try to work with them.
  19. Take a large pot with a steamer attachment. Pour about 2 inches of water into the bottom of the pot, or enough to touch the bottom of the steamer. Line the bottom of the steamer with corn husks.
  20.  Unfold 2 corn husks onto a work surface. Take ¼ cup of dough and, starting near the top of the husk, press it out into a 4 inch  square, leaving 2-3 inches at the bottom of the husk. Place a heaping tablespoon of the filling in a line down the center of the dough square.
  21. Fold the dough into the corn husk.
  22.  And wrap the husk around the dough.
  23.  Fold up the skinny bottom part of the husk.
  24. And secure it with one of the corn husk ties.
  25.  Stand them up in the steamer. If there aren’t enough tamales to tightly pack the steamer, place crumpled aluminum foil in the excess space.
  26.  Steam the tamales for about 40 minutes or until the dough deepens in color and easily pulls away from the husk.
  27. Serve and enjoy!!
Vegan Black Bean and Green Chile Tamales
Adapted from GoodVeg on Squidoo
Ingredients:
1 – 8 ounce (225 grams) bag dried corn husks
For the filling:
  • 1 – 15.5 ounce can black beans, drained and rinsed
  • 1 – 14 ounce can diced tomato with green chiles, drained
  • 1 – 10 ounce can diced green chiles, drained
  • 1 teaspoon garlic salt
  • ½ teaspoon ground cumin

For the masa dough:
  • 4 cups masa harina (corn tortilla mix), I used instant masa mix
  • 2 ½-3 cups vegetable broth
  • ½ cup Extra Virgin Olive Oil
  • ¼ teaspoon salt
Directions:

  1.  Follow the directions from the above recipe for soaking the corn husks.
  2. Make the filling. Combine all ingredients for the filling in a medium mixing bowl.
  3.  Make the masa dough. Combine the olive oil, salt and masa mix in the bowl of an electric mixer. Beat on medium speed until combined.
  4.  Reduce the mixer speed to low and gradually add 2 cups (480 ml) of vegetable broth. If the mixture seems to dry (you can taste it for moistness at this point) add more broth 2 tablespoons (30 ml) at a time.
  5.  Follow the directions in the above recipe for filling and cooking instructions.
  6. Serve and enjoy!!
Tuesday, June 28, 2011

Daring Bakers June 2011: Baklava


Okay people! I think I'm losing my mind over here!

Where the heck did Monday go???

I realized last night that it was Monday and that I was supposed to have posted this already.

But alas, Monday escaped me so it is now Tuesday and I'm going to share this awesome recipe with you.

I have loved baklava for many years now and have been considering making it for some time.

However, I never intended to make my own dough!

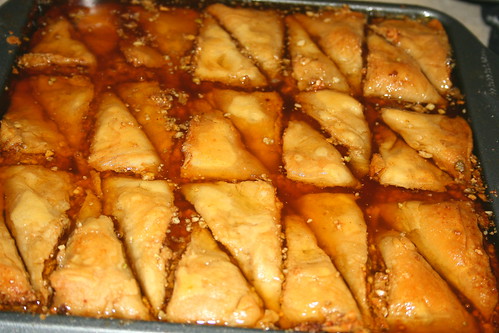
Erica of Erica’s Edibles was our host for the Daring Baker’s June challenge. Erica challenged us to be truly DARING by making homemade phyllo dough and then to use that homemade dough to make Baklava.

This recipe was super delicious. As all baklava is to me...

I feel extremely proud of the fact that I finally made this delicious treat...I just wish The Hubble could have been here to enjoy it with me.

I have to say, I will never be making my own phyllo dough again. This was tough. It took a lot of time and was super frustrating. I think I tore just about every piece of the phyllo. Except one...there was ONE piece I didn't rip. But what can you do??

It's about the experience right?? At least I can now say I made phyllo from scratch. Not many people can say that.

I did have to double the dough recipe to get enough to make all the layers I needed. I also had to piece together the trimmings to make more sheets. Either I didn't roll my dough thin enough or...well...I didn't roll my dough thin enough. I got annoyed and figured whatever. I needed three dough recipes to make all the layers...but I made due.

Also, the syrup I made was WAY too much. It didn't quite soak up and I had to pour some of the syrup out at the end. Only half the syrup was needed. I made the adjustments in the recipe I shared below.

No matter what, this was definitely a challenge that I am glad I stepped up to. The baklava was delicious and I'm so thankful to Erica for giving us this great challenge!

Here's what you can do to make your own phyllo and baklava at home! Let's get daring!!


With the paddle attachment of your electric mixer, combine the flour and salt.


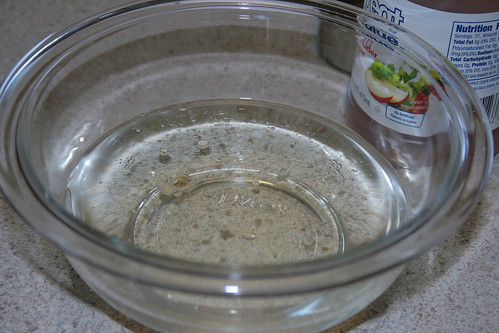
In a separate bowl, combine the water, oil and vinegar.


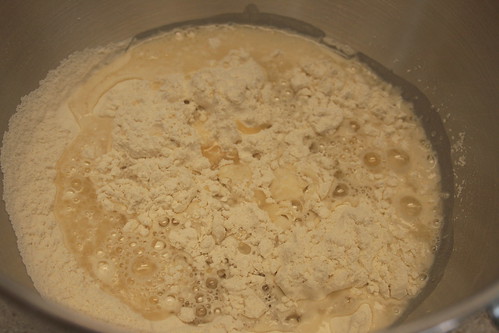
With the mixer on low speed, add the wet ingredients to the dry ingredients.


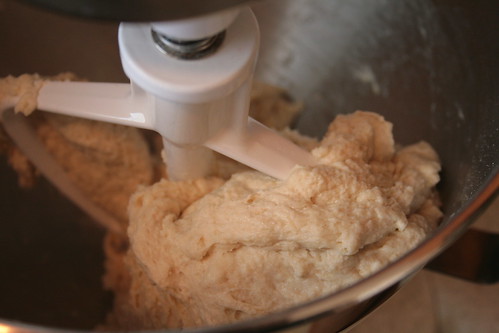
Mix until a soft dough forms.


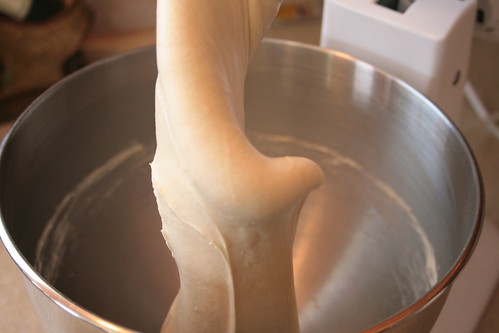
Switch to the dough hook and "knead" until a smooth, elastic dough forms; about 10 minutes.


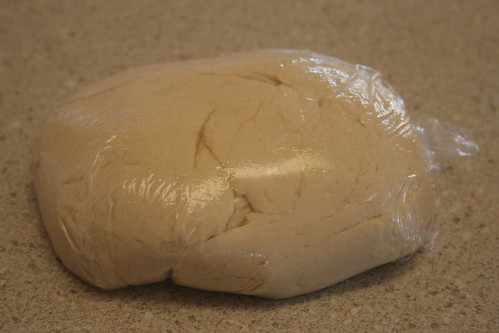
Form the dough into a ball, lightly coat with oil and wrap tightly in plastic wrap. Allow to rest 1 1/2-2 hours.


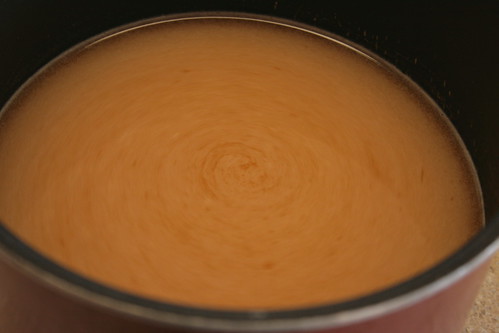
While the dough rests, make the syrup.


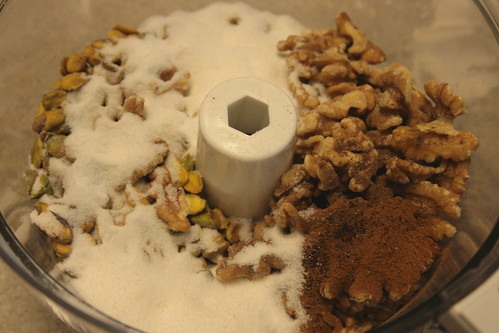
And the nut filling. Set both aside.


Cut off a chunk of dough slightly larger than a golf ball. Use whatever means available to roll it out as thin as possible. Once it's as thin as you can get it with the rolling pin, carefully pick it up with well floured hands and stretch on the backs of your hands like pizza dough.


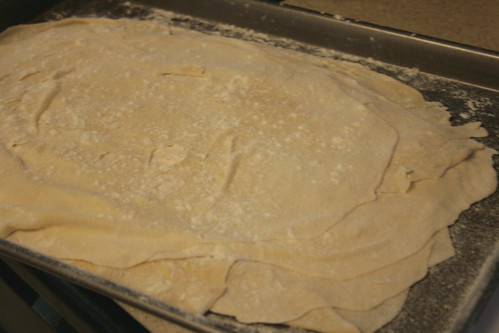
Lay the sheets on a well floured surface, flouring between each sheet. Continue rolling the dough until all the dough is used up.


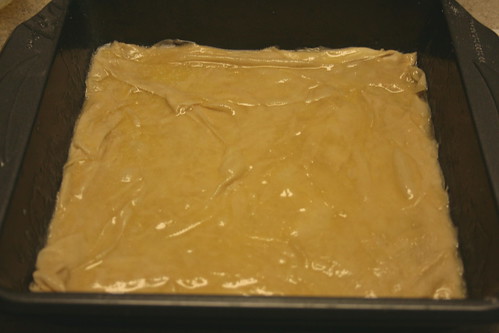
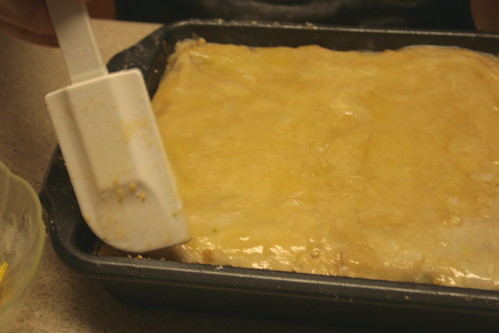
Trim the dough to fit your pan. Butter the bottom of the pan, place the first layer of phyllo in the bottom of the pan. Butter the phyllo. Continue to layer the phyllo and butter 5 more times.


Then layer with 1/3 of the nut filling. Continue to layer the phyllo and nut layers until all used up.


Tuck the corners of the phyllo into the sides of the pan to look nice.


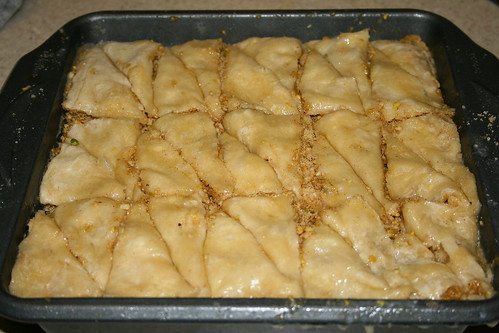
Cut into the shapes you desire.


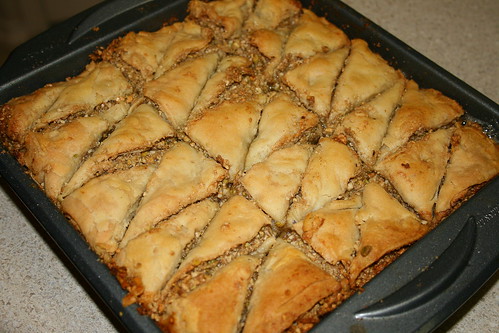
Bake, cut then bake some more.


When the baklava is done baking, pour the cooled syrup over the hot dough, it will crackle. Let it sit overnight to soak up the syrup.


Serve and enjoy!!!


Apricot Baklava

Printer Friendly Version


Phyllo Dough
Retrieved from The Daring Kitchen

Ingredients:

  • 1 1/3 cup unbleached all purpose flour
  • 1/8 teaspoon salt
  • 1/2 cup, minus 1 Tablespoon, water, plus more if needed
  • 2 Tablespoons vegetable oil, plus more for coating the dough.
  • 1/2 teaspoon cider vinegar 
  • 2 cups butter, melted (for assembly of baklava)
Directions:
  1. In the bowl of a stand mixer, combine flour and salt with the paddle attachment.
  2. In a small bowl, combine water, oil and vinegar.
  3. With mixer on low speed, add wet ingredients to the dry ingredients. Mix until a soft dough forms (add more water if dough is too dry).
  4. Change to the dough hook and allow to "knead" about 10 minutes (20 minutes if kneading by hand) until a smooth, elasticy dough forms.
  5. Remove dough from mixer and knead by hand about 2 minutes more (during this process, pick up the dough and throw it on the counter a few times).
  6. Shape the dough into a ball, coat with oil and tightly cover with plastic wrap. Allow to rest 1 1/2 to 2 hours.
  7. While dough rests, make the syrup and nut mixture; recipes follow.
  8. Unwrap the dough and cut off a chunk slightly larger than a golf ball. (While rolling, keep the remaining dough covered so it doesn't dry out)
  9. Flour hands, rolling pin and counter (add as necessary, you can't over flour). Roll the dough as thin as possible (don't worry about tearing it but try to keep a nice sheet for the top layer)
  10. When you get it as thin as possible with the rolling pin, flour your hands well and stretch it on the backs of your hands like pizza dough. The dough should be thin enough to see through.
  11. Set the sheet of dough on a well floured surface, flour the top of the sheet and continue rolling the dough until you have rolled it all out into thin sheets.
  12. When the dough is rolled out, trim your dough sheets to fit the bottom of your pan.
  13. Preheat the oven to 350 degrees F.
  14. Melt the butter, butter the bottom of the baking dish. Lay a sheet of phyllo dough on the butter, butter the dough, place another sheet of phyllo, butter the dough. Continue in this manner until you have 5 layers of phyllo and butter, end with the butter. Then layer with 1/3 of the nut mixture. Then more phyllo.
  15. You should have several layers: 5 sheets phyllo, 1/3 filling, 4 sheets phyllo, 1/3 filling, 4 sheets phyllo, 1/3 filling, 5 sheets phyllo.
  16. When the layers are finished, poke the edges of dough into the pan. Cut the baklava into desired shapes. Butter the top layer of dough.
  17. Bake about 30 minutes, remove from oven and cut the shapes again, making sure to cut all the way through all the layers.
  18. Bake another 30 minutes. Or until golden brown.
  19. Remove from the oven and pour the cooled syrup over the baklava, it will crackle. Allow to set overnight to soak up the syrup.
  20. Serve and enjoy!
Apricot Syrup

Ingredients:
  • 1/2 cup water
  • 1 cup apricot nectar
  • 1 cup sugar
  • 1/4 cup honey
  • 1/2 teaspoon vanilla
Directions:
  1. Combine all ingredients in a medium saucepan. Heat over medium high heat until sugar dissolves.
  2. Without stirring, allow the syrup to reach 225 degrees F. Set aside and allow to cool.
Filling:

Ingredients:
  • 8 ounces walnuts
  • 8 ounces almonds
  • 6 ounces pistachios
  • 2 Tablespoons ground cinnamon
  • 1 teaspoon ground allspice
  • 1 pinch ground cloves
Directions:
  1. Place all ingredients in a food processor.
  2. Pulse until finely chopped.

Monday, May 30, 2011

Daring Bakers May 2011: Chocolate Marquise on Meringue


I don't know if you have noticed this...but I don't have a lot of chocolate recipes here in my little corner of the interwebs.

See...I don't really mention this issue much because I figure y'all will look at me funny when I say it.

I don't really care for chocolate.

I  know!! Crazy right?!?!

I have to really be in the mood for chocolate to have any at all. And that's not too often.

So when I have a chocolate recipe to make, I tend to make it at a time that I can give it away and not have to eat it myself.

The May 2011 Daring Bakers’ challenge was hosted by Emma of CookCraftGrow and Jenny of Purple House Dirt. They chose to challenge everyone to make a Chocolate Marquise. The inspiration for this recipe comes from a dessert they prepared at a restaurant in Seattle.

When I read this month's Daring Bakers challenge, I started thinking of how I was going to make and give away a chocolate, frozen dessert.

Well...the opportunity presented itself the other day when my family was over playing a game of Phase 10.

I know what you are thinking...family game nights are usually events when you make dips, small bites and other finger foods. NOT when you should be making a decadent, gourmet dessert.

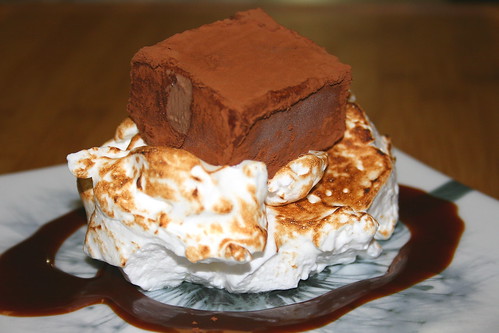
But...this is how I roll. So...chocolate marquise on toasted meringue with a caramel drizzle was served at the last game night. Perfect right?? Ha!

Luckily, I had made the chocolate marquise earlier in the week and it was sitting in the freezer, waiting for the perfect opportunity to make its debut.

Everyone really enjoyed the dessert though the consensus was that the cayenne pepper in the chocolate marquise was a bit overwhelming. So keep that in mind when you are making this dish.

Also, the original recipe called for tequila in the marquise and the caramel but me being in my pregnant state (and the fact that we don't actually bake anything with this challenge, therefore the alcohol wouldn't be cooked off) I omitted that ingredient. There were also other optional components to this dish that I completely forgot about didn't have time to make. So, if you would like to view/make the original recipe jump over here to check it out.

Ready?? Let's get daring!


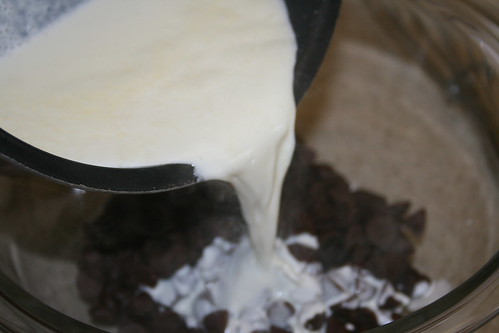
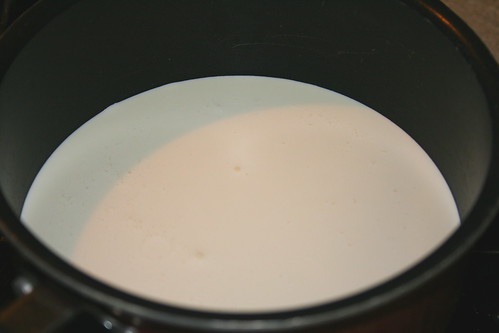
We start by making the chocolate base. Heat up some heavy cream.


And pour it over some chocolate. Let it stand for a minute or two and whisk it up until it's nice and smooth.


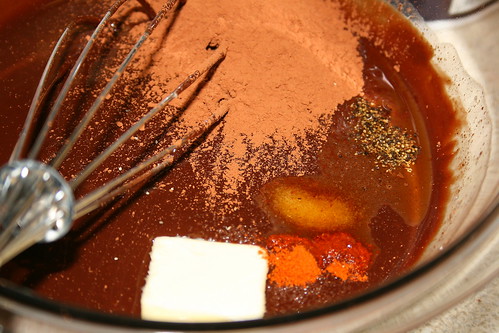
Toss in the rest of the ingredients and whisk those until they are well incorporated. Set it aside.


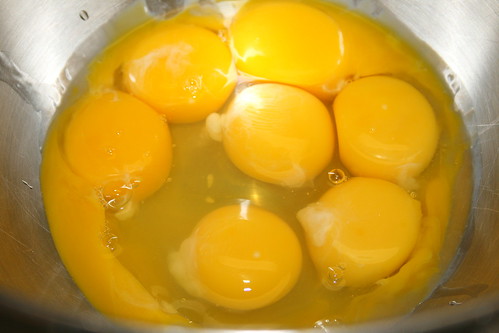
Now we start the marquise. Put the yolks and eggs in a large mixing bowl. And whip them into submission! Well...whip them until they are light and fluffy anyway.


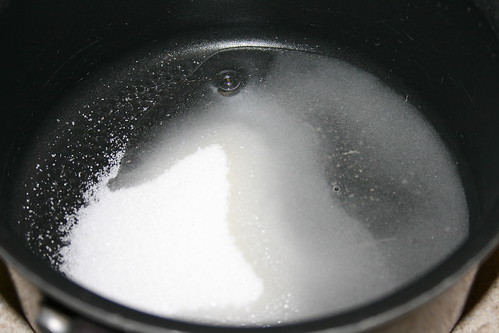
While the eggs are whipping. Make a simple sugar syrup. Bring some water and sugar to boil until it hits the "soft ball stage."


Then slowly but quickly (what?) drizzle it into the eggs as they continue to whip.

Is anyone else having a problem with this song right now (other than me): When an egg comes along...you must whip it! No? Just me? Oh...


While the eggs and sugar syrup whip along...go ahead and make whipped cream out of your heavy whipping cream. That means whip the cream until soft peaks form. Don't be like me and whip too long though. That's annoying. Set that aside.


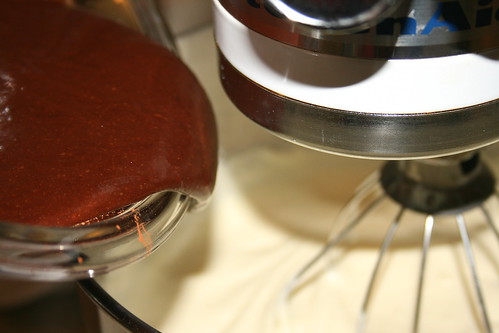
Back to the egg mixture! The eggs should be cool by now (remember, you poured boiling sugar syrup on them) so now it's time to mix in the chocolate base that we made earlier. Pour the chocolate in and mix for about a minute until it's all well incorporated.


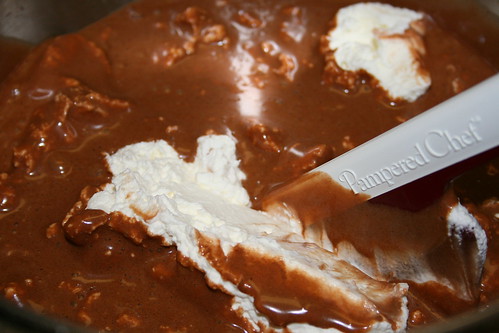
Fold in the whipped cream.


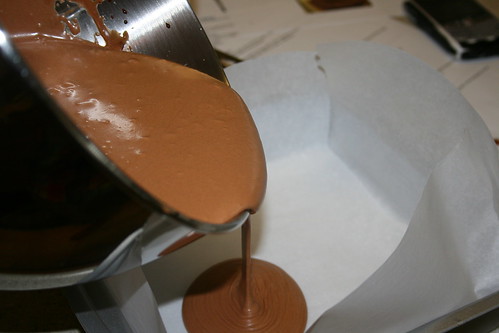
Then pour that mixture into a parchment lined baking pan. Put some plastic wrap over the top, making sure to let the plastic wrap touch the chocolate mixture. Put in the freezer for a couple hours, overnight, or if you are me...a couple days. Oops!


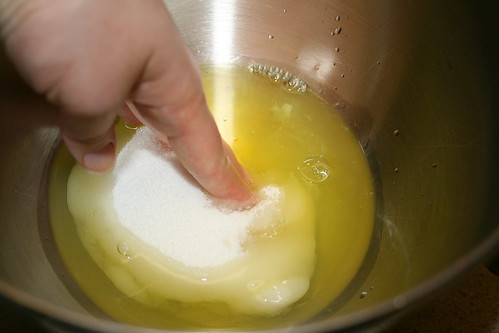
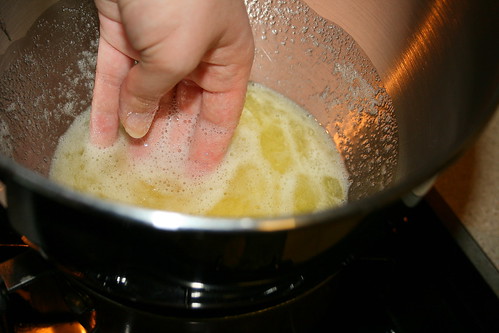
When you are almost ready to serve up this dessert, we are going to make the meringue. put some sugar and egg whites into a mixing bowl. Mix it up with a clean hand.


Then make a sort of double broiler from that bowl, continue to mix with your hand until all the sugar dissolves. Now set that mixture to whip up on the mixer. In the last minute or so, add the vanilla until mixed in. Then set it aside until ready to use.


Now to make the caramel! Put some sugar and water in a small saucepan and cook until a deep amber/mahogany color. Then add the cream and salt and whisk it up. Set the caramel aside until ready to use.


When we are ready to serve up the dessert, unwrap the frozen brick of chocolate and cut it into squares. Quickly (because it's all melting) roll the squares in the cocoa powder then place them in the fridge to thaw for about 15 minutes or so while you work on plating the rest.


Start by drizzling the caramel on the plate. Spoon some meringue on the plate then torch it. Place a thawed chocolate square on the toasted meringue.

Serve it to family or friends and enjoy!!!f

Chocolate Marquise on Meringue
Retrieved from The Daring Kitchen


Printer Friendly Version


Ingredients:

  • 6 large egg yolks at room temperature
  • 2 large eggs
  • 1/3 cup granulated sugar
  • 2 tablespoons + 2 teaspoons water
  • Chocolate Base, barely warm (recipe follows)
  • 1 cup heavy cream
  • 1 cup Dutch process cocoa powder (for rolling) 
  • Torched meringue(recipe follows)
  • Caramel (recipe follows)
Directions:
  1. In the bowl of a stand mixer, combine the egg yolks and whole eggs. Whip on high speed until very thick and pale, about 10 - 15 minutes. When the eggs are getting close to finishing, make a sugar syrup by combining the sugar and water in a small saucepan. Bring the syrup to a boil and then cook to softball stage (235F).
  2. With the mixer running on low speed, drizzle the sugar syrup into the fluffy eggs, trying to hit that magic spot between the mixing bowl and the whisk.
  3. When all of the syrup has been added (do it fairly quickly), turn the mixer back on high and whip until the bowl is cool to the touch. This will take at least 10 minutes.
  4. In a separate mixing bowl, whip the heavy cream to soft peaks. Set aside.
  5. When the egg mixture has cooled, add the chocolate base to the egg mixture and whisk to combine. Try to get it as consistent as possible without losing all of the air you've whipped into the eggs. We used the stand mixer for this, and it took about 1 minute.
  6. Fold 1/3 of the reserved whipped cream into the chocolate mixture to loosen it, and then fold in the remaining whipped cream.
  7. Pour into the prepared pans and cover with plastic wrap (directly touching the mixture so it doesn't allow in any air).
  8. Freeze until very firm, at least 2 - 4 hours (preferably 6 – 8 hours).
  9. When you're ready to plate, remove the marquise from the freezer at least 15 minutes before serving. While it's still hard, remove it from the pan by pulling on the parchment 'handles' or by flipping it over onto another piece of parchment.
  10. Cut it into cubes and roll the cubes in cocoa powder. These will start to melt almost immediately, so don't do this step until all of your other plating components (meringue, caramel, spiced nuts, cocoa nibs) are ready. The cubes need to sit in the fridge to slowly thaw so plating components can be done during that time. They don’t need to be ready before the cubes are rolled in the cocoa powder.
  11. Plate with the torched meringue and drizzled caramel sauce, and toss spiced almonds and cocoa nibs around for garnish. You want to handle the cubes as little as possible because they get messy quickly and are difficult to move. However, you want to wait to serve them until they've softened completely. The soft pillows of chocolate are what make this dessert so unusual and when combined with the other elements, you'll get creamy and crunchy textures with cool, spicy, salty, bitter, and sweet sensations on your palate.

Chocolate Base
Ingredients:
  • 6 oz (3/4 cup) bittersweet chocolate (about 70% cocoa)
  • 3/4 cups heavy cream
  • 1/4 teaspoon salt
  • 1/8 teaspoon cayenne
  • 1/8 cup light corn syrup
  • 1/2 teaspoon vanilla
  • 1/8 cup cocoa powder 
  • 1/16 teaspoon freshly ground black pepper
  • 1/2 oz unsalted butter (1 tablespoon/15 grams), softened

Directions:

  1. Place the chocolate in a small mixing bowl.
  2. In a double-boiler, warm the cream until it is hot to the touch (but is not boiling). Remove from the heat and pour over the chocolate.
  3. Allow it to sit for a minute or two before stirring. Stir until the chocolate is melted completely and is smooth throughout.
  4. Add the remaining ingredients and stir to combine.
  5. Set aside until cooled to room temperature. Do not refrigerate, as the base needs to be soft when added to the marquise mixture. If you make it the day before, you may need to warm it slightly. Whisk it until it is smooth again before using it in the marquise recipe.
Torched Meringue
Ingredients:

  • 6 large egg whites
  • 3/4 cup + 2 tablespoons sugar
  • Splash of apple cider vinegar
  • 1/4 teaspoon vanilla
Directions:
  1. Combine the egg whites, sugar and vinegar in the bowl of a stand mixer. Using your (clean, washed) hand, reach in the bowl and stir the three together, making sure the sugar is moistened evenly by the egg whites and they make a homogeneous liquid.
  2. Over a saucepan of simmering water, warm the egg white mixture. Use one hand to stir the mixture continuously, feeling for grains of sugar in the egg whites. As the liquid heats up, the sugar will slowly dissolve and the egg whites will thicken. This step is complete when you don't feel any more sugar crystals in the liquid and it is uniformly warm, nearly hot.
  3. Remove the mixing bowl from the saucepan and return it to the stand mixer with the whisk attachment. Whisk until you reach soft peaks. In the last 10 seconds of mixing, add the vanilla to the meringue and mix thoroughly.
  4. When you're ready to plate the dessert, spoon the meringue onto a plate (or use a piping bag) and use a blowtorch to broil.
Caramel
Ingredients:

  • 1/2 cup sugar
  • 1/4 cup water
  • 1/2 cup heavy cream
  • 1/2 teaspoon salt

Directions:
  1. In a heavy-bottomed saucepan, combine the sugar and water on medium-high heat. Boil until the water completely evaporates and the sugar caramelizes to a dark mahogany color.
  2. Working quickly, add the cream to the darkened caramel. It will bubble and pop vigorously, so add only as much cream as you can without overflowing the pot.
  3. Return the pot to the stove on low heat and whisk gently to break up any hardened sugar. Add any remaining cream and continue stirring. Gradually, the hard sugar will dissolve and the caramel sauce will continue to darken. When the caramel has darkened to the point you want it, remove it from the heat. 
  4. Add the salt and stir to combine. Set aside until ready to serve.
Related Posts with Thumbnails