Showing posts with label basil. Show all posts

Monday, May 9, 2011

Roasted Red Pepper Pesto


Okay y'all!

It's confession time...yet again.

I need to tell you something.....

The Hubble may not like this....

Here goes...

I may never leave Central Texas!!

The Hubble may not like this because that means his whole military career thing is going to become much more...interesting.

Surely he wouldn't mind if we didn't tag along all over the country/world with him right??

I mean, if it means that I have to go back to some place like the Middle of Nowhere Missouri...I'm sorry buddy, NO. CAN. DO!

Of course, he probably knows that I'm full of hot air because he knows I'd follow him to the ends of the Earth. Stupid love.

Oh well.

At least I can enjoy Texas for now.

Why am I so excited??

Because I found basil!!!!

And not just the dried stuff....or the occasional single use serving of the stuff.

No. I found BASIL!!!! Fresh basil! In bulk!

It was amazing.

And that means...I was able to make pesto! Woohoo!!

Not only that, but I got a wild hair and decided to roast my own peppers for said pesto.

And let me tell you, if you have never roasted your own peppers, you need to go grab some and get to it.

Roasting peppers is probably one of the most awesomely fun experiences I've ever had.

And it was easy too! How can you beat that??

I ended up making this pesto for a savory cheesecake that I will share with you next week.

But since I didn't use it all, I threw together some pasta that I'm going to share with you Thursday.

And you will NOT want to miss Thursday's post because this pasta was pretty much the best stuff I've ever made!!

Anyway. I guess I should stop waxing poetic about Texas and get on with the recipe right??

Here we go...
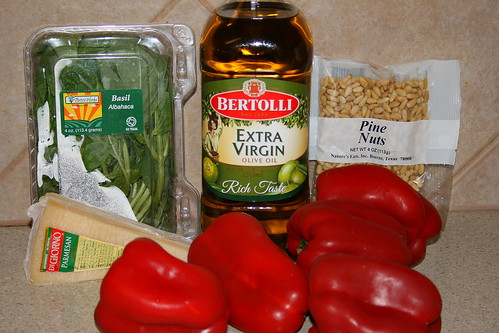

Ingredients: Fresh basil leaves, extra virgin olive oil, pine nuts, fresh Parmesan and red peppers.
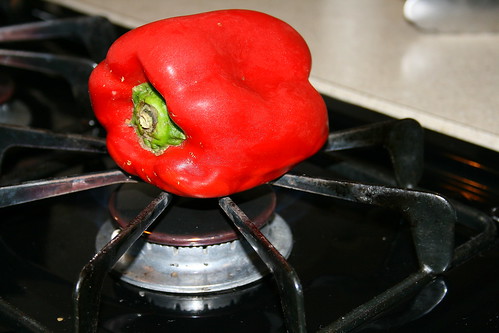

Toss your peppers, one at a time, straight on the burner of your gas stove. If you don't have a gas stove, you can use a grill or your oven on broil (use the top most rack).
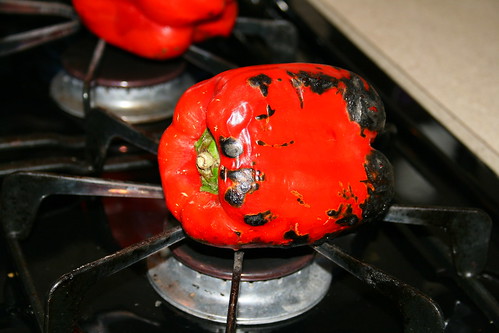

Continue to turn the peppers as they start to char. They will catch fire a bit but since they are so juicy, the fire doesn't really ignite. But please make sure you are wearing short sleeves and using tongs!


See how pretty and black they get??? Try to get as much of the pepper to blacken as you can.
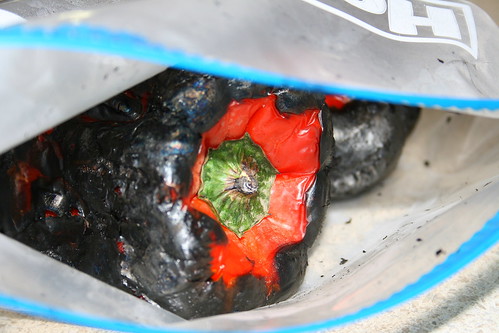

Then immediately toss them into a large Ziploc baggie. Let the steam for about 20-30 minutes (I took a shower while mine were steaming).
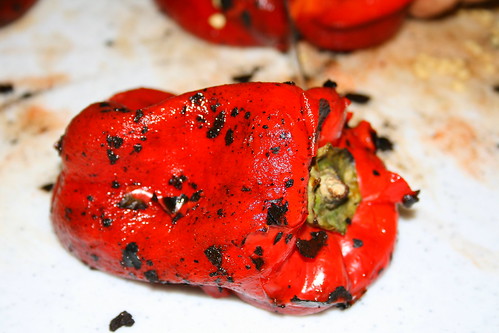


When you are done with your shower or whatever you did while the peppers steamed, take them out of the bag and slip the char off the pepper using your hands or a paper towel. By now the black stuff should just slide right off the pepper. It's messy, but fun! And resist the temptation to rinse the pepper. The char gives it that extra roasty flavor.


Now chop off the tops and cut the peppers in half. Scrape out the seeds. Honestly, when the tops were chopped off, the juices and seeds poured right out of the pepper. There was minimal scraping required.
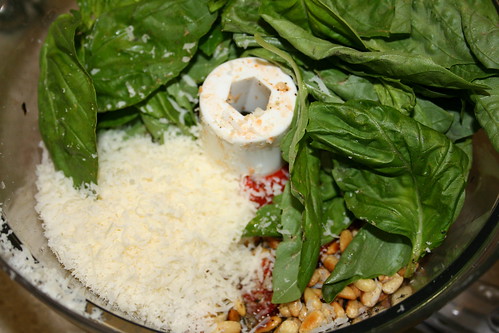

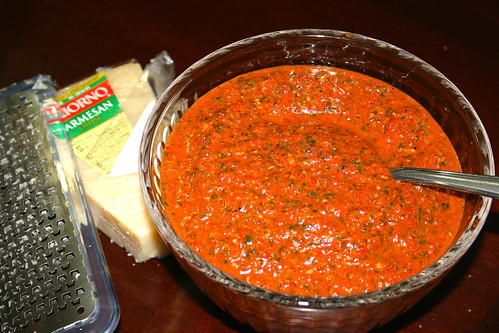
Now toss the roasted and cleaned out peppers into a food processor with all your other ingredients. Pulse a few times, then let her rip! Process until the entire thing is nice and smooth (scrape down the sides of the bowl as needed.


Isn't it gorgeous??? I think pesto always needs a bit more cheese. Now, stop by on Thursday to check out the most AMAZING pasta that I've ever made. I'll give you a hint...this pesto has something to do with it!

Roasted Red Pepper Pesto
Retrieved from Cooking Light

Printer Friendly Version

Ingredients:

  • 1 cup fresh basil leaves
  • 1/4 cup (1 ounce) grated fresh Parmesan cheese
  • 2 tablespoons pine nuts, toasted (either throw these on a baking sheet in the oven or on a dry skillet over medium heat, stirring/shaking often, to toast)
  • 1 tablespoon olive oil
  • 1/4 teaspoon salt
  • 1/8 teaspoon pepper
  • 2 pounds red bell peppers (about 4 large), roasted and peeled
Directions:
  1. Place all ingredients in a food processor; process until smooth, scraping sides of processor bowl occasionally. Store in airtight container in refrigerator for up to one week. 

Thursday, April 7, 2011

Ricotta Bruschetta


I have this list....

It's a list of the dishes I have made and are awaiting their turn in the spotlight. You know...they are waiting their turn to be blogged about.

Yes, my dishes feel as though they are famous when I post about them.

Don't yours???

Either way...

I digress.

Back to the list.

When I don't feel as though I have to post something this. very. instant! I consult the list to see what I am going to share with you next. Basically...who gets their 15 minutes of fame.

Yesterday, I couldn't decide what I wanted to share....so I went to twitter.

I asked the people on twitter if they wanted sweet or savory.

The response I received from Jessica was perfect. She said:

"YES to both. And salty, sweet, savory, spicy, and salty."

Don't you love that response???

Do you think there is possibly a dish on my list that could meet all these criteria?

Well...as soon as I read that, I knew just the thing!

This ricotta bruschetta encompasses all these tastes (though maybe not the spicy, but I'll bet you can get creative and fix that!).

This dish is perfectly well rounded. The tomatoes and mint give it the right amount of sweetness. The ciabatta is drizzled with olive oil, grilled and enlivened by the tangy lemon juice and bold oregano flavors. And the ricotta cheese, perfectly seasoned with salt and pepper, rounds out the brightness of the dish just beautifully.

This dish is truly the most amazing combination of sweet, savory, salty, hearty, fresh and light...all at the same time.

Though the recipe calls for fresh mint, I find that a mixture of fresh mint and basil just adds another layer bursting with flavor.

And what's more...this dish is perfect for Spring!

Not too heavy for an evening appetizer...and not too heavy for an afternoon snack.

Serve this on a warm day with a fresh breeze. As you take your first juicy, crispy bite you will feel the world around you come to life with the promises of Spring beauty.

So what are you waiting for...let's get into the kitchen.


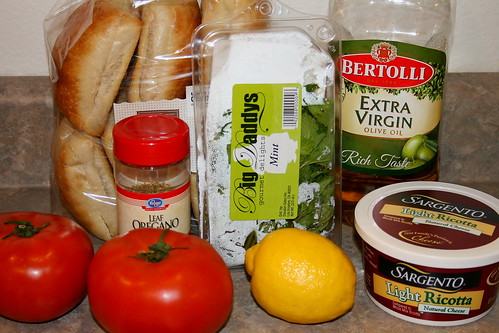
Grab up your ingredients: ciabatta (this is supposed to be a loaf, but when you send The Hubble to the store you get ciabatta rolls. Oh well...it's workable), extra virgin olive oil, skim milk ricotta cheese, fresh mint (and basil, if desired), tomatoes, lemon, dried oregano, salt and black pepper.


Start by preparing the bread. Slice the loaf into 1/2 inch thick slices. Drizzle them with the olive oil.


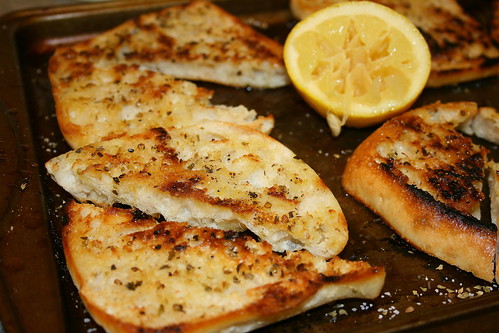
Grab either a grill pan, indoor, gas or charcoal grill and heat it to medium high heat. Grill the ciabatta until golden brown on both sides, about 2-3 minutes per side. Remove from heat and squeeze the lemon juice over  the bread slices. Sprinkle with the dried oregano, salt and pepper.


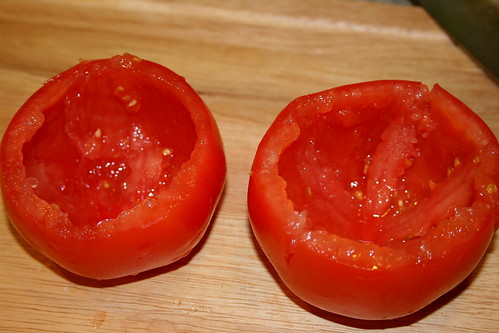
Now for the topping. Core, seed and dice the tomatoes.


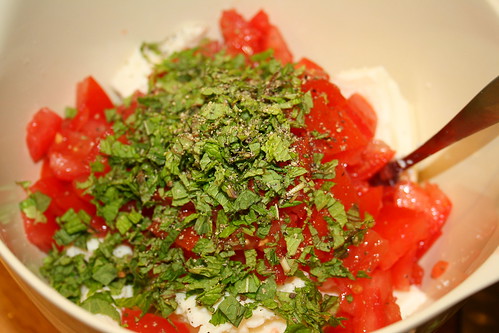
Toss them in a medium bowl with the tomatoes, fresh herbs, salt and pepper.


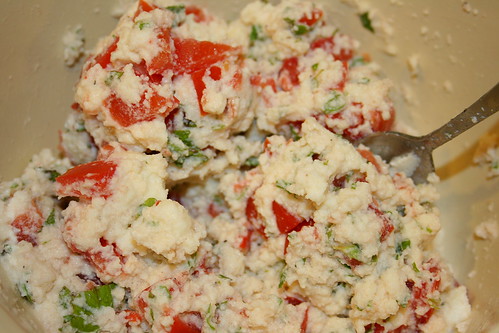
Gently stir it all up until it is well mixed.


Top the bread with a generous helping of the ricotta topping. Serve and enjoy!!

Ricotta Bruschetta
Slightly adapted from The Food Network

Printer Friendly Version

Ingredients:

For the bread

  • 1 pound ciabatta bread loaf, cut into 1/2 inch thick slices
  • 1/4 cup extra virgin olive oil
  • 1 lemon
  • 1 teaspoon dried oregano
  • salt and freshly ground black pepper
For the topping
  • 1 (15 ounce) container skim milk ricotta cheese
  • 2 large tomatoes, seeded and diced
  • 3 Tablespoons finely chopped fresh mint; plus more for garnish (can sub 1 1/2 Tablespoon basil, if desired)
  • 1/2 teaspoon salt
  • 1/4 teaspoon freshly ground black pepper
Directions:

For the bread
  1. Turn a grill of your choice (grill pan, indoor, gas or charcoal grill) onto medium-high heat.
  2. Drizzle the bread slices with olive oil.
  3. Grill the bread until golden on both sides, about 2-3 minutes on each side.
  4. Remove the bread. Squeeze the lemon juice over the bread slices.
  5. Sprinkle the oregano, salt and pepper over the bread slices.
For the topping
  1. In a medium bowl, combine the ricotta, diced tomato, chopped herbs, salt and pepper.
  2. Gently stir to combine well.
  3. Top the bread with a generous amount of the cheese topping and garnish with excess mint.
  4. Serve and enjoy!!

Wednesday, September 29, 2010

Rustic Tomato Tart


I have a confession to make.

Okay....breathe...you can do this...

Here goes....

I love garlic.

There! I said it! And you heard me!

I.

Love.

Garlic.

I can't help myself. I don't care how many dates I may have ruined in the past. And anyway, I done caught my man so I can eat as much garlic as I want to and there's nothing he can do about it. He has to love me anyway.

Phew. I feel so much better that I got that off my chest.

You are probably wondering where all this came from. And if you aren't? I'm going to tell you anyway.

See...I've been trying to play catch up in my Google Reader. I have been so busy this past week that I just didn't have time to read anything. I barely eked out the posts for this blog, let alone my other one.

And let me tell you, when way behind on your friend's posts, it may not be a good idea to add more blogs to your already too long list. But sometimes, I run across a great new find and I have to stick around!

That's what has happened with Baking and Creating with Avril. This blog is new to me and I'm so glad I found it. Especially since I read her recent post about this dish I'm about to share with you. I literally ran out that day to get the finishing ingredients so I could make this meal that very night.

All I needed was the cheese so I'm telling you now...you probably already have most of the ingredients for this dish in your kitchen. It was easy and SO delicious.

I made this on a night that The Hubble had class because his usual response for things like this is "where's the meat??" However, I forgot that the meat was missing from this meal...it was THAT good.

I enjoyed this meal on my own with a glass of merlot and it was heaven.

However, as I said...I love garlic, so I often change the "salt and pepper" to "garlic salt and pepper." Why am I mentioning this now? Because I realized my obsession was a problem when I was making this dish. I realized that almost every time a recipe calls for "salt and pepper" I will change it to "garlic salt and pepper." See what I'm saying? It's a problem. And not everyone may share this love with me...but I don't care. It's GEWD!

Okay. Enough talking. Let's get cooking.


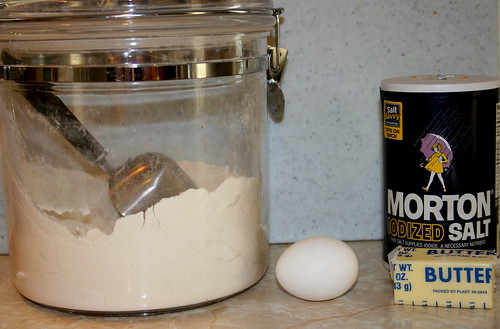
First, we start by making the crust. Grab some flour, salt, butter (cold) and an egg. I actually used salted butter for this but you can do either. I did not find it too salty either. And no...I did not change this one to garlic salt...silly!


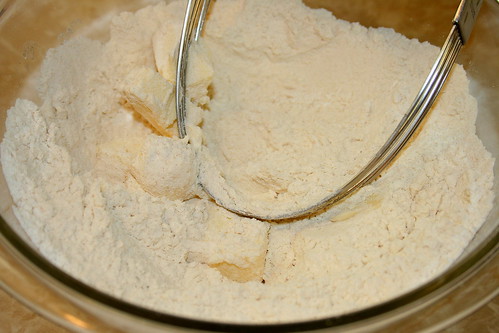
Take a pastry cutter (or two knives) and work the butter and flour together until it resembles a cornmeal type substance.


At this point you are supposed to take a separate bowl and dump in the egg and water, beat it lightly, make a well in the flour and butter mixture, then gently work it all together. Unfortunately, I didn't do that. I cracked the egg into the flour mix then dumped in the water. THEN I read the directions and realized my mistake. So I took the pastry cutter and kind of blended the egg and water in the center of the flour...it was salvaged.


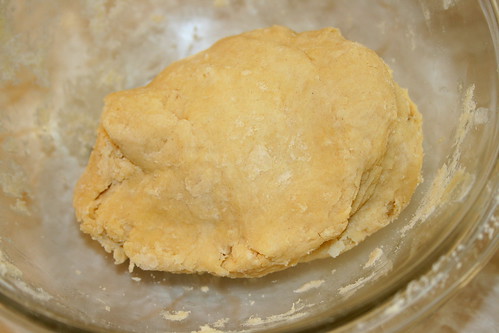
See??? You mix the egg into the flour then I ended up kneading a bit with my hands to make a ball of dough.


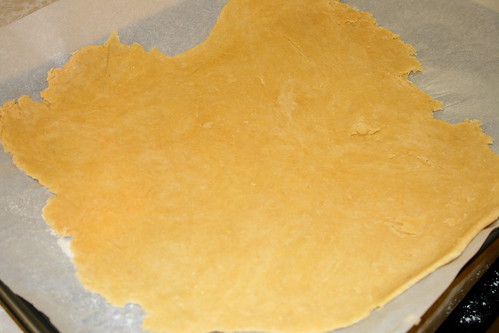
I then rolled the ball into a 14 inch "circle" onto a piece of parchment paper. When the dough was rolled out I transferred the whole thing (parchment and all) onto a baking sheet.


Now for the innards! You will need 2-3 large tomatoes (I used 2 1/2), some olive oil, mozzarella cheese (the good kind), stone ground and dijon mustards (sorry the dijon isn't in the picture), some basil (or other herbs of your choosing), pepper and...you guessed it! Garlic salt!


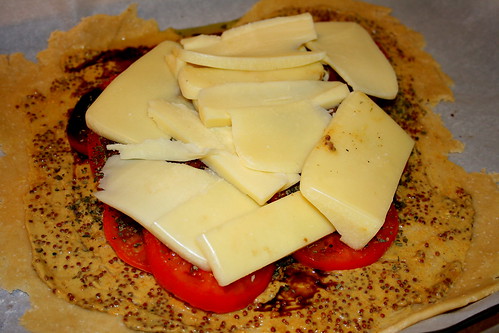
For this part I was planning on just using the stone ground mustard but I found out I didn't have enough. So I made a mix of dijon and stone ground mustard. Spread the mustard onto the unbaked tart shell.


Now slice the tomato and pile it up in the center of the shell.


At this point I decided I wanted to add a little balsamic vinegar because it's SO good with basil and tomato.


So you drizzle a little olive oil and balsamic vinegar over the tomatoes.


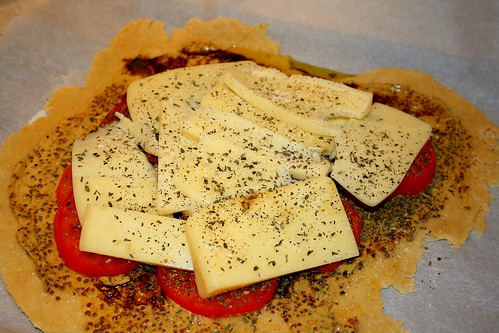
Then sprinkle on some garlic salt, pepper and basil.


Slice up the cheese and place it on top of the tomatoes.


Add a bit more garlic salt, pepper and basil.


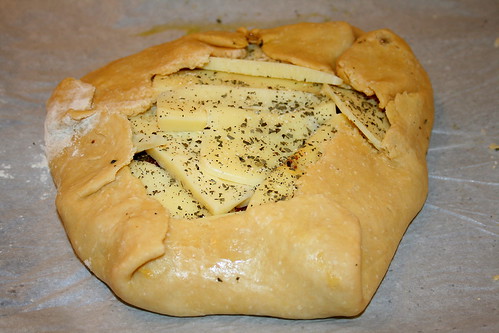
Fold up the edges of the crust over the sides of the tomatoes and cheese. At this point I considered using an egg wash because I was worried about the crust. But, I followed the directions and just left it like this.


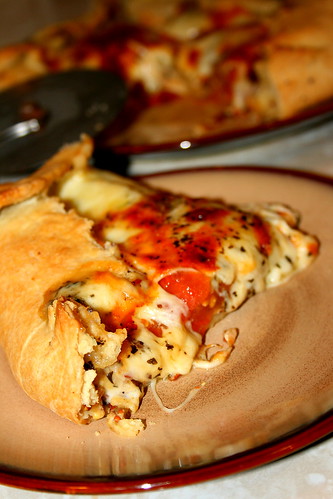
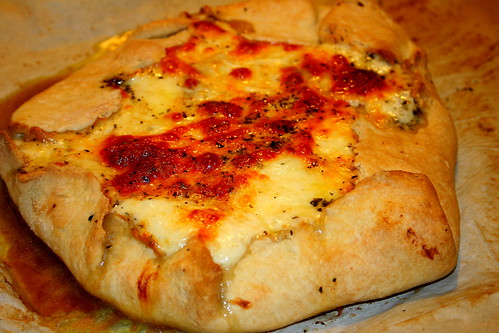
Toss it in the oven for 30 minutes. The crust becomes golden brown and the cheese gets all gooey, brown and bubbly. Oh my!


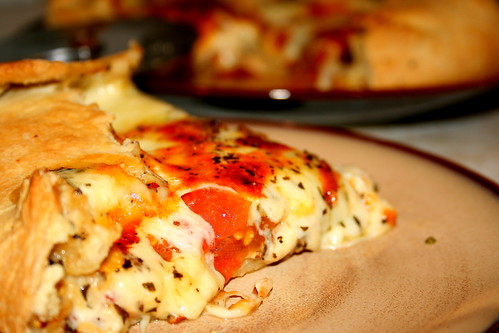
Let it cool for a bit, then slice it with a pizza cutter. Serve and enjoy!

Please, please, please go out and get the stuff to make this tonight. I promise you will hear the angels sing upon your first bite and you will find yourself exclaiming "who needs meat!!!". I know I did! Yum!

Linked with:


Rustic Tomato Tart
Slightly adapted from Baking and Creating with Avril

Printer Friendly Version

Ingredients:

For the crust:

  • 1 1/2 cups all purpose flour
  • 4 Tablespoons chilled butter, cut into cubes
  • 1/2 teaspoon salt
  • 1 large egg
  • 2-3 Tablespoons cold water
For the Filling:
  • 3 Tablespoons stone ground or dijon mustard (use a mix of both if desired)
  • 2-3 large fresh tomatoes
  • 2 Tablespoons Extra Virgin Olive Oil
  • 2 Tablespoons Balsamic Vinegar
  • 2 teaspoons dried basil
  • 8 ounces good quality mozzarella cheese
  • garlic salt and pepper (to taste)
Directions:
  1. Preheat oven to 425 degrees F.
For crust:
  1. Mix salt and flour in medium bowl. With pastry cutter (or using two knives) cut in chilled butter until mixture has a cornmeal consistency.
  2. In separate bowl, lightly beat egg; add 2 Tablespoons water.
  3. Make a well in center of flour mixture and pour egg mixture in the well; mix until well incorporated and a non-sticky dough forms. (During this process, if dough is still too dry, add third Tablespoon of water).
  4. Knead dough into a ball, transfer to parchment paper; roll out into a 14 inch circle. Transfer parchment paper and dough to a baking sheet.
For Filling:
  1. Spread mustard over the unbaked crust until well covered.
  2. Slice tomato and arrange in center of crust circle.
  3. Drizzle tomatoes with olive oil and balsamic vinegar; sprinkle with garlic salt, pepper and basil.
  4. Top with sliced mozzarella; sprinkle with a bit more garlic salt, pepper and basil.
  5. Bring edges of crust up over the edges of tomato and cheese.
  6. Bake in oven for 30 minutes until crust is golden brown and cheese is brown and bubbly.
  7. Allow to cool about 10 minutes, slice with pizza cutter.
  8. Serve and enjoy!
Related Posts with Thumbnails