Showing posts with label baking challenge. Show all posts

Sunday, January 26, 2014

Maple Pecan Pound Cake


Happy New Year! I know the first month of the new year is almost over but I haven't yet acknowledged that we are in 2014. Shouldn't we all have flying cars by now?? No? Hmmm...

Well, the new semester has started for me. I've been in school for 3 weeks now and I'm having trouble finding my motivation. What better way to procrastinate than to talk about cake?!?!?


This cake is the January pick for the Cake Slice Bakers. I ended up making this cake twice. The original recipe is for an old fashioned pound cake and the author, Carole Walter, suggests different options for changing the cake up. The first time I made the cake I went with the "nutty pound cake" option which calls for nuts and a hot liquor-based syrup to be poured over the warm cake. Sounds good right?? Unfortunately, I found the texture to be all wrong. The syrup didn't seep all the way to the bottom of the cake making some parts soggy and others dry. I was really disappointed.


But I refused to give up! I was talking with a friend and she sent me pictures of her husband and his family making pure cane syrup. That gave me an idea! Instead of the milk the original recipe called for, I decided to substitute maple syrup and add some pecans (because maple and pecan just goes together, duh!). Boy am I glad that I tried this cake again! It was fluffy, flavorful, and delicious! 


I'm used to pound cakes being super dense but this one wasn't. It was crumbly and soft. Sadly, my pictures aren't great. I ended up taking the cake to a friend's house for a party and had to snatch up a piece and take some quick pictures before the cake was devoured. 

All in all, I am very happy with how my second rendition of this cake turned out. I suggest making it! I wish I still had some. I would heat up a slice and slab a little butter on that bad boy. Mmmmmm....

Okay. Back to work! And don't forget to jump to the bottom of this post to see how the other Cake Slice Bakers fared with this cake!


Maple Pecan Pound Cake
recipe adapted from Great Cakes via Baking and Creating with Avril


Ingredients:

2 1/4 cups sifted cake flour
1 tsp baking powder
1/4 tsp salt
1 cup (2 sticks) unsalted butter, room temperature
1 cup granulated sugar
4 large eggs
2 tsp vanilla extract
1/4 cup pure maple syrup
3/4 cup chopped pecans

Directions:

1. Preheat oven to 325 degrees F. Spray loaf pan (9x5) with baking spray and set aside.

2. Sift together cake flour, baking powder and salt in a medium bowl.  Set aside flour mixture.

3. Cream together butter and sugar in the bowl of an electric mixer, on medium speed, until light and fluffy, about 6-8 minutes.

4. Add the eggs, 1 at a time at 1-minute intervals.  Add in vanilla and blend well. At this point the batter may appear curdled.  Not to worry as the addition of the dry ingredients will remedy this.

5. On low speed add in 1/3 of the flour mixture followed by 1/2 the maple syrup.  Then again another 1/3 of the flour and the remaining maple syrup, ending with the last of the flour. Mix only until incorporated after each addition.  Scrap the sides of bowl to make sure all ingredients have been included.

6. Gently fold in chopped pecans until blended.

7. Pour batter into prepared pan, smoothing the top with the back of a spoon. Bake in middle of the oven centered on the rack for 60-70 minutes.  If cake appears to be getting dark too fast cover lightly with tin foil. Cake will be done with toothpick inserted into middle comes out clean.

8. Cool cake in pan for 10-15 minutes before inverting onto a platter to serve. Enjoy!!

post signature

Saturday, December 28, 2013

Streusel Squares


I was supposed to post this cake 8 days ago. What's funny is that I made this cake a month ago but I'm barely posting it today. I had fully intended to get this posted on time. Obviously that didn't happen. Best laid plans and all that. 


I don't have much of an excuse for the delay. I could say it was because I was finishing up my first semester of grad school. But that finished on the 6th of this month. I'm happy to say my first semester was a great success! I received 3 A+, 2 A's, and 1 A-. I think not too shabby for someone who hasn't been in a traditional classroom setting for 11 years, had an 8 hour internship, 10 hours of Graduate Assistantship work, 2 small kids, and no husband or family in town. I'm happy with my results! However, that means I've been lazy since school got out for winter break.


I did read a book though! For fun! Donna Tartt's Golfinch was a healthy undertaking at 771 pages but I finished it yesterday and the beauty of the novel did not disappoint. Unfortunately, I need to get back to the reality of Grad school around the 1st so I can start prepping for the new semester. Spring will consist of 4 courses, 20 hours of internship, and 10 hours of Graduate Assistantship work. But this time The Hubble will be home to help. 


But that's enough about me and my school shenanigans. Now for the cake! I made this cake for The Cake Slice Bakers group. This streusel cake is MY first cake from our new book. I skipped November. The group voted and chose the book Great Cakes by Carole Walters. I wasn't thrilled with the selection for November nor did I have any time whatsoever to go get the ingredients so I skipped the first cake. However, I'm glad I jumped in for December's cake. This streusel cake was delicious! It was light and flaky with a topping to kill for! I took the cake to class (since I made it so long ago) and it was devoured within an hour. The next time I make the cake, I would add nuts (probably pecans) to the topping; I love texture. But other than that I thought the cake was perfect! 


Since I'm WAY late posting this cake, the linky tool thing to the other Cake Slice Bakers is closed but you should still try to pop over to the blogroll and see what everyone else thought of the cake. And don't forget to make the cake yourself so you can form your own opinion too! Enjoy!

Streusel Squares
Recipe from Great Cakes by Carole Waltervia Lick the Bowl Good


Ingredients:


Streusel Topping:
  • ⅓ cup (⅔ stick) unsalted butter
  • 1¼ cups unsifted all-purpose flour
  • ⅔ cup sugar
  • 1 teaspoon ground cinnamon
Cake:
  • 2¼ cups unsifted all-purpose flour
  • 2 teaspoons baking powder
  • ½ teaspoon salt
  • ¾ cup (1½ sticks) unsalted butter
  • 1 cup superfine sugar
  • 2 large eggs
  • 1 large egg yolk
  • 1½ teaspoons vanilla extract
  • 1 cup milk 
  • 1 large egg white

Directions:

Position a rack in the lower third of the oven and preheat to 350⁰F. Butter a 9 x 13 x 2” pan.
To Make The Streusel Topping: Melt the butter, then cool slightly.

Add the flour, sugar and cinnamon all at once and stir with a fork until the mixture forms small crumbs. Take a handful of the crumbs and make a fist to press the mixture into a large clump, and then separate into smaller clusters, at least two or three times the size of the original crumbs.

Repeat until all of the crumbs have been reshaped, then set aside.

To Make The Cake: Sift together the flour, baking powder and salt, set aside.

Cut the butter into 1-inch pieces and place in the large bowl of an electric mixer fitted with the paddle attachment to soften on low speed. Increase speed to medium-high and cream until smooth and light in color, about 1½ to 2 minutes.

Add the sugar, 1 tablespoon at a time, taking about 6 to 8 minutes to blend it in well, scraping the sides of the bowl as necessary.

Add the eggs and additional yolk, 1 at a time at 1-minute intervals, scraping the sides of the bowl as necessary.Blend in the vanilla.

Reduce mixer speed to low and add the dry ingredients alternately with the milk, dividing the flour mixture into three parts and the milk into two parts, starting and ending with the flour. Mix just until incorporated after each addition, scraping the sides of the bowl and mix for 10 seconds longer.

Spoon the batter into the prepared pan and smooth the surface with the back of a tablespoon.

Beat the egg white lightly with a fork, and using a pastry brush, spread about half of the beaten egg white over the top of the cake batter. Discard the remainder - the egg white helps the streusel adhere to the top of the cake.

Sprinkle the entire surface of the batter generously with the streusel, gently patting the crumbs into the batter with the palm of your hand; do not press hard.

Center the pan on the rack and bake for 40 to 45 minutes, or until the cake is golden brown on top, begins to come away from the sides of the pan, and the streusel is crisp. A toothpick inserted into the center should come out dry.

Remove the cake from the oven and set on a cake rack to cool. When ready to serve, dust the top with powdered sugar and cut into squares.

Can be stored at room temperature for up to 5 days.


post signature

Sunday, October 20, 2013

Kentucky Bourbon Cake


Yesterday, I was sitting in my Policy class thinking about how much I would have loved to have a glass of wine or a beer in my hand. The topic of discussion yesterday was substance abuse. We talked a lot about different forms of substance abuse, but since we had taken a midterm the day before and had several large projects due this week all we could think about was Happy Hour. 

I had already made this Kentucky Bourbon cake and taken it in a couple weeks ago. But it sure would have gone with the topic of discussion quite well.


I made this cake for the Cake Slice Bakers group. Every October is bakers' choice since October marks the end of the baking year for that year's book.

As I was looking through the book and wondering if I should make one of the cakes that I've missed or try a new one, I ran across the Kentucky Bourbon cake and immediately closed the book. I had found my cake

I am so glad I chose this cake! It was simple to make and amazingly delicious! The glaze poured onto the bottom of the hot cake seeps into the crumb making it moist and flavorful. Then pouring the remaining glaze over the top of the cake creates a glaze doughnut type texture. This cake was definitely a winner! And I didn't hear any complaints from my fellow students or professors.


So this past week was midterm week. I can't believe that I'm already halfway through my first semester of Grad school. It's so crazy! Unfortunately, I had a mid-term breakdown on Thursday evening. I've heard that a number of us had the same kind of breakdown. Fortunately, I have a couple Godiva truffle flights so I ate my feelings that night. That's what a good foodie does right? But, I made it through that and now it's time to pick myself back up and keep going. Yes, it's stressful. Yes, it's hard. But the best things in life don't come easy.

My internship is also going really well. I'm sad that I'm only on the unit for 8 hours a week. I wish I was there every day. But I guess getting the education is kind of important. So I'll keep going to class and appreciate the time I have at my internship while I'm there. And make the most of it. 


How are things going in your life? Do you have anything new happening? Are you planning on making this cake? Because you absolutely should. You won't regret it! I really wish I had a piece of it right now. Yum! If you are feeling brave, take a few minutes to check out the other Cake Slice Bakers October cakes. You can find the links to their blogs at the bottom of this post! 


Kentucky Bourbon Cake
Adapted from Vintage Cakes


Ingredients:

Cake:
  • 3 cups sifted cake flour
  • 1 teaspoon baking powder
  • 1/2 teaspoon baking soda
  • 1 teaspoon salt
  • 1 cup unsalted butter, room temperature
  • 1 1/2 cups granulated sugar
  • 1/2 cup firmly packed brown sugar
  • 4 large eggs, room temperatures
  • 1/4 cup bourbon
  • 1 cup buttermilk, room temperature
Glaze:
  • 6 Tablespoons unsalted butter
  • 3/4 cup granulated sugar
  • 1/4 cup bourbon
Directions:
  1. Position rack in center of oven and preheat oven to 350 degrees F.
  2. Sift together flour, baking powder, baking soda, and salt in a medium mixing bowl and whisk until well blended.
  3. In the bowl of a stand mixer, fitted with the paddle attachment, cream butter and sugars on medium-high speed until fluffy, about 5 minutes.
  4. Blend in eggs, one at a time, scraping down the sides of the bowl after each addition.
  5. In a small bowl, combine bourbon and buttermilk.
  6. With the mixer on low speed, add the flour mixture in three parts, alternating with the buttermilk mixture in two parts, beginning and ending with the flour mixture. After each addition, mix until just barely blended and stop to scrape down sides of bowl. Stop mixer before the last of the flour has been incorporated and blend it in by hand with a rubber spatula.
  7. Spread the batter evenly into a prepared bundt or fluted metal tube pan.
  8. Place pan in oven and bake until golden and the cake springs back when lightly touched, about 40 to 45 minutes.
  9. To make the glaze: In a small saucepan, over low heat, combine the butter, sugar, and bourbon and heat just until the butter melts and the sugar dissolves, whisking to combine.
  10. Remove cake from oven and, while leaving it in the pan, immediately poke holes all over the cake with a wooden skewer or toothpick. Pour 3/4 of the glaze slowly over the cake, set aside remaining glaze.
  11. Allow cake to cool in pan for 30 minutes then flip it out onto a serving plate so glazed side is on the bottom.
  12. Brush or drizzle the remaining glaze over the top of the cake (if glaze has thickened, rewarm it over low heat.
  13. Slice, serve, and enjoy!

post signature

Wednesday, June 20, 2012

Brooklyn Blackout Cake


Life.

Life is messy.

It is hard.

But it's the messy and hard things that get us where we need to be.

Nothing that is worth having comes easily right??

My life feels a bit of a mess lately. The Hubble was home for a couple weeks but now he's gone again. We won't see him for another 5 months (hopefully).

Currently, the kids and I are struggling to get back into our groove. Little Butt has been a bit wild and Baby N has been a bit whiny. To me, it feels like it's been weeks since he left instead of days. Has it only been days? Or has it been weeks? Who even knows anymore?

You want to know what else is messy? Baking.

Or at least, baking this cake was messy.

This cake and I?? We have this love hate thing going on.

I hate this cake because it is messy...and hard and ridiculous. I had to bake the cakes twice because the centers on the first batch sank so low there was no way to make layers. I dropped chocolate all over the floor when I was making the pudding. When I assembled the cake, it was slipping and sliding all over the place because the pudding center is soft instead of firm.

I love this cake because it's messy...and rich and forgiving. Yes, I made the cakes twice, but that meant I had sunken cakes to cut up and make into a trifle for Father's Day. Yes, I dropped chocolate all over the floor, but it was easy to clean up and the pudding didn't suffer for it. Yes, it was slipping and sliding all over the place and when I frosted it the pudding mixed with the frosting in some parts, but I didn't have to worry about the pudding showing or a crumb coat because you cover the whole thing in crumbs anyway!

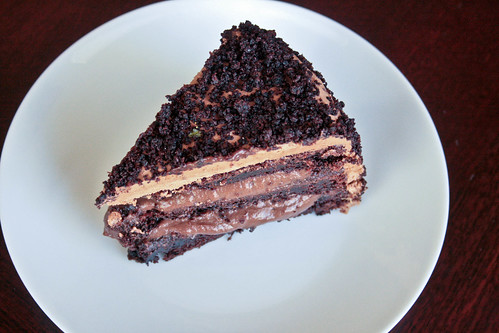
This cake was the top pick for June for The Cake Slice Bakers. It is a 3 layer cake with a chocolate pudding filling and chocolate frosting smothered in chocolate cake crumbs. The cake itself is dense and fudgy, almost like a brownie. The pudding filling was smooth and creamy. The chocolate frosting was fluffy and rich. The whole thing was a chocolate lover's dream (though I was asked where the chocolate syrup was, the syrup made it onto the Dad's Day trifle).

Personally, I thought it was too rich and only had a bite or two. I don't believe my opinion should count though since I don't really care for chocolate. Give me lemon or pumpkin over chocolate any day and I'll be happy.

However, I didn't really make this cake for me. My nephew recently turned 17 and he asked for something chocolaty and fudgy. So, I obliged. And I didn't hear any complaints from the many chocolate lovers in my family (I've always been the odd ball in my family so there are a lot of them).

If you are looking for a rich, delicious, messy, forgiving cake to enjoy and share with the chocolate lover in your life look no further. I have the recipe you need!

Let's bake!


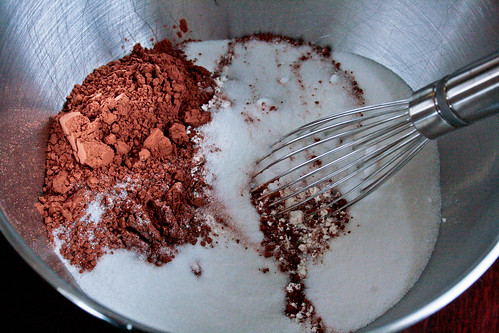
In the bowl of an electric mixer, whisk together the cocoa powder, flour, sugar, baking powder, baking soda, and salt until well blended.


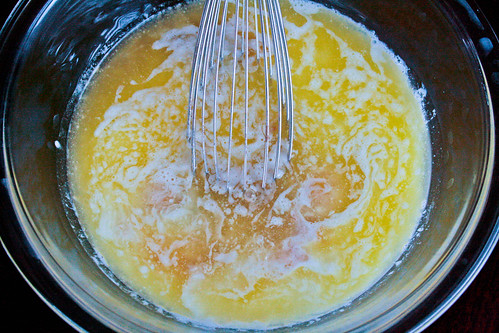
In a separate bowl, whisk together the eggs, egg yolk, buttermilk, melted butter, and vanilla.


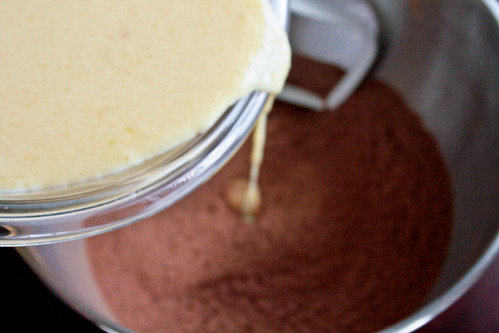
With the mixer on low speed, add the egg mixture to the dry ingredients in a steady stream.


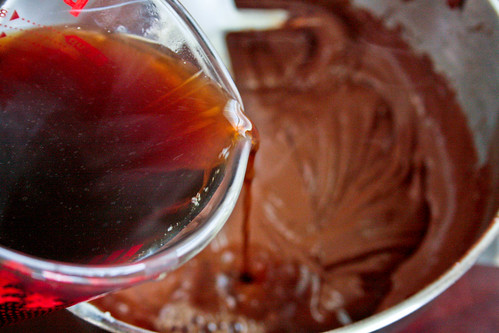
Then mix in the hot coffee until just blended.


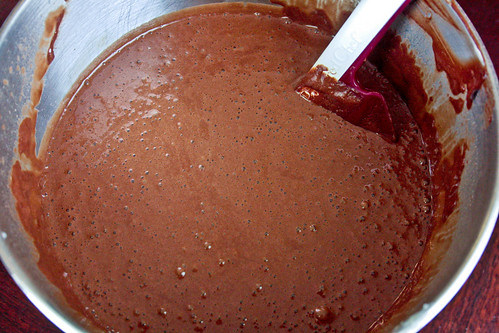
Using a rubber spatula, stir the mixture up from the bottom to make sure it's thoroughly combined.


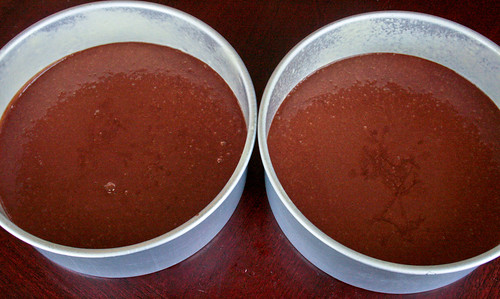
Evenly distribute among your 2 prepared pans and bake them up. Then cool them down.


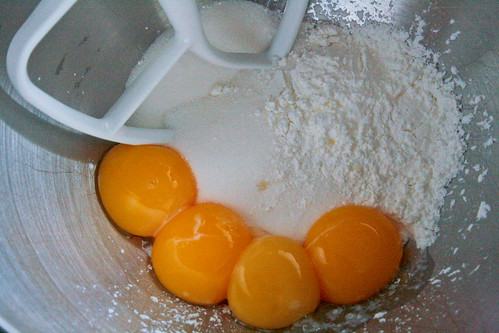
Now we move on to the pudding filling. Beat together the egg yolks, sugar, cornstarch, and salt.


In a medium saucepan, combine the water and cream then bring to a boil.


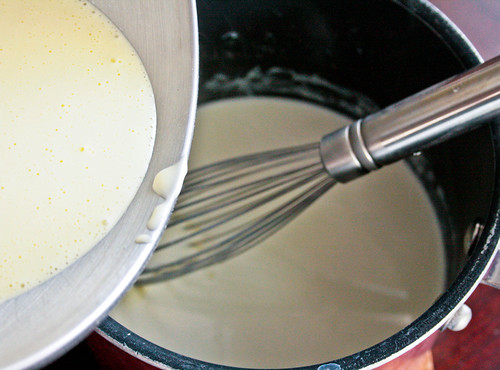
Whisk half the cream mixture into the yolk mixture...


Then turn around and whisk that all back into the saucepan. Whisk constantly and bring the whole thing back to a boil and whisk and boil for 1 minute.


Remove from heat and whisk in the chocolate until fully melted.


And of course, stop to take a picture of the huge mess you made while dumping the chocolate all over the floor and table.


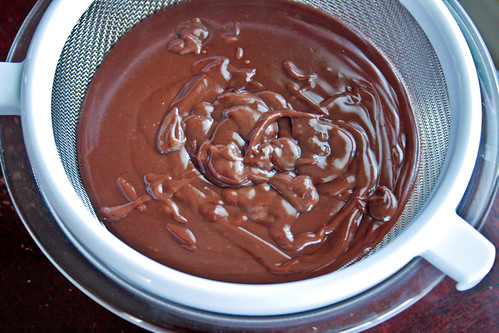
Pour the mixture through a fine mesh sieve into a small bowl. Then stir in the vanilla.


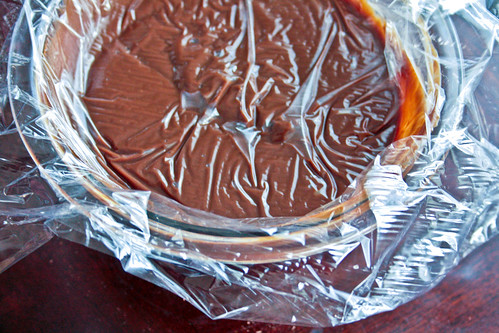
Cover the surface of the pudding with plastic wrap and refrigerate for 2 hours to overnight. You want this to be thoroughly chilled.


And finally, the frosting.

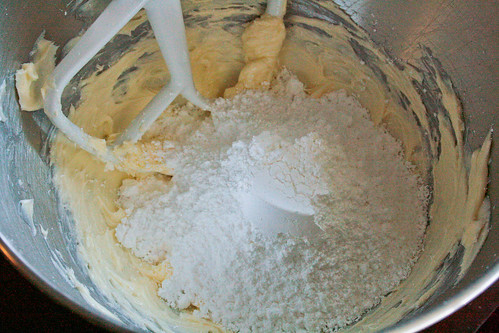
Melt some chocolate then cream your butter and add in the powdered sugar. Beat that up until light and fluffy...


Then beat in the vanilla and chocolate. Viola!

Now to assemble the cake. Cut the 2 cakes horizontally to make 4 cake layers. Set one layer aside.

Place one cake layer on a serving platter, cut side up. Top with half the chilled pudding mixture. Add a cake layer then spread remaining pudding on that layer. Top with the third layer and frost that 3 layer cake with the frosting.


Place half of the fourth cake layer (eat the other half) into a food processor and process until you have cake crumbs. Press the cake crumbs into the sides and top of the cake.


I made this cake for my nephew's 17th birthday. I mean, what's messier than a 17 year old boy anyway?? LOL! He loved that it was chocolate cake with chocolate pudding with chocolate frosting with chocolate cake crumbs. The only thing missing was the chocolate syrup!


Slice, serve, and enjoy!!


Brooklyn Blackout Cake
Adapted from The Cake Book

Printer Friendly Version

Ingredients:

For the Cake

  • 1 1/2 cups unbleached all purpose flour
  • 1 cup natural unsweetened cocoa powder
  • 1 1/2 teaspoons baking powder
  • 1 1/2 teaspoons baking soda
  • 1 teaspoon salt
  • 2 cups sugar
  • 2 large eggs
  • 1 large egg yolk
  • 1 cup low fat buttermilk
  • 1/2 cup (1 stick) unsalted butter, melted
  • 2 teaspoons pure vanilla extract
  • 1 cup hot brewed coffee
For the Pudding Filling
  • 4 large egg yolks
  • 2/3 cup sugar
  • 2 Tablespoons plus 1/2 teaspoon cornstarch
  • 1/8 teaspoon salt
  • 1 cup water
  • 2/3 cup heavy cream
  • 3 ounces bittersweet or semi sweet chocolate, finely chopped
  • 1 teaspoon pure vanilla extract
For the Frosting
  • 4 ounces unsweetened or semi sweet chocolate, coarsely chopped
  • 11 Tablespoons unsalted butter, softened
  • 1 2/3 cups powdered sugar
  • 2 teaspoons pure vanilla extract
Directions:
  1. MAKE THE CAKE: Position rack to the center of the oven. Preheat to 350 degrees F. Spray two 9-inch round baking pans with baking spray.
  2. In the bowl of an electric mixer, whisk together the flour, cocoa powder, baking powder, baking soda, salt and sugar until blended.
  3. In a medium mixing bowl, whisk together the eggs, egg yolk, buttermilk, butter, and vanilla.
  4. With the mixer on low speed, add the egg mixture to the dry ingredients in a slow, steady stream.
  5. Scrape the sides of the bowl with a rubber spatula then mix on medium speed until well blended, about 1 minute.
  6. Add the hot coffee and mix until just blended.
  7. Remove the bowl from the mixer stand and, using a rubber spatula, stir the batter up from the bottom of the bowl a few times to thoroughly blend. (The batter will be quite runny by now).
  8. Evenly distribute the batter into the cake pans and smooth tops if needed.
  9. Bake the cakes for 30 to 35 minutes, or until a tester inserted into the center of the cakes comes out clean.
  10. Cool cakes in the pans for 10 minutes then invert onto wire racks to cool completely.
  11. MAKE THE PUDDING FILLING: In the clean bowl of an electric mixer, using the paddle attachment, on medium speed, beat the egg yolks, sugar, cornstarch, and salt until pale, about 1 minute.
  12. In a medium saucepan, over medium heat, combine the water and cream, bring to a boil.
  13. Remove pan from heat and whisk about half the mixture into the yolk mixture then whisk the yolk and cream mixture back into the saucepan and the remaining cream mixture.
  14. Whisking constantly, cook over medium heat until mixture reaches a boil. Continue to whisk constantly and boil for 1 minute. 
  15. Remove from heat and whisk in chocolate until completely melted. 
  16. Pass the mixture through a fine mesh sieve into a small bowl then stir in the vanilla extract.
  17. Cover with plastic wrap making sure the surface of the pudding mixture is well covered. 
  18. Refrigerate at least 2 hours or up to overnight.
  19. MAKE THE FROSTING: Place the chocolate in a heat proof bowl. Microwave chocolate, stopping to stir every 10-15 seconds, until fully melted. Set aside.
  20. In the bowl of an electric mixer, using the paddle attachment, on medium speed, cream the butter about 1 minute.
  21. With the mixer on low, add the powdered sugar until just blended, increase speed to medium-high and beat for 2 minutes, scraping down sides of bowl as necessary.
  22. Beat in the vanilla and chocolate until well blended and creamy, about 1 minute more.
  23. ASSEMBLE THE CAKE: Using a long, serrated knife, cut each cake in half horizontally to make 4 layers. Set one layer aside.
  24. Place one cake layer, cut side up, on a serving plate. Stir the chilled filling until smooth then spread half of the filling over the cake layer.
  25. Top with another cake layer and spread the remaining filling over it. Top that with the final cake layer, smooth side up.
  26. Take the fourth cake layer and break it in half. Place half of this layer into a food processor and process until it becomes crumbs (go ahead and eat the other half of that layer, you know you want to).
  27. Using a small, offset metal spatula, frost the top and sides of the cake with frosting.
  28. Pat a generous amount of cake crumbs along the side of the cake, pressing the crumbs lightly into the frosting. Then sprinkle and pat the crumbs onto the top of the cake.
  29. Slice, serve, and enjoy! 

Monday, February 20, 2012

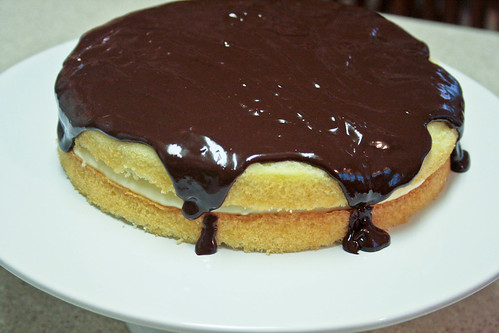
Boston Cream Pie


Who thinks we've had enough healthy stuff around here??

Me too!!

It's time for some cake!

I know the title says pie...but apparently Boston Cream Pie is actually a cake.

The only Boston Cream Pie I've ever seen was my mom's donuts. LOL!

Seriously, my mom love Boston Cream donuts and that's all I've ever known...until now.

The Cake Slice Bakers voted this as the cake for February.

It seems like a lot. There are 3 components to this cake. But they are all pretty straight forward and not too difficult.

The cake itself was a bit on the dry side for my taste, but it was a darn good cake nonetheless. And my mom thoroughly enjoyed it!

Let's get baking!


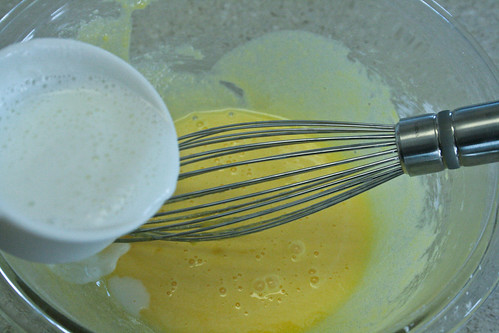
Let's start with the custard filling. Whisk sugar, cornstarch, and egg yolks together.


Add in some of the warm milk.


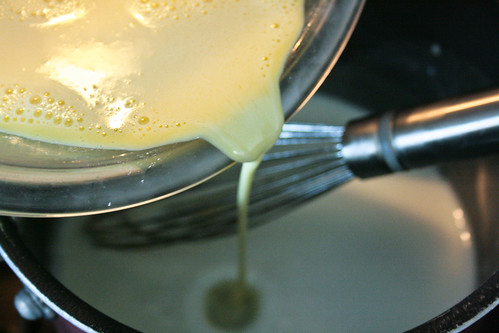
Pour the egg mixture back into the pan. Whisk and cook until thickened.


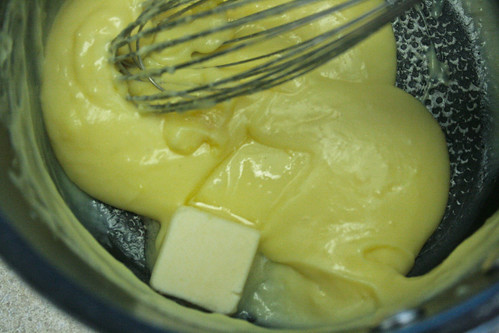
Remove from heat and whisk in butter.


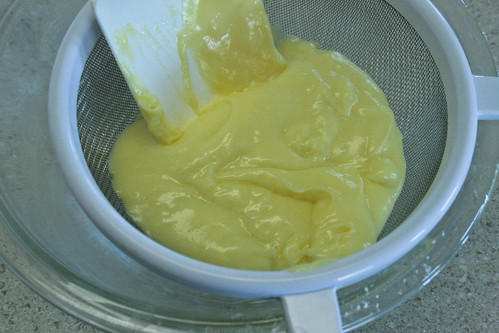
Strain the mixture through a fine mesh sieve.


Stir in some vanilla.


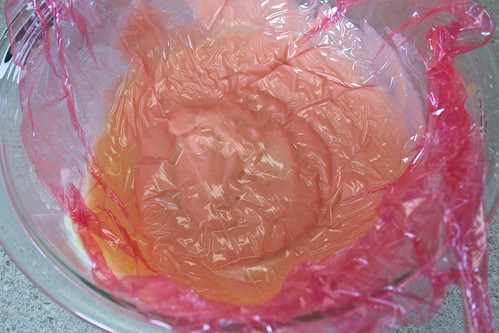
Cover in plastic wrap and chill. Do you love my red plastic wrap???


Now let's make the cake. Whisk together some cake flour, salt, and baking powder.


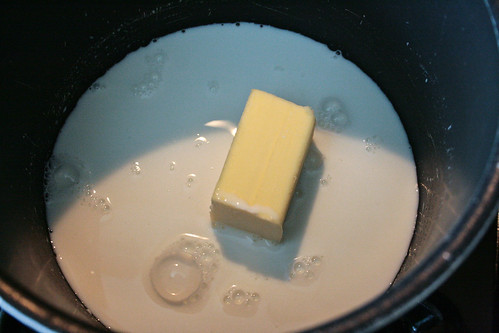
Heat up some milk and butter.


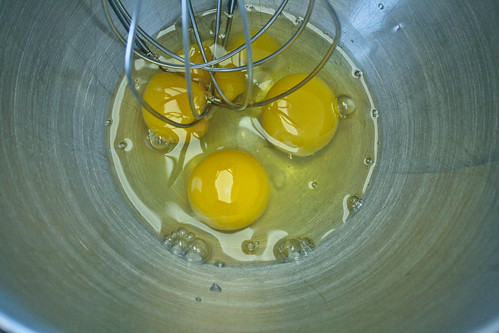
Whisk up some eggs.


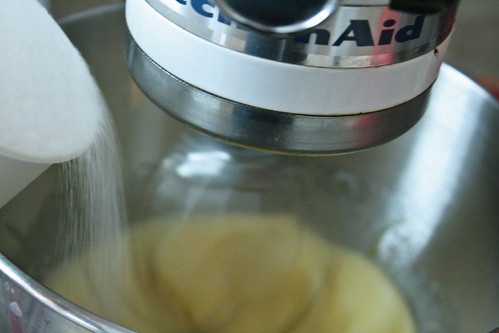
Gradually add some sugar...


And some vanilla. Keep whisking until tripled in volume and mixture becomes pale.


In 3 additions, gently fold in the flour mixture.


Reheat the milk then add it all at once to the batter.


Pour the batter into your prepared pan and bake.

Go ahead and make the glaze while the cake is cooling. Heat some cream, add the chocolate until melted and smooth, add the vanilla, cover, and cool.


Now let's put the cake together. Whisk together the chilled custard and heavy cream.

Slice the cake into 2 even layers. Fill with the custard and top with the glaze.


Serve and enjoy!!

Boston Cream Pie
Adapted from The Cake Book

Printer Friendly Version

Ingredients:

For the Vanilla Custard Filling

  • 3 large egg yolks
  • 1/4 cup granulated sugar
  • 2 Tablespoons cornstarch
  • 1 cup whole milk
  • 1 Tablespoon unsalted butter
  • 1 teaspoon pure vanilla extract
  • 1/4 cup heavy cream

For the Hot Milk Sponge Cake
  • 1 1/3 cup cake flour
  • 1 1/4 teaspoons baking powder
  • 1/4 teaspoon salt
  • 1/2 cup whole milk
  • 4 Tablespoons unsalted butter
  • 3 large eggs, at room temperature
  • 3/4 cup granulated sugar
  • 1 teaspoon pure vanilla extract

For the Chocolate Glaze
  • 3 ounces semi-sweet chocolate, coarsely chopped
  • 1/3 cup heavy cream
  • 1/2 teaspoon pure vanilla extract
Directions:

For the Vanilla Cream Custard
  1. In a medium bowl, whisk together the egg yolks, cornstarch, and sugar until well combined and smooth. Set aside.
  2. In a medium saucepan, bring the milk to a gentle boil. 
  3. Remove milk from the heat and whisk about 1/3 cup of hot milk into the yolk mixture. Whisk entire mixture back into the saucepan.
  4. Whisking constantly, place mixture over medium high heat and bring to a boil. Continue to boil and whisk continuously for 1 minute. 
  5. Remove from heat and whisk butter into mixture until melted. 
  6. Immediately strain custard through a fine mesh sieve into a medium mixing bowl.
  7. Whisk in vanilla extract.
  8. Cover with plastic wrap allowing the plastic to touch the surface of the custard. Let cool to room temperature then refrigerate for 2 hours, or until well chilled.
For the Hot Milk Sponge Cake
  1. Preheat oven to 350 degrees F. Spray a 9 inch round cake pan with baking spray.
  2. In a medium mixing bowl, whisk together the cake flour, baking powder, and salt. Set aside.
  3. In a small saucepan, over medium heat, cook milk and butter just until butter is melted. Remove from heat and set aside.
  4. In the bowl of an electric mixer, using the whisk attachment, whisk eggs at high speed until blended, about 1 minute.
  5. Gradually add sugar and vanilla extract. Continue to beat on high until pale and tripled in volume, about 6 minutes.
  6. Gently fold 1/3 of the flour mixture into the egg mixture. In 2 more additions, repeat with the remaining flour mixture.
  7. Reheat milk mixture until just under a boil. Add it all at once to the egg mixture and gently fold it in,
  8. Pour batter into prepared pan.
  9. Bake until the cake springs back when lightly touched and a toothpick inserted in the center comes out clean; about 20-25 minutes.
  10. Cool in the pan about 10 minutes then invert onto a wire rack and allow to cool completely.
For the Chocolate Glaze
  1. In a small saucepan, bring cream to a boil.
  2. Remove from heat and add chocolate to the pan. Stir until chocolate is completely melted and mixture is smooth.
  3. Stir in vanilla.
  4. Transfer glaze to a small mixing bowl and cover with plastic wrap, with the wrap touching the top of the glaze. 
  5. Let cool for about 10 minutes.
To Assemble the Cake
  1. Using a long serrated knife, cut the cake into 2 even layers.
  2. Place custard filling into the bowl of an electric mixer. Add the 1/4 cup heavy cream and whisk at high speed until mixture is light and soft peak forms, about 1 minute.
  3. Reserve smooth bottom portion of the cake for the top. Place the other layer of the cake, cut side up, on a platter. Spread custard filling over this cake layer. Top with remaining cake layer.
  4. Pour warm glaze over the top of the cake, allowing the glaze to flow over the edges of the cake. 
  5. Serve immediately or refrigerate.
  6. Enjoy!!
Related Posts with Thumbnails