Wednesday, July 27, 2011

Apricot Fried Pies


Before I get started talking about this treat, I want to apologize to you, my dear readers.

Things are going to be a bit more quiet around here.

I've decided that since I'm ready to pop here in a couple weeks, that I need to step back a bit from being in the kitchen.

Therefore, I'm going to go down to posting once a week for a while.

I'm just so tired that I've been having trouble keeping up with the baking/cooking schedule I had set for myself in order to post new recipes for you all twice a week.

I hope you all understand and stick with me through this!

Can I bribe you with baby pictures when he comes?? LOL!

Anywhoooo.

Let's talk food!

Apricots.

I love apricots.

I think this is definitely one of those underrated fruits.

Unfortunately, they are only around for a short time during the summer. But I'm willing to jump on them when they are around!

Apricots mean summer to me.

They mean spending time at my grandma's house.

Playing in the huge dog house out back.

Playing in the shed when my grandparents left it open.

Playing catch in the huge field across the street.

Lying in front of the air conditioner unit in the dining room.

Open windows, cool night breezes and nothing but the sound of chirping crickets as we lay beneath a single bed sheet.

Ice cream before bed every night.

And fruit.

Endless fruit. Fresh from my grandma's garden.

We would eat cantaloupe and green apples with salt. Yes, salt on both.

Tomatoes. Picked ripe off the vine.

Strawberry jam.

Homemade apple butter.

And apricots.

Mine and my mother's favorite thing my grandma did with apricots were to make these individual apricot friend pies.

They were amazing!

Sadly, when my grandma died, most of her recipes died with her.

But I've been trying to replicate these pies.

The problem is that my grandma died when I was young, so I don't have much to go on.

I made these pies this past weekend for my mom. She said they were delicious, but they weren't her moms.

That's okay. My mom ate half of them by herself anyway (I made her share the rest).

Though these aren't my grandma's fried pies, they are pretty amazing anyway.

The tart apricot, paired with a sweet glaze (this was my addition to the pies) really compliment each other well.

These are definitely going to be a summer staple in my home.

Let's get in the kitchen!


Peel, pit and slice you apricots. Pour your sugar over the top, stir them up and let them sit about an hour or 2.


Roll out your dough and cut it into circles. My grandma used to use a pink plastic plate for this. I used a large round cookie cutter. Place a good amount of the apricots on top of the dough circle.


Fold the pies, pinch the ends together, then crimp the edges with a fork to keep them closed.


Toss the pies into some oil and cook until golden brown, about 1-2 minutes per side.


When they are cooked through, place them on a paper towel lined plate to dry.

We tried some of these freshly fried, but found they were MUCH better then next day. They were mushier, which made them more like my grandma's pies.

Throw together a glaze of powdered sugar and milk, drizzle onto the pies. Let the glaze set, about 30 minutes (if you can keep your hands off of them).


Then serve and enjoy!!!

Apricot Fried Pies

Printer Friendly Version

Ingredients:

  • 2 1/2 pounds apricots, pitted, peeled and thinly sliced
  • 1 cup granulated sugar
  • Pie Dough (Can use 1 package of store bought as well)
  • Oil
  • Glaze (optional): 1/2 cup powdered sugar to 2 Tablespoons milk
Directions:
  1. Place apricots and sugar in large bowl. Cover and let sit about 1-2 hours until soft. Taste fruit to make sure it has reached the desired sweetness.
  2. Heat about 3 inches of oil to 300 degrees F.
  3. Roll out dough and cut into 4 inch circles.
  4. Place a heaping Tablespoon of apricot in the center of the dough circles. Fold, pinch ends together then crimp with a fork.
  5. Place pies into hot oil and cook until golden brown, about 1-2 minutes per side.
  6. Remove pies from oil using a slotted spoon and set on a paper towel lined plate to drain and dry.
  7. If you so choose, make your glaze. Stir together the powdered sugar and milk. Add more powdered sugar to make glaze thicker, or more milk to make it thinner. It's your preference. 
  8. Drizzle glaze over pies.
  9. Let glaze set about 30-60 minutes.
  10. Serve and enjoy!! (I found the pies were better enjoyed the next day).

Thursday, July 21, 2011

Chocolate Zucchini Bundt Cake


When I was little, I was always the "good girl."

In fact, I was always told that I was "perfect."

I think my family still refers to me that way even today.

Though I don't see it.

I'm definitely FAR from perfect!

However, nowadays, I feel as though I'm currently the family rebel.

I'm heavily tattooed.

I move away a lot.

I let people know exactly how I feel about things (even if it's not so nice sometimes).

And now I'm proving to be a rebel in the baking world as well.

You see, it's Cake Slice Bakers time!

The number one voted cake for this month was the zebra cake.

Now...I tried to be a good girl. I made the zebra cake. And it was a dismal failure. Wanna see??

Here ya go:


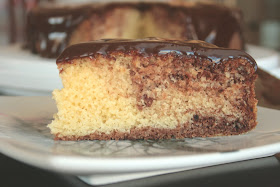
As you can see...there's nothing resembling a zebra about my cake.

I know I must have done something wrong since other bakers have been able to get theirs to stripe properly, but mine didn't.

Normally, I would try again, as I did with the lime chiffon cake. However, this cake tasted a bit like cardboard and was DEFINITELY not worth the ingredients the first time, let alone a second time.

So onward and upward right??

Upon talking with my dear friend Monica, we decided to be rebellious this month and make the second place cake. And boy am I glad I made this one!

I've never baked a chocolate zucchini cake before but Monica loves them. In fact I will quote her as saying she "big puffy heart loves them."

The original recipe called for 2 teaspoons of espresso powder, and you know me...I usually jump at the chance to add espresso/coffee to anything! But, I've been have some cardiology issues lately and was told I need to stay away from coffee until the baby comes, so I omitted that ingredient.

This cake was DE.LICIOUS!

It wasn't too sweet. But it was nice and moist. I loved the flakes of almonds scattered throughout the cake. Every bite had lovely texture.

And let's not forget the soft chocolate pockets when biting into a chocolate chip.

I'm immensely impressed with chocolate zucchini cakes now. You can't even tell there's a couple cups of veggies in the batter.

But that makes it deceptively healthy right???

Anyway. Once you have looked through and learned how to bake this cake, jump over to Monica's place to see how she fared with our month of rebellion.

Let's bake!


Whisk together your flour, cocoa powder, baking soda, baking powder and salt. Set aside.


Whisk together the sour cream, eggs and vanilla. Set aside.


Now cream together both sugars and the butter until fluffy.


In an alternating manner, add 1/3 of the dry ingredients.


Then 1/2 of the wet ingredients. Repeat, ending with dry ingredients.


Then stir in the chocolate chips, nuts and zucchini.


Pour the batter into your bundt pan and smooth the top with a rubber spatula. Bake about 45-50 minutes (according to the directions but it took me a good 60 minutes for the cake to be done) or until a toothpick inserted in the center comes out clean.

Let the cake cool in the pan about 10 minutes then invert onto a cooling rack to cool completely.


To give the cake a little extra pizzazz, go ahead and dust it with powdered sugar. Then slice, serve and enjoy!!

Chocolate Zucchini Bundt Cake
Adapted from Cake Keeper Cakes by Lauren Chattman

Printer Friendly Version

Ingredients:

  • 1/2 cup unsweetened, Dutch processed cocoa powder
  • 1/2 cup sour cream
  • 3 large eggs
  • 2 teaspoons pure vanilla extract
  • 2 1/2 cups unbleached all purpose flour
  • 2 1/2 teaspoons baking powder
  • 1 1/2 teaspoons baking soda
  • 1 teaspoon salt
  • 3/4 cup (1 1/2 sticks) butter, softened
  • 1 cup granulated sugar
  • 1 cup packed light brown sugar
  • 2 cups coarsely shredded zucchini
  • 1 cup semisweet chocolate chips
  • 1 cup sliced almonds
Directions:
  1. Preheat oven to 350 degrees F. Spray a 12 cup bundt pan with baking spray.
  2. Whisk together the cocoa powder, flour, baking soda, baking powder and salt in a medium mixing bowl, set aside.
  3. In a large glass measuring cup, whisk together the sour cream, eggs and vanilla, set aside.
  4. Combine butter and both sugars in a large mixing bowl. Cream with an electric mixer on medium high speed until fluffy, about 3 minutes. Scrape down sides of bowl as necessary.
  5. With the mixer on low speed, add 1/3 of the flour mixture and beat until incorporated. Add 1/2 the sour cream mixture. Repeat, alternating flour and sour cream mixtures, ending with flour mixture, scraping down sides of bowl between additions.
  6. Stir in the zucchini, chocolate chips and nuts.
  7. Scrape batter into prepared bundt pan. Smooth with rubber spatula.
  8. Bake about 45 to 50 minutes or until a toothpick inserted in the center comes out clean. (It took 60 minutes before the cake was done for me)
  9. Let cool in the pan about 10 minutes then invert onto wire rack to cool completely. 
  10. Dust with powdered sugar (if desired). 
  11. Slice, serve and enjoy!!!

Monday, July 18, 2011

Erica's Stuffed Shells


In our lives, we experience so many "firsts."

We have our first words, first steps, first loves, first kisses, and so on.

Yesterday I had a second something.

I had my second baby shower.

However, this was my first BOY baby shower.

It still shocks me that I'm having a boy. We were beyond convinced that we would have 2 girls. But alas...

Yesterday, as I'm opening all these blue blankets and boy centered presents, I couldn't help but think about Little Butt.

My baby girl is only 4 but she has experienced so much already. But yet, she has so much still to live through.

The night that my friend Erica came over and brought these stuffed shells with her, oh so many years ago, was the same night that Little Butt took her first steps.

The Hubble was off training (as he does sometimes) and was due back home the next day. So Erica and I decided to have a girl food night before he came home.

We were eating these shells and watching Top Chef (a new to me show that I was introducing Erica to) when Little Butt did it! She was 11 months old and teetered from the couch to the chair where I was sitting, all by herself!

As Erica and I clapped and laughed, and yes, cried, I couldn't help but think how The Hubble had missed it.

With this new baby, The Hubble will miss his entire first year. But it's the life. It's what we do. It's what we signed up for.

I don't ever want you all to think that I'm complaining. Honestly, this is all I know having grown up an Army Brat.

But again, this is my life and this is what I have to talk about. These are my experiences. This is life. And that is all.

Though The Hubble will miss many firsts in our children's lives, I hope that he will be here for so many others.

Maybe he will be here for Little Butt's first crush, first heartbreak, first baby??

Maybe he will be here for Baby N's first day of school, first soccer game, first sleep over.

But...maybe not.

My job is to make sure I document these firsts and try to make him as involved as possible.

Memories are often centered around smells and sounds. To me, they center around foods.

Whenever I make these shells I get to relive Little Butt's first steps and the love that we have for our family and friends who have been able to experience our lives with us.

I'm sure you have similar stories, and I would love to hear about them!

As I share this recipe with you today, please think about the meals that have been essential to some of your best memories. And feel free to share them with me!

Until then...let's get cooking some memory making stuffed shells!


In a medium mixing bowl, mix together your ricotta and parmesan cheeses, basil, salt, pepper and spinach. Please pay no attention to the red pepper flakes in the picture. I goofed. But it wasn't bad. ;-)


Then, get your lovely assistant to take your partially cooked shells and stuff them with the mixture. Place them back in your baking dish.


Now for the sauce! In a large saucepan, heat some oil then throw in the garlic.


Toss in your marinara and FOR REAL, the red pepper flakes. Mix it all together and cook until heated through.


Pour the sauce over the stuffed shells and top with the mozzarella.


Toss in the oven and bake until the mixture is heated through and the top is a golden brown.


Allow to cool, serve and enjoy!!!

Erica's Stuffed Shells

Printer Friendly Version

Ingredients:

  • 1 box (12 ounce) Jumbo shells
  • 2 Tablespoons olive oil
  • 2 teaspoons crushed red pepper flakes
  • 2 garlic cloves, minced
  • 5 cups marinara sauce
  • 2 (15 ounce) containers ricotta cheese
  • 1 1/2 cups grated parmesan cheese
  • 3 Tablespoons fresh basil, chopped (or 3 teaspoons dried)
  • 1 (10 ounce) package frozen chopped spinach, thawed
  • 2 cups shredded mozzarella
  • 1 teaspoon salt
  • 1/2 teaspoon pepper
Directions:
  1. Preheat oven to 350 degrees F.
  2. Partially cook the shells in a large pot of boiling salted water (about 6 minutes, shells will cook more in oven).
  3. Using a slotted spoon, remove shells to a lightly greased 9x13 inch baking dish.
  4. In a medium medium mixing bowl, mix together ricotta, parmesan, basil, salt, pepper and spinach until well incorporated. 
  5. Fill shells with cheese mixture (about 2 teaspoons per shell), arrange shells back in the baking dish.
  6. To make the sauce, heat oil in a large saucepan over medium high heat until glistening. Saute garlic about 30 seconds. Add in marinara and red pepper flakes. Stir and heat until warm throughout.
  7. Pour marinara over prepared shells.
  8. Sprinkle mozzarella evenly over shells and sauce in the baking dish.
  9. Bake in the lower 1/3 of the oven until filling is heated through and top is golden brown, about 30 minutes.
  10. Let cool, serve and enjoy!!!

Thursday, July 14, 2011

Maple Brown Sugar Bacon Banana Bread


Reading the name of this treat I'm sharing with you today, you may be thinking that my crazy pregnancy taste buds have completely taken over!

And maybe that's where this all started...

But I assure you, non-pregnant people have enjoyed this bread probably more than I have.

That's not to say I didn't enjoy this bread. But my poor mother seemed to be awfully obsessed with the stuff. She talked about it for days.

The bread is moist and sweet with the perfect amount of banana flavor. But the smoky, salty flavor of the bacon is a welcome surprise.

Honestly, I'm not crazy!

Well...maybe that's going a little far.

But it's not crazy taste buds!

If you are skeptical, I suggest you try this. I'll bet you will be a convert within 2 bites.

Let's get baking!


Whisk together the flour, baking soda and salt.


Cream together the butter and sugar.


Add in the banana, milk, sour cream and egg whites. Mix until well combined.


Mix in the maple syrup.


Add the dry ingredients and mix until well combined.


Stir in the bacon pieces.


Pour the batter into your prepared loaf pan and bake about an hour.


The cooling time depends on your will power here. But slice it up when it's cool enough, serve and enjoy!!


Maple Brown Sugar Bacon Banana BreadHeavily Adapted From Cooking Light 

Printer Friendly Version

Ingredients:

  • 2 cups unbleached all-purpose flour
  • 1 teaspoon baking soda
  • 1/2 teaspoon salt
  • 1 cup light brown sugar
  • 1/4 cup butter, softened
  • 3 ripe bananas, mashed
  • 1/4 cup fat-free milk
  • 1/4 cup low-fat sour cream
  • 2 large egg whites
  • 2 Tablespoons pure maple syrup
  • 4 slices maple bacon, cooked, cooled and roughly chopped

Directions:
  1.  Preheat oven to 350 degrees F. Spray a 9x5 inch loaf pan with baking spray.
  2. In a medium mixing bowl, whisk together flour, salt, and baking soda; set aside.
  3. Cream together butter and sugar in a large mixing bowl.
  4. Add banana, sour cream, egg, and milk to butter and sugar mixture, mix until well blended.
  5. Stir in maple syrup.
  6. Add flour mixture to banana mixture, blend until fully combined.
  7. Stir in the bacon pieces.
  8. Pour batter into prepared loaf pan.
  9. Bake about 1 hour or until a toothpick inserted in the center of the loaf comes out clean.
  10. Cool on wire rack in pan 10-15 minutes. Remove from pan and cool completely on cooling rack.
  11. Slice, serve and enjoy! 

Monday, July 11, 2011

Blackberry Sage Lemonade Sorbet: A #BakeTogether Recipe


Growing up in an Army Brat I never truly payed attention to what that meant for my mom.

Now that I am an Army Wife, I tend to have a bit more...perspective into the life of a military spouse. And let me tell you, I'm not liking it too much these day. But that's only because we are trying to get into a deployment groove before the actual deployment. It's complicated.

One of the things that I've learned to take in stride and not stress over is the anniversary celebration.

The Hubble and I are coming up on our 9 year anniversary in September but we won't be able to spend it together. Now, we've been lucky. We've spent more anniversaries together, at this point, than we have apart.

Year 1 (2003): Apart. He was in Missouri for Army training, I was living in New Mexico.
Year 2 (2004): Apart (but just barely). He had to be in Arizona on the day so I flew out to El Paso, Texas. We saw each other the night before.
Year 3 (2005): Together. We figured the third time must have been the charm.
Year 4 (2006): Together. We thought it would be apart but he was sent home from deployment early.
Year 5 (2007): Together. We were new parents by this point though.
Year 6 (2008): Together.
Year 7 (2009): Together. He was deployed but scheduled his R&R 9 months into the deployment so he could come home for that day.
Year 8 (2010): Together. He was in training in Missouri again but this time I moved with him.

Now here we are at Year 9. We will spend it apart because I'm in Texas and he's in Florida. Then Year 10 will also be spent apart because he'll be in Afghanistan and I...won't be. Ha!

I'm thankful that we've had the opportunity to share so many together.

When he came home for R&R during the last deployment for our anniversary, we decided to take a weekend trip to San Antonio. While we were there, we were looking in the phone book for somewhere to go eat. I found out that San Antonio has a Melting Pot there! I had heard so much about it and wanted to try it!

In true The Hubble fashion, he thought it sounded "suspicious." He was definitely skeptical but reluctantly went with me.

Not even halfway through our meal he was a convert. He thought it was the most awesome restaurant! Since then, he's been the brainchild of fondue parties and he even decided we needed to take some good friends to the one here in Austin.

We took these friends to The Melting Pot a couple years ago actually. But S ordered this drink from the bar (I always get wine there). She ordered a Blackberry Sage Lemonade. Say what???

I know! I did a double take there too!

I tried her drink that night and have not forgotten the flavor combination since then.

I've always wanted to use this flavor combination but never had an opportunity...until I was introduced to Abby Dodge's #BakeTogether.

Basically, Abby posts a recipe and an idea. You take those and you run with them! Go back to the original post and provide a link to your blog post so Abby can feature it on the roundup.

I jumped over in the first couple days of July and realized I had just missed the June Sorbet.

But wait! Abby says on Twitter. She's running behind this month so go forth and make sorbet!

It hit me in that moment! Blackberry Sage Lemonade Sorbet! Perfect!!!

She said "Let there be sorbet!"

And there was.

It was perfect in every way.

It was sweet, tart and fresh from the herbs.

My niece said it tasted like Summer.

My mom couldn't get over the "interesting" flavor and just kept eating it.

My sister didn't even speak in between spoonfuls.

I think this was definitely a success.

And SO easy to make!!!

The only thing I would change would be to strain the blackberry puree through a sieve. The seeds were annoying to me, but my family didn't seem to mind.

Anyway. I think I've rambled enough. Let's make a sorbet...old school style because I don't have an ice cream maker!


You are going to start by boiling some sugar and water together in a medium saucepan.


Toss your fresh blackberries in a food processor and process them until they are fully pureed.


Then (after straining out the seeds???) pour the puree, the lemon juice and the sage into the saucepan. Let cook another few minutes then remove from heat. Allow to cool completely. Also, make sure you taste it at this point to be sure it tastes exactly how you want it.


Then pour it into a 13x9 inch baking dish. Place that dish in the freezer (make sure it's level and undisturbed). Every 30 minutes, take a table fork and run it through the mixture. The sides should start freezing after the first 30 minutes. You will have to do this about 4 times. The freezing time takes about 2 hours. When the mixture is fully frozen...


Scoop it out of the dish and serve it to your family and friends. Or if you don't want to share, serve some to yourself and sit on the back porch with a spoon and a good book. Either way you have it...enjoy!!!

Blackberry Sage Lemonade Sorbet
Adapted from Abby Dodge

Printer Friendly Version

Ingredients:

  • 3/4 cup water
  • 3/4 cup sugar
  • 12 ounces fresh blackberries, rinsed and well dried
  • 3 1/2 Tablespoons lemon juice
  • 1 teaspoon fresh sage, roughly chopped
Directions:
  1. In a medium saucepan, place the water and sugar. Cook over medium heat, stirring occasionally until the sugar dissolves.
  2. (At this point, if you don't want seeds, push the mixture through a fine metal sieve. If you want NO chunks, do this after step 3 so as to also remove the sage chunks)
  3. Pour the puree into the sugar water mixture. Add the lemon juice and sage. Cook, stirring about another minute. Remove from heat and let cool completely. 
  4. Place mixture in a 13x9 inch baking dish and place in freezer, make sure the  space is level and secure.
  5. Let freeze about 2 hours, or until mixture is thoroughly frozen; scraping and stirring the mixture with a table fork every 30 minutes.
  6. Serve and enjoy!
If you are interested in the ice cream maker directions. Please head over to Abby's post. And feel free to join in while you are over there!

Thursday, July 7, 2011

My Journey Through Cake Decorating...So Far

Today, I want to take a trip through the past.

I won't lie...I kinda got nothin' today. LOL!!

See...The Hubble decided to fly in this past Saturday to surprise Little Butt and me for the long weekend. Needless to say, we were excited and rather distracted.

The same day, The Hubble's best friend, his wife and his daughter came in for the weekend for a visit as well. I had a very full house all weekend. The Hubble flew out Monday morning to get back to training and his best friend left later that afternoon. Best friend's wife and daughter left yesterday.

On top of the visits, Little Butt started swim lessons this week. I've been getting up at 6am every day this week to get ready then get her up and ready for her early swim lessons.

And if that wasn't enough, Little Butt also started dance classes this week! She's only gone to one class so far, but with everything else, that one class had me falling asleep on the couch.

So...with all that being said, I have done NO cooking lately. I have some stuff in the archives I've never shared but I've been wanting to share my journey through cake decorating for some time so I figure now is the perfect time!

Now, I'm not a professional cake decorator or anything but it's something I super enjoy. So...I want to show you all the cakes I've done over the last couple years. So here we go!

Let's start with my very first "decorated" cake ever:


In December, 2009 I was able to squeeze in the first Wilton cake decorating course. This was back before they changed the courses and what the students learned. There were four courses back then.

In the second class, we decorated these rainbow cakes (sorry for the horrible picture, the cake itself is light blue).


One of the classes was canceled and I already had a carrot cake made and ready so I decided since I was so inspired by cake, I would make a homemade cream cheese frosting and use some of the spiced nuts I had made for Christmas gifts to adorn this cake. I mean...you can't let a good carrot cake go to waste can you???


The third class, we learned the clowns. These were my little clowns. Now, the only way I could squeeze this class in before I headed to NY to greet The Hubble home from deployment was that the course was condensed into 2 weeks instead of 4. Sadly, since the one class was canceled and we had to make it up, I would miss the final class. So the instructor showed me how to make the Wilton rose. The one in the front is my first rose, the one in the back was the instructors. Oh well...


February of 2010 The Hubble and I decided to participate in the Race for the Cure in El Paso, TX. I decided I wanted to finally do my finale cake so I made a cake to commemorate the Race for the Cure.


My Wilton roses got much better after a bit of practice.


In March 2010, Little Butt and I were staying with my best friend until we could move to the Middle of Nowhere, Missouri with The Hubble. Every year, she has an Oscar party. And she always creates a menu to go along with the nominees. This year, Up! was nominated for animated film. So I asked if I could make a cake. It didn't turn out too bad. It was a half sheet cake so it was huge! And that was my first time working with fondant (the house is made of fondant).


I then tried to make a "candy box" cake with cake balls as the "candy." Not the best, but not horrible for a newb. The cake pops were super delicious!


Then, in April, I made this crazy 3 tiered Tinkerbell cake for Little Butt's birthday! Crazy!


And because it was Easter, I made some fun cupcakes! Too cute!


We finally arrived in The Middle of Nowhere, Missouri and I was able to continue my Wilton education. Course 2 was all about the flowers. This was the final cake for the class. I was really happy with it!


About this time, I started really getting into food blogging and joining baking groups. I made this hummingbird cake for a group bake and wanted to dress it up a bit. So I free handed the flower on top and the dots on the side.


This was the final cake for the Wilton course 3 class. That's a lot of fondant baby!!


Thanks to the Daring Bakers, I've even gotten to play around with decorating cookies! Fun! But a lot of work...


Now, I just like to try to challenge myself. I made this Rapunzel doll cake with cupcakes for a friend's daughter.


This was Little Butt's birthday cake this year. She asked for it...I just obliged!


Both my nephews were celebrating their birthdays recently. They both really like Toy Story and I saw THIS CAKE on Cakewalker. So I replicated it my way.


And finally! My mother needed a dessert for her 4th of July potluck (on July 1st) and this is what I sent with her.

And that's it for now! I haven't been doing too much decorating lately but I enjoy it when I do. Thanks for walking down memory lane with me. I hope you are craving cake now!!