Saturday, July 28, 2012

Strawberry Icebox Cake


Don't forget to enter my giveaway HERE!

As some of you already know, the 20th of each month is dedicated to The Cake Slice Bakers.

Any detective can easily deduce that I'm just a bit late this month. Actually, I didn't make this month's cake.

The top voted cake this month was a White Chocolate Espresso Icebox Cake. Sounds amazing right??

I was super excited about this cake. In fact, I voted for it as well. I mean, it sounds like the perfect cake for me right?? Yes, I know...I only think it's perfect because it contains espresso. You know I love my coffee!

So I was totally pumped to make the cake but I hadn't gotten to the store yet. However, I had run across this strawberry icebox cake recipe and I did have the stuff for that one. So I whipped it up. Get it?? "whipped" it up??? Because icebox cakes contain whipped cream?? LOL! I totally crack myself up!

After I made the strawberry icebox cake I swiftly decided I was not going to make the white chocolate espresso icebox cake. Let me tell you why.

  1. No one in my geographically close family (besides me) enjoys anything coffee related (I am definitely the black sheep here). So why make a huge cake that only I would eat?
  2. I discovered upon trying the strawberry icebox cake that I don't like icebox cakes. Therefore, if I'm the only one who would eat the cake and I don't like it, why make it?
Why don't I like icebox cakes you ask? The whipped cream. I don't like whipped cream. Never have. I guess I never will.

I'm the type of person who tries something a million times hoping that the next time I try it I'll have changed my mind. People also think I'm weird because I try to force myself to like certain foods because I think I should. I won the war on chicken wings and I love them now (how could anyone NOT love a food that is drenched in Ranch dressing???). Right now, I'm working on forcing myself to like avocado. It's so good for you! Shouldn't I like it?? I'm trying...

But whipped cream? I guess not. I can only focus on one thing at a time and right now it's avocado. I was hoping that the whipped cream nestled between layers of graham crackers and strawberries would be subtle. But it's not. Not to me anyway.

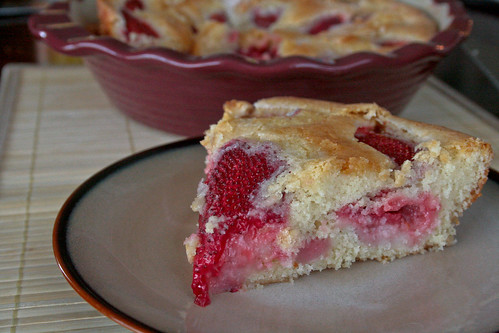
However! If you ask my family, they will tell you that this cake was amazing! I went with a white chocolate drizzle on top of the cake. I even considered adding some amaretto to the white chocolate because I love white chocolate amaretto fondue with strawberries. But I erred on the side of kid friendly. You can use any type of chocolate for the drizzle. 

If nothing else, this cake was fun to make. It was easy. Pretty. And definitely a crowd pleaser. I'm an oddball so my opinion doesn't really count. 

Before Summer is over, you should make this cake, if you are into whipped cream that is. It would be great for a dinner party or family BBQ.

If you are interested in the white chocolate espresso icebox cake, head over to The Cake Slice Bakers page and check out some of my fellow groupies posts.

Let's "bake!"


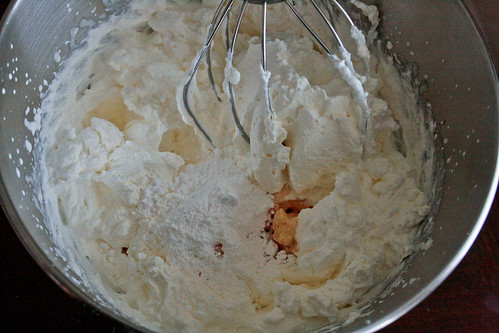
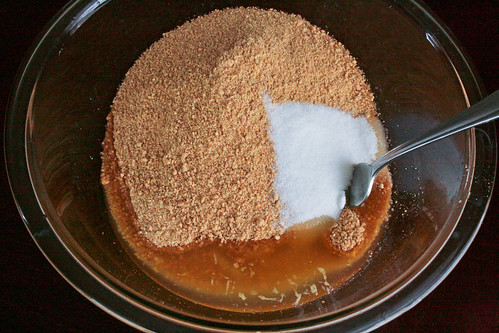
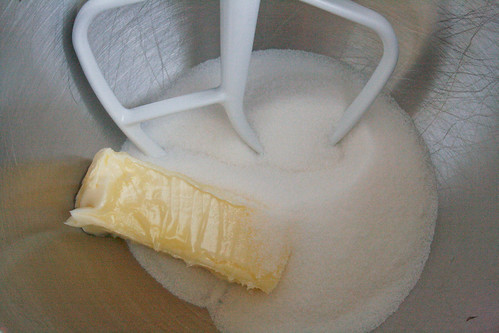
Whip the cream until stiff peaks form. Add the sugar and vanilla and whip until combined.


Spread a small spoonful of whipped cream at the bottom of a 9x13 inch dish. Arrange 6 graham crackers on the whipped cream.


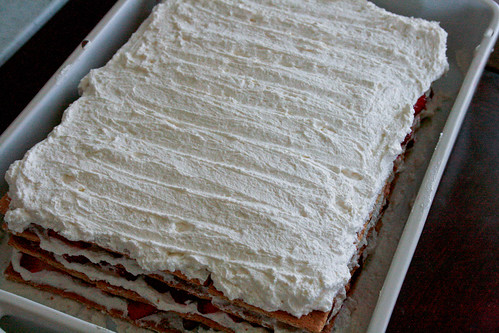
Spread whipped cream over the graham crackers.


Then top with sliced strawberries.

Repeat 3 times to make a total of 4 layers.


Heat the remaining cream and pour it over the chocolate. Let sit then whisk until smooth.


Drizzle over the cake. Refrigerate the cake for 4 hours or up to overnight.


Garnish with extra strawberries. Slice, serve, and enjoy!!


Strawberry Icebox Cake
Adapted from The Kitchn

Printer Friendly Version

Ingredients:

  • 2 pounds fresh strawberries, hulled and sliced
  • 3 1/4 cups heavy whipping cream, divided
  • 1/3 cup powdered sugar
  • 1 teaspoon pure vanilla extract
  • 24 sheets of graham crackers, 3-4 sleeves
  • 2 ounces white chocolate, finely chopped (can substitute another chocolate if desired)
Directions:
  1. In a large, metal mixing bowl, with an electric mixer, using the whisk attachment, whip 3 cups of the heavy whipping cream until stiff peaks form. 
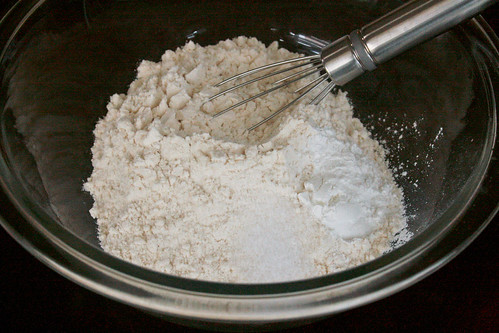
  2. Add the powdered sugar and vanilla and whip to combine.
  3. Spread a small spoonful of whipped cream in the center of a 9x13 inch dish.
  4. Arrange 6 graham crackers on top of the spread whipped cream.
  5. Top the layer of graham crackers with whipped cream.
  6. Top the whipped cream with slices of strawberries.
  7. Repeat the graham cracker, whipped cream, strawberry layers 3 more times for a total of 4 layers.
  8. Place the chocolate in a small mixing bowl. Heat the remaining 1/4 cup of cream in a small saucepan over medium heat until it just comes to a boil. Pour the hot cream over the chocolate and let sit for 30 seconds. Whisk until smooth. Drizzle over the cake.
  9. Refrigerate for 4 hours or overnight.
  10. Garnish with extra strawberries. Slice, serve, and enjoy!

Wednesday, July 25, 2012

Lemon Pie Bars, a Review, and a Giveaway {CLOSED}


Note: The giveaway is at the end of this post. {GIVEAWAY IS NOW CLOSED}

Have you ever heard that some people are really good at one or two things and some other people are pretty good at a number of things?

Well...I'm the latter type. I have many, many different interests. Mostly, my interests reside on the creative side of things. I like drawing and doing makeup. I've taught myself to knit. I've made wreaths. I've toyed with the idea of writing but figure I'll leave that to people who enjoy it. I've considered interior design. I have a degree in Psychology.

Okay. That last one isn't so much creative. But is it not? I wanted to be a therapist for a very long time. Now I don't think it's for me.

The one thing I haven't swayed on is baking. I love to bake. Baking is in my soul, it's in my blood. It's my history, my heritage, my inheritance.

As a young child, I would sit at my grandma's aged, formica topped table and watch her roll pie crust and form apricot fried hand pies. I remember the smells, the tastes, everything. Thinking of that wonderful, simple time brings me a sense of joy that not much else can.


When I picked up a copy of The Back in the Day Bakery Cookbook I thought that it looked like a cute cookbook for which I could do a review and a giveaway. I had no idea what was really in store for me.

This cookbook brings back the thoughts of love and warmth that I used to feel at my grandma's kitchen table. The book provides a sense of love, family, community. I found myself on the verge of tears during the introduction.


This book pulls you in and makes you feel like you are home. At the beginning of each recipe are a few words by Cheryl about why the dish is special enough to be in the cookbook. There are stories of celebration and community hidden among the pages. Introductions to each section take you back into the childhood memories of Cheryl and Griff and make you nostalgic. There's even a poem written by a customer about a favorite cookie they sell in their shop.


The book is full of stunning, vintage like photos. The recipes are simple and easy to understand. There are no big words, the recipes are written as if you were explaining to a friend how to make a beloved recipe.

The book is broken down into 9 chapters:

  1. Breakfast
  2. Coffee Cakes, Quick Breads, and Sweet Yeast Breads
  3. Cupcakes and Cakes
  4. Pies, Cobblers, Crisps, and Tarts
  5. Puddings and Custards
  6. Cookies
  7. Brownies and Bars
  8. Confections
  9. Savories
I have so many recipes on my to make list from this book. Seriously. It's bad. I want to make just about everything in this book.

I will admit. I have tried a number of these recipes. So far I've tried the snickerdoodles, cinnamon biscones with vanilla glaze drizzle, the hummingbird cake with cream cheese frosting, and of course, these lemon pie bars. Not one thing on this list has disappointed. 


My dear friend Monica came over the day that I made these lemon pie bars. She decided to make the Drunk Blondies and we ended up trading bars with one another (so I've tried these too. That's 5 recipes so far!). I won't spend a lot of time on these bars because she is blogging about them today. After you are done here, you should pop over and read about these bars as well!!


These lemon pie bars were absolutely amazing. The perfect amount of tang and sweet. The crust was buttery and felt like it melted in your mouth as it gently crumbled upon each bite. The first [few] bars I ate were just the bars by themselves. However, I made some whipped cream for the pictures and fell even more in love with the bars than when they were naked! And I don't even like whipped cream!! But the sweetness and cloud like texture of the whipped cream just enhanced the lemon pie bars and made them extra special.

So without further ado, let's bake!


First, mix together some graham cracker crumbs, butter, and sugar.


Press the mixture into a pan and bake it up. Take it out to cool.


While the crust is cooling, whip up the filling. Toss together some cream, egg yolks, lemon zest, lemon juice, and sweetened condensed milk and whisk it until thoroughly combined.


Pour the filling over the cooled crust.


Place in a water bath and bake it until it no longer jiggles. After it has baked, remove the bars from the water bath and let cool to room temperature. Place the pan in the fridge and allow to get really cold.


Slice into bars and top with whipped cream if you are into that kind of thing.


Serve and enjoy!!


Lemon Pie Bars
Adapted from The Back in the Day Bakery Cookbook

Printer Friendly Version

Ingredients:

For the Crust

  • 3 cups graham cracker crumbs (about 24 crackers)
  • 12 Tablespoons (1 1/2 sticks) unsalted butter, melted
  • 2 Tablespoons sugar
For the Filling
  • 1 cup heavy cream
  • 2 teaspoons lemon zest
  • 1 cup fresh lemon juice
  • 2 (14 ounce) cans sweetened condensed milk
  • 6 large egg yolks
Directions:
  1. Position a rack in the center of the oven and preheat oven to 350 degrees F. Spray a 9x13 inch baking pan and line with parchment, allowing the ends of the paper to hang over two opposite sides of the pan.
  2. In a medium mixing bowl combine the graham cracker crumbs, melted butter, and sugar with a fork until evenly moistened. 
  3. Press the mixture firmly and evenly into the bottom of the prepared pan until level.
  4. Bake the crust for 8 minutes or until lightly golden. Let cool while preparing the filling.
  5. Reduce oven temperature to 325 degrees F.
  6. In a large mixing bowl, whisk together the heavy cream, lemon zest, lemon juice, sweetened condensed milk, and egg yolks until well combined.
  7. Pour filling over the cooled crust and level with a plastic spatula.
  8. Place the baking dish into a larger pan and pour water into the larger pan until the water reaches about halfway up the sides of the smaller pan.
  9. Bake about 20 to 25 minutes or until the center no longer jiggles and the edges are puffed.
  10. Remove pan from water bath and let cool to room temperature. Then refrigerate until cold.
  11. Cut bars into squares, top with whipped cream if desired.
  12. Serve and enjoy!


And what good is a cookbook review without a giveaway?? I loved this cookbook SO much that I want to share it with the world. Unfortunately, I can't afford that, so I'm giving one lucky person a copy of this wonderful cookbook. Here are the rules:

GIVEAWAY IS NOW CLOSED
To enter this giveaway you MUST answer THIS question in the comments:

1. What is your favorite food/baking memory from back in the day?

For additional entries please leave a comment for each entry:

2. Follow Jolts & Jollies through Google Friend Connect or RSS feed

3. "Like" Jolts & Jollies on Facebook

4. Leave a comment on Monica's drunk blondies saying I sent you (If you are here from Monica's blog, leave an extra comment saying so)

This giveaway is open to US residents only (sorry) and will close at 11:59pm CDT on Tuesday, July 31st.

The thoughts and opinions given in this review are strictly my own. I have not been compensated in any way for this review and am paying for the giveaway copy myself.

Wednesday, July 18, 2012

Brioche Loaf


Did you know that carbs make the world go 'round?

Well...they make my world go 'round anyway.

I'm not sure I've ever met a carb I didn't like.

That age old saying comes to mind... "If you like carbs so much, why don't you marry them?"

Okay. Maybe it's not an age old saying. I first heard it from PeeWee Herman on PeeWee's Playhouse but that's old enough for me.

I would definitely marry carbs if I could. Like that guy on the commercial who married bacon. I just don't know how that would go for carbs. Or myself really. It would be a volatile relationship.

Anyway. Enough about that.

Let's talk bread. One of the greatest carbs out there.

Many times I have tried my hand at making bread. I have made rosemary olive oil bread, French bread loaves, no fuss focaccia, and my first ever bread baking experience, the French baguette. I've always found my bread skills to be a bit lacking.

I have the desire to produce beautiful loaves of bread. I want the outer shell to crackle as you gently squeeze it. I want the inside to be soft and chewy brought to perfection with the generous smear of butter. But alas, it hasn't been meant to be. Until...

Until I made this loaf of brioche.

I had read reviews of different brioche recipes in the past. I must admit, I was heartily intimidated by the lengthy process of this delicate bread. However, I recently made a batch of chocolate chip cookie dough bread pudding that I believed would only be enriched by using homemade brioche.

So I set about researching recipes to find the perfect one. My Google-fu was strong that day and I ran across a recipe that boasted authenticity and simplicity. Could it be? Was this the one? The reviews for the recipe increased my excitement. So I pushed up my sleeves and delved into the process.

Though it took me the better part of a day to make these loaves, I was extremely pleased with the outcome. The dough was smooth and breathtaking. It's beauty could not be denied. Once baked, the loaves were a delicious golden brown and light as air.

As I mentioned before, I made the bread to be used in another recipe. Well...that didn't happen. My family and I couldn't keep our greedy little fingers away from the slices of this delectable bread. Needless to say, it didn't last long enough to become dried out for a bread pudding recipe.

Whether making this bread with the intention of using in another recipe or sharing with loved ones, this recipe is definitely a keeper. The directions were thorough and easy to follow. And the results are easy enough for an novice like me to attain, meaning anyone can make fantastic bread using this recipe!

Let's bake!


In a mixing bowl, mix together the flour, sugar, and yeast.


Add in the milk and some eggs.


As the ingredients start to come together, switch to the hook attachment. Beat about 4 minutes then scrape the bowl and hook.


Beat another 4 minutes then scrape the hook.


Turn dough out onto a lightly floured surface. Knead a few times Then form into a ball:


Fold the dough into the center from the top...


Right side...


Bottom...


And left side.

Flip it over and tuck the bottom into itself as you turn it and smooth out the top.


Place the dough, folded side down, into a clean, large bowl. Cover loosely with plastic wrap and let rise for an hour.

Turn it out onto a lightly floured work surface, smooth side down, and repeat the forming it into a ball process.

Place back into the bowl, smooth side up, and let rise another hour or overnight in the fridge.


I tried to put mine in the fridge overnight but after about an hour and a half it looked like this so I finished it up that same day.


Turn the dough out onto a clean work surface. Fold the top, right, bottom, and left into the center of the dough and cut it into 2 even pieces. Cover one half with plastic wrap as you work with the other.


Cut each half into 8 equal pieces, 16 total. Form each little piece into a tight little ball.


Place the dough balls into some loaf pans, cover loosely with plastic wrap, and let rise another hour.


Once risen, gently brush on some egg wash then pop into the oven.


The bread should be a dark golden brown when done. Let it cool in the pan for about 25 minutes before removing.


Slice, serve, and enjoy!!

PS. If you are feeling generous, eat one loaf and share the other with a friend.


Brioche
Adapted from Fine Cooking

Printer Friendly Version

Ingredients:

  • 4 cups unbleached all purpose flour
  • 1/3 cup granulated sugar
  • 4 1/2 teaspoons active dry yeast
  • 2 teaspoons salt, plus a pinch for egg wash
  • 6 large eggs plus one large egg yolk, divided
  • 1/2 cup milk, at room temperature
  • 1 cup unsalted butter, slightly softened, cut into 16 pieces
Directions:
  1. In the bowl of an electric mixer, using the paddle attachment, on low speed, mix the flour, sugar, yeast, and salt until well combined.
  2. Add for of the eggs and the milk, mix to combine. 
  3. When the dough begins to stick together (before all ingredients are combined), switch from the paddle attachment to the dough hook. Increase the speed to medium and mix for 2 minutes.
  4. Using a plastic dough scraper or strong rubber spatula, scrape the bowl and dough hook then continue to mix about 2 minutes more, until the dough becomes firm and elastic. The dough will continue to stick to the hook, scrape the dough off the hook again.
  5. Reduce the mixer speed to medium-low and add half the butter pieces, a few at a time.
  6. Scrape the bowl and dough hook again then knead the dough by hand a few times to fully incorporate the butter.
  7. Replace the dough hook, turn the mixer on medium low speed, and add the remaining butter, a few pieces at a time.
  8. Once the butter has been added and incorporated, increase the mixer speed to medium and mix for 4 minutes. Scrape bowl and dough hook. 
  9. Mix 4 minutes more. Dough should be smooth, soft, and shiny and should slap the sides of the bowl as it mixes.
  10. Scrape the dough onto a lightly floured (too much flour will toughen the dough) work surface. Knead by hand a few times then form into a ball by folding the edges from the top, right side, bottom, then left side. Turn the dough over and tuck the bottom into itself as you turn the ball of dough and smooth the top.
  11. Place dough, fold side down, into a clean large bowl. Cover loosely with plastic wrap and let dough rise in a warm area for about an hour, the dough should double in size.
  12. Turn the dough out of the bowl, smooth side down, onto a lightly floured work surface and repeat step 10 above, folding the dough and working it into a smooth ball.
  13. Place the dough, smooth side up, back into the bowl and cover tightly with plastic wrap. Allow to rise another hour, or place in the refrigerator overnight. Dough should double in size.
  14. Butter two 9.25x5.25x2.75 inch loaf pans (I used butter flavored cooking spray).
  15. Turn the dough out of the bowl, smooth side down, onto a clean work surface.
  16. Form the dough into a ball by folding it into the middle from the top, right, bottom, and left. Cut the dough into 2 equal parts. Wrap one in plastic wrap while working with the other.
  17. Cut each dough half into 8 equal pieces, 16 total. Roll each piece of dough into a tight ball.
  18. Arrange balls of dough into 2 rows of four pieces into each of the prepared loaf pans.
  19. Cover loosely with plastic wrap and allow to rise about 1 hour. Dough should be almost doubled in size and should spring back when lightly poked with a finger.
  20. Halfway into the rise time, position a rack in the center of the oven and preheat to 375 degrees F.
  21. In a small bowl, beat together the remaining 2 eggs, 1 egg yolk, and a pinch of salt.
  22. Gently brush the tops of the dough with the egg wash being careful not to let the egg wash drip into the pan.
  23. Bake loaves for about 25 minutes or until they reach an internal temperature of 190 degrees F. Tops should be dark golden brown and edges should be golden in color.
  24. Allow to cool in the pan on a wire rack for 25 minutes.
  25. Remove loaves from pan.
  26. Slice, serve, and enjoy!

Wednesday, July 11, 2012

Strawberry Cake


My goodness! Time sure flies when you are having fun no??

It has been a crazy couple of weeks for us over here. We have been doing a bunch of traveling.

We went out to College Station to see a friend one week. The next week we headed to Houston for a couple days to see family. And we just got back this past weekend from a trip to El Paso. Phew!

Not only have we been driving all over the state of Texas, there has been some sickness going on. I ended up taking Little Butt to the ER and I found out she was working on a little case of pneumonia. Poor baby! She looked awfully cute in her little face mask though.


With all the driving around I've been doing, I haven't been in the kitchen much. However, I did make this strawberry cake several weeks ago and I figured it was high time I share it!

This. Cake. Was. Perfect! The crumb was moist and fluffy at the same time. It was sweet and buttery. The punches of sweet strawberry throughout each slice was intoxicating.

The only problem I had with this cake is that I didn't use the whole box of strawberries the first time I made it. It was so good that I had to make it again and I used the whole box that time. Stack those strawberries on top of each other if you have to. Make it work. It's worth it.

Not only was this cake super scrumptious, it was also incredibly easy to prepare. Honestly, let me show you.

Let's bake!


Hull and half your strawberries. Try not to eat them all in the process.


Whisk together the flour, baking powder and salt.


Cream together the butter and sugar.


Add the egg, milk, vanilla.


Then mix in the flour until just combined.


Scrape the batter into your pie plate and top with strawberries and sprinkle with sugar. Obviously, this was NOT enough strawberries. I missed the part about them being real close together and overlapping and such. The second time around I did it up right!


Bake up your cake and let it cool a bit. If you can anyway...the cooling part was the hardest part so we dug in with it still warm.


Slice, serve, and enjoy!! This may just be me...but that cake seems to be smiling at me. ;-)


Strawberry Cake
Adapted from Martha Stewart via Sticky, Gooey, Creamy, Chewy

Printer Friendly Version

Ingredients:

  • 6 Tablespoons unsalted butter, room temperature, plus more for pie plate
  • 1 1/2 cups unbleached all purpose flour
  • 1 1/2 teaspoons baking powder
  • 1/2 teaspoon salt
  • 1 cup plus 2 Tablespoons sugar
  • 1 large egg
  • 1/2 cup milk
  • 1 teaspoon pure vanilla extract
  • 1 pound fresh strawberries, hulled and halved
Directions:
  1. Preheat oven to 350 degrees F. Generously butter a 10 inch round cake pan or pie plate or a deep dish 9 inch pie plate.
  2. In a medium mixing bowl, whisk together the flour, baking powder, and salt.
  3. In the bowl of an electric mixer, using the paddle attachment, on medium high speed, cream together the butter and 1 cup of the sugar until light and fluffy, about 2 minutes.
  4. With the mixer on low speed, mix in the egg, milk, and vanilla until combined.
  5. Gradually add in the dry ingredients, scraping down the sides of the bowl as necessary. Mix until just combined.
  6. Scrape batter from mixing bowl into pie plate or cake pan.
  7. Arrange strawberries, cut side down, on top of the batter, overlapping strawberries if necessary.
  8. Sprinkle the remaining 2 Tablespoons sugar evenly over the strawberries.
  9. Bake cake for 10 minutes then reduce heat to 325 degrees F and continue to bake about 50 minutes. Top of cake should be golden brown and a tester inserted into the center of the cake should come out clean.
  10. Let cake cool in pan on a wire rack.
  11. Slice, serve, and enjoy!
Related Posts with Thumbnails