Tuesday, October 18, 2011

Butterscotch White Chocolate Blondies


I can't believe how late I am to post today!

I started working on this post this morning but ended up having a very full day.

You see...The Hubble is home! We have been spending some quality time as a family and we have been loving it!!

At this moment, Little Butt is in bed and The Hubble is feeding and hanging out with Baby N.

The boys took some time adjusting to one another but so far, things are going pretty well. Daddy is figuring out how to handle the little guy and it's so cute.

Little Butt has been able to spend some alone time with Daddy too. They went to the store together this evening and have been having many dance parties.

I know our time is short but we are living it up as best we can!

So let me not spend too much more time here. Let me tell you about this recipe!

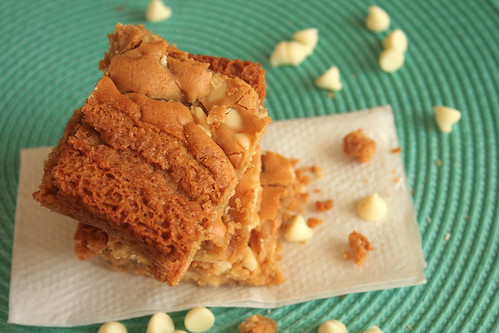
I made these blondies before I even had Baby N and I haven't stopped thinking about them.

I found the recipe in a Cooking Light magazine I grabbed at the store.

I thought the butterscotch blondies sounded awesome, but that they needed a little something extra.

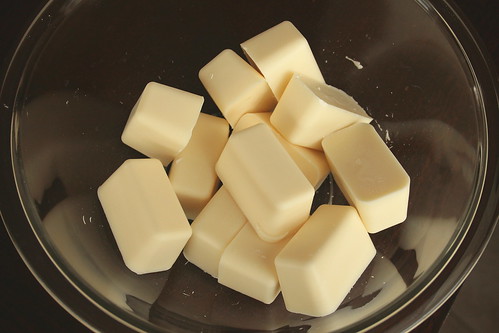
Enter in white chocolate chips stage left.

The sweet white chocolate morsels were the perfect addition to these buttery bars.

And speaking of butter...this recipe uses brown butter!! Everything is better when you brown the butter!!

Let's get baking!


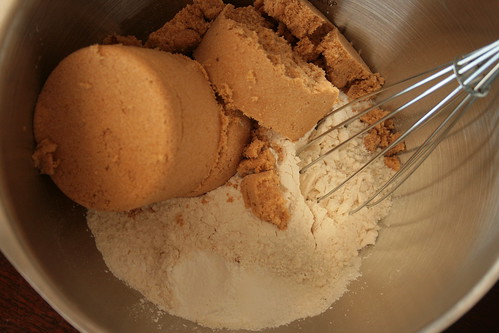
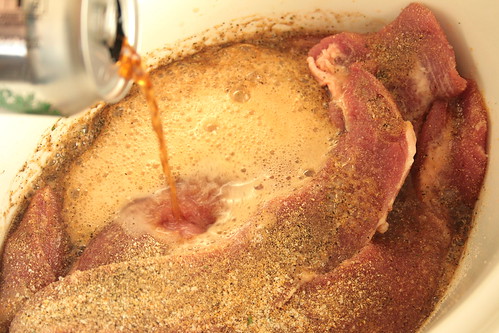
In a medium mixing bowl, whisk together the flour, brown sugar, baking powder and salt.


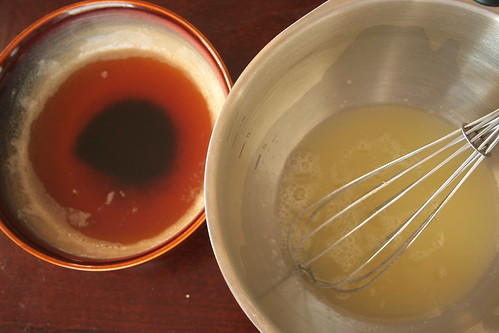
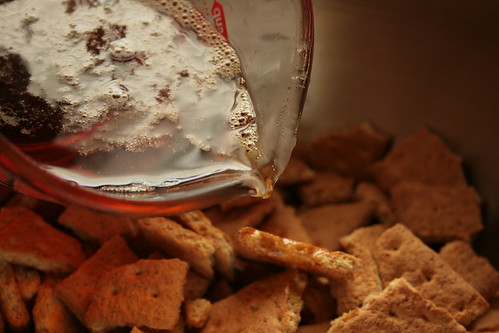
Brown up your butter, cool it down then whisk it into the egg substitute.


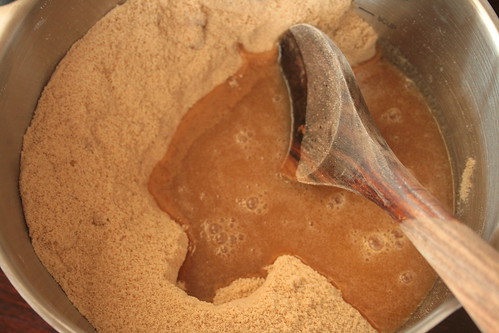
Pour the egg and butter mixture over the dry ingredients and mix until just moistened.


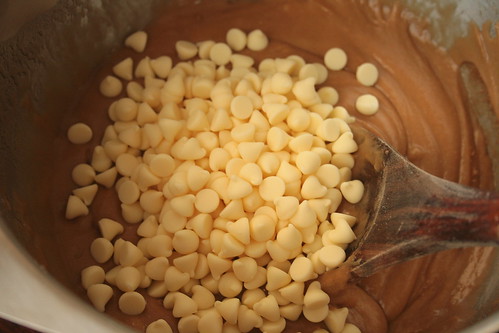
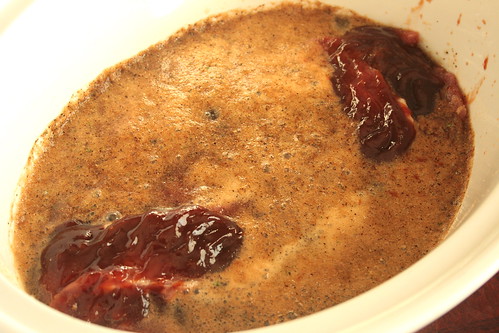
Stir in the white chocolate chips.


Pour the batter into a prepared pan and even it out until smooth. Bake it up, cool it off then cut it up.


Serve and enjoy!!


Butterscotch White Chocolate Blondies
Adapted from Cooking Light


Ingredients:
  • 2 cups unbleached all purpose flour
  • 2 1/2 cups firmly packed light brown sugar
  • 2 teaspoons baking powder
  • 1/2 teaspoon salt
  • 10 Tablespoons unsalted butter
  • 3/4 cup egg substitute
Directions:
  1. Preheat oven to 350 degrees F. Spray a 9x13 inch pan with baking spray.
  2. Combine flour, brown sugar, baking powder and salt in large mixing bowl.
  3. Heat butter in a small skillet over medium heat for about 6 minutes, stirring occasionally or until lightly browned. Pour into small bowl and set aside for about 10 minutes to cool.
  4. In a medium mixing bowl, whisk together the egg substitute and browned butter.
  5. Pour butter mixture over dry ingredients and stir until just moistened.
  6. Fold in the white chocolate chips.
  7. Pour batter into prepared pan and smooth out with a rubber spatula.
  8. Bake for 30 minutes or until a toothpick inserted in the center comes out clean.
  9. Cool on a wire rack. Cut into 48 bars.
  10. Serve and enjoy!!

Friday, October 14, 2011

Zombie Doll Cake


Last weekend was my Niecelet's 2 year birthday.

My Niece was gracious enough to let me decorate the cake for the party.

When I heard the theme, I was even more excited to do this cake.

We made a Zombie Doll cake!

These pictures definitely don't do the cake/dress j
ustice but trust me...it was so pretty!


The gown itself was a deep purple. The "sash" was black and textured to look like feathers. The feathers had orange shimmer and the dress had orange polka dots.


I enjoyed making the cake. However, for some reason, a stray cat from the neighborhood decided to take that night to come sit outside my back door and cry the ENTIRE time. It took 4 people to get that cat out of my yard...and it just ended up coming back the next day to play with Little Butt.


The cake was a boxed butter pecan cake. And the frosting was a rum buttercream. I had never had a butter pecan cake but it tasted like a pancake.

So there you have it. That is my most recent decorated cake. I want to start posting these so I don't end up having to post a big cake decorating post like last time.

Tuesday, October 11, 2011

Pumpkin Maple Trifle & Giveaway Winner!


So I have some news.

Yes, I have news about the giveaway winner but you are just going to have to wait for that one.

The news I have is that...

I am now a Pampered Chef consultant!

I love The Pampered Chef so much that a friend of mine talked to me about the idea of selling it a few months ago.

I hadn't had the baby yet so I put it on the back burner.

Then...I just kept thinking about it. I finally decided to do it and I'm kind of excited.

I even have my own personal website.

I already have some shows set up and I'm ready to get started. I just have to wait for my kit to get here.

To celebrate my love of the product and my new venture, I'm sharing a Pampered Chef recipe today.

What I love about The Pampered Chef recipes is that they are super easy to make.

Let me show you what I mean:


Start with making the maple walnuts. Toss some butter and maple syrup in a sauce pan until butter melts. Throw in the walnuts and stir until well coated. Continuously stir until the nuts are toasted.


Place the maple walnuts on some parchment paper and set aside to cool


In a large bowl, toss together graham cracker pieces and hot syrup until the crackers are well coated. Set aside.


In a medium mixing bowl, whisk up the pudding mix and milk. Then add the pumpkin and cinnamon.


Then fold in the whipped topping. Set aside.


In a small mixing bowl, mix together the remaining maple syrup and whipped topping. Throw the trifle together and refrigerate for a few hours to let the flavors develop.


Serve and enjoy!!

Pumpkin Maple Trifle
Adapted from The Pampered Chef Simply Sweet


Ingredients:
  • 2 Tablespoons butter
  • 1 cup chopped walnuts
  • 1/2 cup plus 6 Tablespoons pure maple syrup
  • 1 box (14.4 ounces) whole graham crackers
  • 1 package (3.4 ounce) cheesecake instant pudding and pie filling
  • 1/2 cup milk
  • 1 can (15 ounces) pumpkin puree (not pumpkin pie filling)
  • 2 teaspoons ground cinnamon
  • 1 container (12 ounces) frozen whipped topping, thawed
Directions:
  1. Make the maple walnuts: combine butter and 3 Tablespoons maple syrup in a saucepan. Cook on medium heat until butter melts. Add walnuts and stir constantly about 5-7 minutes or until walnuts are evenly toasted. Place on parchment paper and allow to cool.
  2. Break up graham crackers and place in a large mixing bowl. 
  3. Pour 1/2 cup of maple syrup into a microwave safe bowl and heat in the microwave for 60 seconds. Pour syrup over graham crackers and toss to evenly coat. Set aside.
  4. In a medium mixing bowl, whisk together pudding mix and milk until well combined. Add pumpkin puree and cinnamon. Mix to combine. Fold in 2 cups of whipped topping until there are no more white streaks. Set aside.
  5. In a small bowl, combine the remaining whipped topping and remaining 3 Tablespoons maple syrup and fold until well blended.
  6. Fill a decorator bag with 2/3 cup of the maple cream and set aside.
  7. Assemble trifle: place 1/3 graham crackers evenly in the bottom of a trifle bowl. Top graham cracker layer evenly with 1/2 the pumpkin filling. Top with 1/3 graham crackers. Top with remaining maple cream. Top with final 1/3 graham crackers. Top with remaining pumpkin filling. Break up maple walnuts. Decorate the top of the trifle with the decorator bag of maple cream and the maple walnuts.
  8. Refrigerate trifle for 4 hours or overnight.
  9. Serve and enjoy!

And finally!! The giveaway winner.

Chosen from random.org

The winner is....


Sarah, please email me your address at mannadonn[at]msn[dot]com

Thanks to everyone who entered this giveaway!!!!

Friday, October 7, 2011

Root Beer BBQ Pulled Pork

Don't forget to enter my giveaway HERE!


Well...this is definitely NOT what I wanted to share with you today...

See...I had this thought in my head that I would celebrate my favorite month (October) with nothing but Halloween treats and pumpkin goodies.

I have a delicious pumpkin recipe to share with you, but unfortunately flickr was being mean to me last night and wouldn't let me upload pictures.

My mornings are usually taken up by getting me and the two kids ready before having to take Little Butt to school, so I tend to start setting up my blog posts the night before.

But lucky for you, flickr wouldn't let me do that last night so I'm sharing this delicious recipe instead!

Pulled pork is super easy to make.

I only recently discovered just how easy it really is.

Once I found out the trick, I've been a pulled pork making machine!

Not really. I've only made it about 4 times in the last 4 months. Once a month...that's not bad right??

The only negative I've ever had to say about this stuff is that it makes SO much! (I never think to half a recipe)

When it's just me, a 4 year old and an infant, pulled pork for days can get a bit old.

HOWEVER! This last time I made it, I took the leftovers and made BBQ pulled pork nachos.

Go ahead...think that one over. I'll give you a minute.

...........

You back? Awesome!

You hungry for pulled pork that can then be made into the most amazing nachos ever??

Let's get cooking then!


Cut the tenderloin lengthwise to get four pieces. Sprinkle both sides of meat with the magic four ingredients.


Toss the pork in a crockpot and pour in the root beer.


If any of the meat pokes out of the top of the root beer, cover it with some BBQ sauce. Cook that up for a good 6 hours or so.


The meat should shred easily when attacked with two forks. Pour off the excess juices after shredding the meat, then smother with BBQ sauce. Cook for another 30 minutes to an hour.


Serve it up and enjoy!!

Root Beer BBQ Pulled Pork

Printer Friendly Version

Ingredients:

  • 2-2 1/2 pounds boneless pork tenderloin
  • 24 ounces root beer
  • 20 ounce bottle BBQ sauce
  • garlic powder
  • onion powder
  • garlic salt
  • pepper
Directions:
  1. Slice tenderloin lengthwise so you have 4 long pieces.
  2. Sprinkle both sides of each piece with garlic powder, onion powder, garlic salt and pepper. Place in crockpot.
  3. Pour root beer over the pork tenderloin. 
  4. Baste any pieces of tenderloin that are not covered by the root beer with BBQ sauce.
  5. Cook on low about 6-8 hours.
  6. Shred pork and pour off excess juices.
  7. Add BBQ sauce and stir to coat well.
  8. Let simmer another 30-60 minutes.
  9. Serve and enjoy!!

Tuesday, October 4, 2011

Candy Corn Bark & A Giveaway {Giveaway Closed}


I read an article recently about how people don't really like candy corn anymore.

Apparently, candy corn is an outdated Halloween treat and many people don't think it should still be around.

Reading this made me start doing a poll among my family and friends.

The results did not make me happy. I found more people dislike candy corn than like it.

I LOVE candy corn.

I look forward to enjoying it every year.

I can't get enough of the stuff!

And the pumpkins??? The pumpkins are just plain heaven.

When I grabbed a Halloween treat magazine while I was grocery shopping a few weeks ago (yes, I am a total impulse shopper) I knew that I had to make this candy corn bark immediately!!

And guess what! Those people who "don't like candy corn" sure didn't turn their noses up at this bark.

I even bought the stuff to make it again when I went grocery shopping a couple days ago.

I must warn you though, this stuff is addicting!

So make it at your own risk!

Let me show you how stinking easy it is to make:


Throw your almond bark in a microwave safe bowl and microwave, stirring every 30 seconds, until smooth.


Stir in the candy corn.


Stir in the pretzel pieces.


Spread the mixture over your prepared baking sheet. Sprinkle more candy corn on top and press down into the bark a bit. Let cool for an hour or more. Break into pieces.


Serve and enjoy!!

Candy Corn Bark
Retrieved from Betty Crocker Best Halloween Recipes 2011

Printer Friendly Version

Ingredients:

  • 24 ounces vanilla flavored candy coating (almond bark), chopped
  • 2 cups broken pretzel sticks
  • 2 1/2 cups candy corn
Directions:
  1. Spray a 15x10x1 inch pan with cooking spray then line with waxed paper.
  2. Place the almond bark in a large microwaveable bowl and microwave, stopping to stir in 30 second increments, until smooth.
  3. Mix in 2 cups of the candy corn.
  4. Mix in the pretzel pieces.
  5. Smooth mixture evenly onto prepared pan.
  6. Sprinkle remaining 1/2 cup of candy corn onto the top of the mixture, press into candy coating to stick.
  7. Allow to set, at least one hour.
  8. Break into pieces.
  9. Serve and enjoy!!


{This giveaway is closed}
Now on to the giveaway!!

A couple months ago, my BFF sent me the Scentsy cupcake warmer and the Happy Birthday scent as an early birthday present (my birthday is at the end of this month).

I decided that since I didn't have to buy one for myself, I would buy one for you!

Then...I had a baby...and didn't get a chance to do the giveaway.

Then I decided to wait until I hit 100 followers to do this giveaway.

And guess what...we hit it!! I have 100 followers now!! Thank you guys so much for hanging around!!

And since I love and appreciate you all SOOOOO much, I can't wait for one of you to have this. I love mine and I drool every time I walk into my house and it smells like funfetti cake without me having to turn my oven on!

So here are the deets:


You can win this Cupcake Scentsy warmer.

And a bar of the Happy Birthday scent.


To enter to win this giveaway, answer this question:
(be sure to leave your email with the comment)

What is your favorite Halloween candy?

For extra Entries
(Leave a comment for each additional entry)

1. Follow Jolts & Jollies through Google Friend Connect or RSS Feed

2. "Like" Jolts & Jollies on Facebook

3. Follow @mannadonn on Twitter

4. Tweet about this giveaway, including the link (can do this daily, just leave a comment each day)

5. Blog about this giveaway, including the link

6. Facebook this giveaway, including the link (can do this daily, just leave a comment each day)


That is an incredible amount of possibilities to win! 

This giveaway will end on Monday, October 10th at midnight. The winner will be announced on Tuesday, October 11th. Good luck!!
Related Posts with Thumbnails