Friday, September 30, 2011

Individual Oreo Cheesecakes (Halloween Style)


I know I've said this before...but where has this year gone??

It seems like it is just flying by.

But I am BEYOND excited that tomorrow is the first day of October. October is probably my favorite month of the year.

Not only is Halloween in October, but the month marks the beginning of cooler weather, pumpkin season, and well...the fact that my birthday is in October doesn't hurt either.

This year October is especially exciting because The Hubble comes home for 2 weeks!! We haven't seen him for more than 2 days at a time since May and I'm so ready for him to be home...if only for 2 weeks.

October also marks Horror month for me. I tend to watch a ton of Horror movies and read Horror type books.

It's my favorite month. ;-)

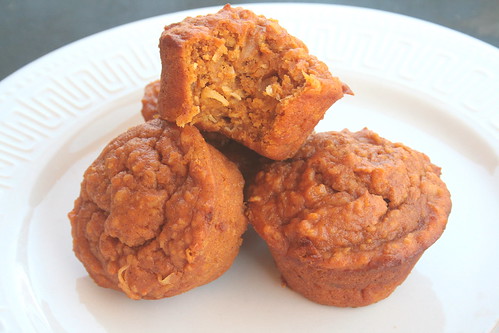
A couple months ago, my Niece and I decided that we were going to bake our way through Martha Stewart's Cupcakes book.

So far, we have made 3 cupcakes from the book. LOL! We sure are over achievers aren't we???

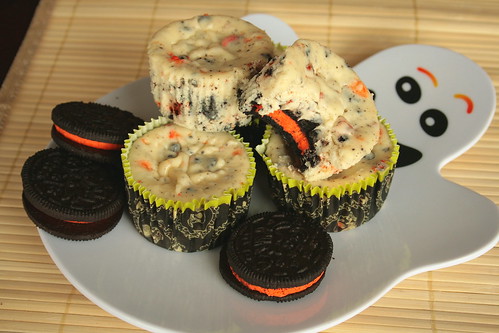
My Nephew-in-Law chose the individual Oreo cheesecakes about a month ago and I kept putting them off. I had made them before and was not terribly impressed with them.

However, I got to thinking that if I just used the Double Stuffed Oreos that would push these over the edge of deliciousness.

Then I saw the Halloween Oreos! They were thicker than regular Oreos AND they were orange! (I love the color orange)

I quickly grabbed a package and the other needed ingredients and finally made these single serving cheesecakes.

I must say, I was reluctant to try them. I hadn't liked them in the past (I'm not a cheesecake person) so what made me think I would like them now?

Luckily, I did try them. Because they were amazing! I think the orange cream inside made these taste better than normal.

I ended up eating a half dozen of these on my own, and looking at the pictures makes me sad that I don't have them anymore.

I guess that means that I have to make more before the Halloween Oreos leave the shelves! Maybe I'll make them for The Hubble's homecoming.

Who knows...

What I do know, is that these are a MUST make! So drop what you are doing and go find these cookies!

Let's bake!


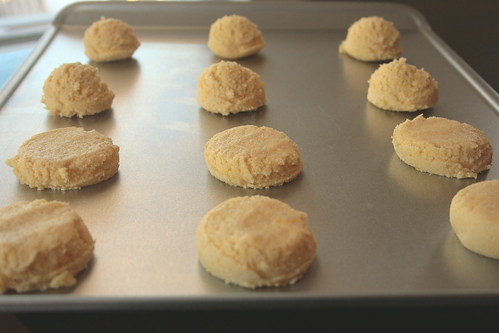
Line a couple muffin tins with cupcake liners then drop a whole cookie at the bottom of each.


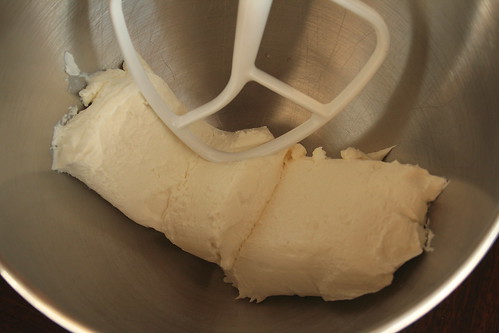
Beat your cream cheese until smooth.


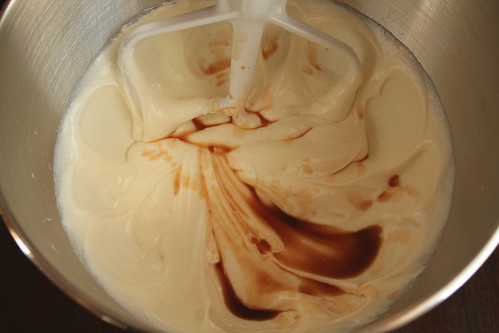
Gradually mix in the sugar. Then add the vanilla.


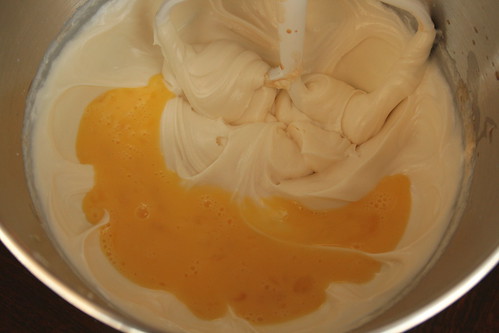
Beat in the eggs, a bit at a time.


Then add your sour cream and salt.


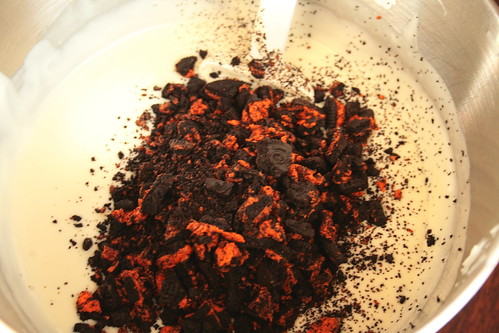
Grab the bowl off the mixer and stir in the cookie chunks by hand.


Fill up each cookie filled cup with batter. Don't be afraid to fill them to the top...they don't rise. Bake them up, cool them down then refrigerate for a good four hours, or up to overnight. (Leave them in the tins through the whole cooling and refrigerating process.


Remove from tins, serve and enjoy!!


Individual Oreo Cheesecakes


Ingredients:
  • 42 Oreo cookies, 30 left whole, 12 coarsely chopped (I used the Halloween Oreos: 18 left whole, 12 coarsely chopped)
  • 2 pounds lower fat cream cheese, room temperature
  • 1 cup sugar
  • 1 teaspoon pure vanilla extract
  • 4 large eggs, room temperature, lightly beaten
  • 1 cup light sour cream
  • Pinch of salt
Directions:
  1. Preheat oven to 275 degrees F. Line standard muffin pans with cupcake liners. Place one whole cookie in the bottom of each lined cup.
  2. In a large mixing bowl, on medium high speed, beat cream cheese until smooth, scraping down the sides of the bowl as necessary.
  3. Gradually add the sugar and beat until combined.
  4. Beat in vanilla.
  5. Add the eggs, a bit at a time, beating to combine. Scrape down the sides of the bowl as necessary.
  6. Beat in sour cream and salt.
  7. Remove bowl from mixer and stir in chopped cookies by hand.
  8. Divide batter evenly among cookie filled cups. Fill each liner almost to the top (don't be afraid, they don't rise).
  9. Bake until filling is set, about 22 minutes, rotating the tins halfway through.
  10. Transfer tins to wire rack to cool completely.
  11. Leave in tins and refrigerate 4 hours or up to overnight.
  12. Remove from tins immediately before serving, serve and enjoy!!

Tuesday, September 27, 2011

Peanut Butter Bundt Cake with Chocolate Butterfinger Ganache


There is something magical about the combination of chocolate and peanut butter.

Whenever I eat a Reese's peanut butter cup or a Butterfinger candy bar...I tend to feel giddy like a kid.

My favorite Blizzard is the Butterfinger Blizzard. I love it so much and, again...I get that giddy feeling whenever I have one in hand.

So, it should come as no surprise, when I was trying to decide on my last Cake Slice cake from Cake Keeper Cakes by Lauren Chattman (and my family demanded a chocolate option) that I would choose the one with the chocolate and the peanut butter.


But what really sealed this cake for me was the chopped Butterfinger on top! 


I mean, HELLO!! Who could resist that??


Not me!


This cake was super fun to make (I love bundt cakes and think they are an under appreciated dessert) and it was tasty too.


The only issue I had with this cake is that it seemed a bit dry. The ganache was mandatory when eating each bite. 


If you make this cake, I would suggest maybe upping the amount of sour cream in the recipe. Maybe by a 1/2 cup or so. 


But either way, the cake disappeared quickly and there were definitely no complaints from anyone besides me!


Let's bake!


In a large glass measuring cup, whisk together the eggs, sour cream and vanilla.


In a medium mixing bowl, whisk together the flour, baking powder, baking soda and salt.


Now cream together your butter, peanut butter and brown sugar.


Add 1/3 of the flour mixture and mix it up.


Then add 1/2 the sour cream mixture and mix that up. Now add the rest of the stuff in an alternating method, mixing in each addition: 1/3 flour mixture, remaining 1/2 sour cream mixture then remaining 1/3 flour mixture.


Pour the batter into the bundt pan and spread it evenly. Then bake that baby up! Let it cool...


Then toss some butter, chocolate chips and hot cream together to make a ganache.


Pour the ganache over the cake, letting it fall down the sides. Then top with the chopped Butterfinger.

Now slice, serve and enjoy!

Peanut Butter Bundt Cake with Chocolate Butterfinger Ganache
Adapted from Cake Keeper Cakes by Lauren Chattman


Printer Friendly Version


Ingredients:

For the Cake
  • 1 cup sour cream
  • 3 large eggs
  • 2 teaspoons pure vanilla extract
  • 2 1/4 unbleached all purpose flour
  • 1 teaspoon baking powder
  • 1/2 teaspoon baking soda
  • 1/2 teaspoon salt
  • 1/2 cup (1 stick) unsalted butter, softened
  • 1 cup creamy peanut butter
  • 1 1/2 cups packed light brown sugar
For the Ganache
  • 1 cup semi sweet chocolate chips
  • 2 Tablespoons unsalted butter
  • 3/4 cup heavy cream
  • 1 Butterfinger bar (60 grams), finely chopped
Directions:

For the Cake
  1. Preheat oven to 350 degrees F. Spray a 12-cup bundt pan with baking spray.
  2. Whisk together the sour cream, eggs and vanilla in a large glass measuring cup.
  3. In a medium mixing bowl, whisk together the flour, baking powder, baking soda and salt.
  4. In a large mixing bowl, on medium high speed, cream together the butter, peanut butter and brown sugar until fluffy, about 2 minutes; scrape down sides of the bowl once or twice as necessary.
  5. Turn the mixer to low and add 1/3 of the flour mixture and beat until incorporated. 
  6. Add 1/2 the sour cream mixture and beat until incorporated. Repeat; add 1/3 flour mixture, 1/2 sour cream mixture then remaining 1/3 flour mixture, beating until incorporated and scraping down sides of bowl after each addition. 
  7. Turn mixer back up to medium high speed and beat for 1 additional minute.
  8. Pour batter into prepared pan and smooth out with rubber spatula. 
  9. Bake until a toothpick inserted in the center comes out clean, about 40-45 minutes.
  10. Let cake cool in the pan for 5 minutes then invert onto a cooling rack to cool completely.
  11. Once cake is cool, make the ganache: place butter and chocolate in a medium heat proof bowl. Heat cream in a small saucepan until just boiling. Pour hot cream over butter and chocolate, let sit for 30 seconds then whisk the mixture until smooth. 
  12. Pour the warm glaze over the top of the cake, letting it drip down the sides.
  13. Sprinkle with chopped Butterfinger bar.
  14. Let stand until ganache is set, about 30 minutes.
  15. Slice, serve and enjoy!

Friday, September 23, 2011

Grilled Peach Salad with Candied Pecans and Feta


You know what's crazy???

I'm sharing a salad with you today!!

You know what's even crazier???

I made salad!!!

I'm not really a salad person. In fact, I'm not really a vegetable person. I think I may have mentioned this before.

The only way it seems that I can stand veggies is if I roast them...but that's another day, another blog.

I will tell you that I don't often order salad.

I will order a salad to precede a meal...but I'm not one of those people who order a salad as the meal. (Unless I'm at Cheddar's, then I order the Chicken Caesar Pasta Salad...but I don't think that counts)

I recently joined a local book group and the book we read was The Peach Keeper by Sarah Addison Allen. (By the way, I loved the book so much I ended up reading all her other books as well).

When I contacted the hostess for this month's meeting, I asked her what I could bring. She mentioned that salad was always a good addition. Blah. Salad?? Really?? Okay...

I figured I would just make my standard green salad with tomato, cucumber and bell pepper. BUT, when I was in the shower one day (where all great ideas are born) I was wracking my brain trying to think of something peach themed I could bring to this group. Then I came up with this combo of grilled peaches, red onion, candied pecans and feta cheese.

I asked a couple friends what they thought of the sound of this salad and everyone seemed to be interested. So I put it together for a trial run several days before the meeting.

The salad was a huge hit!! Even mandatory-in-every-meal-meat-eaters exclaimed how good the salad was.

So I went with it.

I put it together that day and took it to the meeting that evening.

It was met with the same reaction! The ladies at the group loved it and a couple even went back for more. I'll take it!

I know the warm weather days are coming to an end and fresh salads will be pushed aside for comforting soups and stews. But before the last days of Summer fly by without a backward glance I suggest you try this salad.

Here's how you can throw yours together as well:


Mix up your pecans with some choice spices then toss them in the oven until dry.


Cut and pit your peaches, then slice again to make four round peach pieces...


Then toss those babies on the grill. Do you love my new Pampered Chef grill pan??? I sure do!! Especially since outdoor grilling is currently outlawed due to the drought we are experiencing in Austin.

After these are grilled, cut them into bite sized chunks.


Place the greens on a plate, top with onion, feta, pecans and grilled peaches. Drizzle with balsamic vinaigrette. Serve and enjoy!!

Grilled Peach Salad with Candied Pecans and Feta

Printer Friendly Version

Ingredients:

  • 1 bag of green salad (I used the 50/50 blend with spring greens and baby spinach)
  • 1 large peach (choose a firm one)
  • 1/2 red onion, halved and sliced
  • candied pecans* (recipe follows)
  • 1/2 block reduced fat feta cheese, crumbled
  • balsamic vinaigrette
Directions:
  1. Cut peach in half and remove pit. In same direction, slice the halves again so you have four round pieces of the peach. 
  2. Grill the peach slices until grill lines appear and the flesh is heated through. Remove from grill, allow to cool and cut into bite sized chunks.
  3. Top salad greens with red onion, candied pecans, feta and the grilled peach chunks. 
  4. Drizzle with balsamic vinaigrette.
  5. Serve and enjoy!!
*Candied Pecans

Ingredients
  • 1 (10 oz) bag pecan halves and pieces
  • 1 large egg white
  • 1/2 cup granulated sugar
  • 1 teaspoon ground cinnamon
  • 1/2 teaspoon salt
Directions
  1. Preheat oven to 350 degrees F. Line a baking sheet with parchment paper.
  2. In a small mixing bowl, combine the sugar, cinnamon and salt until thoroughly combined.
  3. In a separate mixing bowl, toss the pecans in the egg white until well coated.
  4. Add the cinnamon sugar mixture to the pecans and toss until well coated with seasoning.
  5. Place pecans in a single layer on the baking sheet. 
  6. Bake until dry, about 20 minutes, stirring halfway through.

Tuesday, September 20, 2011

Mango Upside Down Cake


Once upon a time I used to be a crazy picky eater.

I mean, I wouldn't even try beef and broccoli because it was not traditional "American" fare.

I liked bologna and cheese sandwiches, macaroni and cheese, and hot dogs.

I did end up trying beef and broccoli...and I loved it! Now I can't get enough Chinese food. Mmmmm...that sounds good!

I have also expanded my horizons quite a bit in the last 4-ish years.

My taste buds changed when I had Little Butt. For some reason, the moment I gave birth to her, things changed.

That night, in the hospital, I ate steamed spinach for maybe the first time ever.

A couple months after she was born, I ate red onions...before Little Butt, you couldn't have gotten me to even consider eating something with onions in it.

Now that I have given birth to my second baby, Baby N, it seems like I'm all out of whack again.

Food doesn't seem appetizing at all. I find myself realizing at about 3pm that I haven't eaten at all. I just don't want to eat anymore.

But that doesn't prevent me from making yummy things for others in my life.

Today is Cake Slice Baker time! For our last month baking from Cake Keeper Cakes by Lauren Chattman we were given the option to make any cake from the book that we wanted.

I went through the entire book and wrote down about 13 different cake titles. Then I took a poll amongst my family members to decide which one they wanted to try. There were 2 winning cakes. Today I am going to share the first one with you...a mango upside down cake.

I only took one bite of this cake...it went too quickly! My Father in Law didn't want to share. When someone would eat a piece, they always went back for a second piece.

This cake was good. It was sweet, with a nice tropical flavor from the mango. It was sticky and moist. The one bite I got, I really enjoyed.

If you are interested in joining The Cake Slice Bakers, now is the time! The group is being opened up to new members for the new book we will be baking from.

If you want to join, here's what you do: email Katie with the following info:


Name 
Blog Name
Blog URL 
and email address to appleandspice[AT]hotmail[DOT]co[DOT]uk  with 'New Cake Slice Member' as the subject.

There are a limited number of new spaces available so make sure you jump on this chance quickly. I hope to see you in the group!

Until then, let's talk mango upside down cake!


Start by heating the butter until foaming, then whisk in the brown sugar. Now stir in the rum. (Sorry for the annoyingly blurry picture!)


Pour the brown sugar mixture into your prepared pan, tilting it to make sure the bottom of the pan is completely covered. Then sprinkle the coconut and macadamia nut evenly on top of that.


Place the sliced mango evenly over the top of the nut mixture. Set aside the pan.


Whisk together the flour, salt and baking powder.


Whisk the egg whites until they just come to a stiff peak. Then transfer to another bowl so you can use this bowl again.


Toss the sugar and egg yolks into the bowl (no need to wash it) and beat until light, fluffy and increased in size.


Mix in the lime zest, milk and vanilla.


Then mix in the flour mixture until smooth.


Gently fold in the egg whites...


Then pour the batter evenly over the mangoes in the pan. Bake it up until a toothpick inserted in the center of the cake comes out clean, about 40 to 45 minutes.


When the cake is done, immediately invert it onto a cake plate, scraping any bits out of the bottom of the pan if they have stuck on. Allow to cool about 20 minutes.


Slice, serve and enjoy!!


Mango Upside Down Cake
Slightly Adapted from Cake Keeper Cakes by Lauren Chattman

Printer Friendly Version

Ingredients:

For the Topping

  • 1/2 cup (1 stick) unsalted butter
  • 3/4 cup packed dark brown sugar
  • 2 Tablespoons Spiced Rum
  • 1/3 cup sweetened flaked coconut
  • 1/3 cup unsalted macadamia nuts, finely chopped
  • 2 medium mangoes, peeled, pitted and thinly sliced
For the Cake
  • 1 cup unbleached all purpose flour
  • 1 teaspoon baking powder
  • 1/4 teaspoon salt
  • 3 large eggs, separated
  • 1 cup granulated sugar
  • 1 teaspoon grated lime zest
  • 6 Tablespoons milk
  • 1 teaspoon pure vanilla extract
Directions:

Make the Topping
  1. Preheat the oven to 350 degrees F. Spray a 9 inch round cake pan with baking spray.
  2. Heat the butter in a medium saucepan over medium heat until foaming. 
  3. Whisk in the brown sugar, turn the heat to low and cook, whisking, for 2 minutes. 
  4. Stir in the rum. 
  5. Scrape the mixture into the prepared pan and tilt to cover the bottom of the pan. 
  6. Sprinkle the coconut and macadamia nuts over the sugar mixture.
  7. Arrange the mango slices on top. 
  8. Set aside.
Make the Cake
  1. In a medium mixing bowl, whisk together the flour, baking powder and salt.
  2. In a large mixing bowl, bet the egg whites with an electric mixer until they just hold stiff peaks. Transfer to another bowl.
  3. Place the granulated sugar and egg yolks in the same large mixing bowl (no need to wash it) and beat on medium high speed until pale yellow and increased in volume, about 5 minutes. 
  4. Mix in the lime zest, milk and vanilla.
  5. Stir in the flour mixture until smooth.
  6. Gently fold the whipped egg whites into the batter.
  7. Pour the batter over the mangoes, gently spread the batter evenly with a spatula.
  8. Bake until the cake is golden and a toothpick inserted into the center comes out clean, about 40 to 45 minutes. 
  9. Immediately invert the cake onto a plate, scraping off any bits left in the pan.
  10. Let the cake cool about 20 minutes.
  11. Slice, serve and enjoy!!

Wednesday, September 14, 2011

Apple Cinnamon Carrot Coconut Muffins


I don't really know what I was going to say for this post earlier...but now all I can think about is my aching ankle and knee.

See...I feel like I'm on the run all the time now.

Baby N's doctor found a mass in his neck last week. We went for a scan and it is not cancerous, thank goodness!

He has something called Torticollis. Basically, the muscle on one side of his neck is bunched up and is preventing him from being able to turn to the left (the reference to Zoolander does not escape me here). With the Torticollis he needs physical therapy at least once a week and I have to do neck stretches with him several times a day.

Then there is the whole running Little Butt to and from school thing. I'm not ready to let her ride the bus yet (even though she really wants to look all around inside) so I've been taking her and picking her up.

Today, I was taking her to school and carrying Baby N in his carseat/carrier thing and my left ankle found a hole in the ground. I twisted my ankle really good and scraped up my right knee. Blah!! I also kind of landed on the baby...but he's fine!

Poor Little Butt was so traumatized though! Mommy's are NOT supposed to get hurt. She cried and cried until her teacher took her inside. I'm still not sure if she has stopped crying...poor thing.

Anyway, since I'm on the run constantly nowadays it helps to have quick and lower fat options for breakfast. These muffins really do the trick for me. I mean, you dump some stuff in a bowl, stir it up and bake it! Easy peasy!

This recipe is basically doctored up muffin mix. But it is so worth it. If you are not averse to using boxed cake mix then you will be totally cool with making these muffins. They are too easy and delicious not to make them!

Here's what you do:


Mix all the ingredients together in a large bowl until combined.


Spoon the batter into the muffin pan until each one is about 2/3 full. And bake! Let them cool when they come out of the oven.


Serve and enjoy!!

Apple Cinnamon Carrot Coconut Muffins


Ingredients:
  • 1 (19oz) box apple cinnamon muffin mix (I used Duncan Hines)
  • 4 (4oz) jars organic carrot baby food puree
  • 1 cup shredded coconut
  • 1/4 cup apple juice
  • 1 teaspoon ground cinnamon 
  • 1/2 teaspoon ground ginger
Directions:
  1. Preheat oven to 400 degrees F. Spray a muffin pan with baking spray.
  2. In a large mixing bowl, mix together all ingredients until combined.
  3. Spoon batter into prepared muffin pan, filling each muffin cup about 2/3 full.
  4. Bake until tops are golden and a toothpick inserted in the center comes out clean (there will be a few crumbs), about 20-25 minutes.
  5. Cool in the pan on a cooling rack about 10 minutes. Remove from pan and allow to cool completely.
  6. Serve and enjoy!!

Wednesday, September 7, 2011

Lemon Cornmeal Cookies


I have always been a huge fan of lemon desserts.

There is something about the citrusy tang from the lemon and the sweet from the sugar that gets me every time.

When I make a lemon dessert, I'm often reminded of the bittersweet nature of life as well.

How can these two flavors, the bitter and the sweet, work together in such harmony??

This last weekend, The Hubble was able to come for another quick weekend visit. These visits are usually no more than 2-3 days. This time, he flew in on Friday afternoon and had to leave again Monday afternoon.

Though the visit was amazing, it was way too short. And I also know that it was the last quick weekend visit we will have. Bittersweet.

The next visit we will have from The Hubble is going to be about 2 weeks! I love that we will have him so long, but I also know that will be the last time we will see him before he deploys. Bittersweet.

My Father in Law is here this week. He came over the weekend (which is why The Hubble surprised us with another visit). The time with him, my Mother in Law and the kiddos has been exceptional...but that means they are leaving this weekend. Bittersweet.

I am definitely the kind of person that believes you can't know good without knowing the bad so I do understand how bitter and sweet can make such a great marriage. Without one, we wouldn't know the other right??

Now, on to these cookies.

As the weather is starting to cool off and Autumn is slowly making her presence known, we should savor these last moments of summer.

And what better way to do that than a light, yet hearty lemon cookie??

These had just the right amount of lemon balanced with the sugar. I loved the added texture from the cornmeal in this cookie. It really gave it that something extra.

I suggest you make these cookies and share them with loved ones. And consider how wonderful life really is!!

(Please read all the way to the end of this post, after the recipe. Thanks!)


In a small mixing bowl, combine the flour, zest, salt and cornmeal.


In a large mixing bowl, combine the butter, sugar, egg and lemon juice until incorporated.


Add in the dry ingredients a little at a time until just combined.


Roll about 1 1/2 Tablespoons each of dough into balls and place them on a cookie sheet. Flatten the dough slightly with your fingers into a thick disk.

Bake the cookies until the edges are a nice golden brown color. Cool them on the sheet then transfer to a cooling rack to cool completely.


Serve them up and enjoy!!

Lemon Cornmeal Cookies
Slightly adapted from Martha Stewart

Printer Friendly Version

Ingredients:

  • 1 1/2 cups unbleached, all purpose flour
  • 1 cup yellow cornmeal
  • 1 Tablespoon lemon zest
  • 1/2 teaspoon salt
  • 12 Tablespoons (1 1/2 sticks) unsalted butter, room temperature
  • 3/4 cup sugar
  • 1 large egg
  • 1 teaspoon lemon juice
Directions:
  1. Preheat oven to 350 degrees F.
  2. In a small mixing bowl, combine flour, cornmeal, lemon zest and salt. Set aside.
  3. In a large mixing bowl, mix together the butter, sugar, egg and lemon juice.
  4. Gradually add the dry ingredients to the butter and sugar mixture until just combined.
  5. Roll dough (about 1 1/2 Tablespoons each) into balls and place on cookie sheet. Use fingers or the back of a spoon to flatten dough slightly.
  6. Bake until edges are lightly golden, about 20-25 minutes.
  7. Let cool on the baking sheet a few minutes then transfer to a cooling rack to cool completely.
  8. Serve and enjoy!!


Another thing that is hurting my heart right now are the wildfires in the surrounding Austin areas. Since moving here to the Austin area, I have fallen in love with this place. But the drought has been hard and the wildfires that are exploding in the area are devastating. I am especially heartsick for those in Bastrop where the fire is still raging out of control. We have friends whose homes are being threatened out there and too many people have lost everything...including two people who have lost their lives. If there is anything you can do to help...Please consider donating to the American Red Cross of Central Texas. The families affected by these fires need so much help right now.   
Related Posts with Thumbnails