Wednesday, December 29, 2010

Guest Post: Lick the Bowl Good

Today I have a really special treat for you! It's Monica from Lick the Bowl Good!

Monica is always baking or cooking up something that is absolutely mouthwatering.

I am one lucky girl at this point. Last week, I had the pleasure of getting to meet Monica!


Monica helped me realize that I have no pictures of myself on my blog...so there ya go!

This lady is so sweet. And a ton of fun.

I found myself wanting to hang out with her every day until we left Austin.

Alas, I had family and other friends to visit while we were in town so we only got to hang out for one afternoon.

But I'm more than happy to have had even that small amount of time with her.

Luckily, I still have her blog to visit. And so do you!

Monica is sharing an incredible recipe with us today. After you read this post you should head over to Monica's blog and show her as much love as she puts into her recipes and posts.

Thanks again Monica, not only for this wonderful guest post but also for a great afternoon. I hope we have many more to come!


Hello Jolts and Jollies fans! I am Monica from Lick The Bowl Good and I am happy to be here guest posting on Maranda's blog. I "met" Maranda several months back- she was a loyal reader of my blogs and commented occasionally, but I didn't really know who she was. Then one day, she emailed me and introduced herself to me. She was so genuine and nice and we became instant blog buddies. We emailed back and forth and found out that she's from Texas and her family and I lived in the same town! How crazy is that?


Over the past few months, I've gotten to know Maranda better and I realize she likes her coffee just as much as I do. I've shared this recipe on my blog before, but I know she'd love them, so here they are again! They're loaded with butter and instant coffee/espresso, but they're light and tender and they melt in your mouth. It doesn't seem possible, but it's true. These muffins are studded with chocolate chips which adds a bit of sweetness and compliments the coffee flavor very nicely.


This recipe makes quite a bit of muffins, but it can easily be halved. Or make the full batch and freeze them in Ziploc bags, like I did. Take one or two out, thaw or nuke 'em for about 20 seconds to bring them to room temperature. They're perfect every time.

Thank you Maranda for asking me to be a guest blogger on Jolts & Jollies. I hope you and your readers will enjoy these caffeinated beauties. They're sure to put a "jolt" in your step :-)


Coffee Chocolate Chip Muffins from LTBG
Printer Friendly Version
Beat at high speed in a large bowl until fluffy:

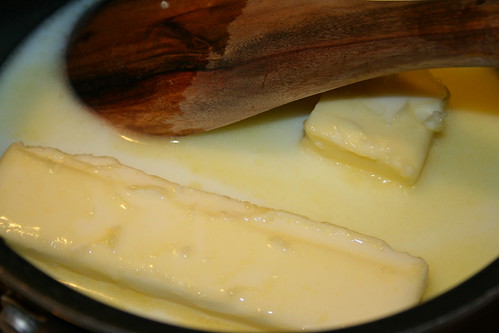
  • 3 sticks (1 1/2 cups) butter
  • 1 cup sugar
  • 1/2 brown sugar, packed
  • 2 large eggs
  • 5 tbsp instant espresso powder*
Sift in:

  • 4 cups all purpose flour
  • 2 tbsp baking powder
  • 1/4 tsp salt
At low speed add until just combined:
  • 1 cup milk
  • 1 cup chocolate chips
Scoop the batter into prepared muffin tins.
Bake at 350F for 20 - 25 minutes or until tester inserted in center comes out clean.

Makes 24-28 muffins.


Monday, December 27, 2010

Guest Post: GDK

I hope everyone had a wonderful Christmas weekend!!

Did Santa bring you everything you were hoping for??

Today we are headed from Austin to Houston for a few days. Then it's on to El Paso.

Luckily, I still have some awesome bloggers who are willing to share some yummy recipes with you while I'm traipsing through Texas.

Today we have Katie from gdk.

Katie is a fellow military spouse who makes some delicious looking casseroles and soups. Lately, she's been making sweet treats for the troops.

Today she is sharing a recipe that I've never made but have been intrigued by for a couple months now.

Thanks for sharing with us today Katie! I think you may have kicked my butt into gear so I'll be making my own marshmallows soon!

Take it away Katie:


When Maranda asked me to do a guest post, it was pretty hard to narrow down my huge list of Christmas-time recipes to one single idea.

I have a huge sweet tooth, so I cut out a third of my list and stuck with the sweets.

After a few days of asking my Marine what he liked best and him trying to convince me to do something savory or salty, I finally decided.

Homemade marshmallows.

What is more tempting than homemade marshmallows?  I think the actual definition of homemade marshmallows is:  better than anything you can buy in a bag.

Super vanilla-y and more fluffy than you can imagine, they absolutely melt in your mouth. 

And for some reason, the Christmas season always reminds me of marshmallows.

I don’t know if it’s all the hot chocolate I consume and the decadent chocolate cakes that just beg for white fluffs on top, but they just seem like an indulgent treat to have this time of year.

And hey, add a drop of mint extract or two, and a drop of red (or green!) food coloring and you’ve really got the Christmas spirit going on!

Homemade Marshmallows
Makes a ga-zillion.
Stores in a tupperware container forever and a day.
Three 1/4-oz. envelopes unflavored powdered gelatin
2 cups sugar
1 cup light corn syrup
1/4 teaspoon kosher salt
1 teaspoon vanilla
1 cup plus 2 tablespoons powdered sugar; more as needed


Pour 3/4 cup cold water into the bowl of a stand mixer.


Sprinkle the gelatin over the water.


Attach the bowl to the mixer and fit it with the whisk attachment.
Clip a candy thermometer to a 3-quart saucepan; don’t let the tip of the thermometer touch the bottom of the pan. In the saucepan, boil the sugar, corn syrup, salt, and 3/4 cup water over medium heat without stirring until it reaches 234°F to 235°F, about 10 minutes.


With the mixer on low speed, pour the hot sugar mixture into the gelatin in a slow, thin stream.


Add the vanilla, carefully increase the speed to high, and beat until the mixture has thickened and cooled, about 5 minutes (the bottom of the bowl should be just warm to the touch).


Line a 9x13-inch pan with foil, leaving an overhang on 2 sides. Sift 1 tablespoon of the confectioners’ sugar into the bottom of the pan, then pour the marshmallow mixture into the pan and sift another 1 tablespoon confectioners’ sugar on top.


*snow, right???*

Let sit at room temperature until set, at least 2 hours.
Use the foil overhang to lift the marshmallow from the pan. Using a knife that has been dipped in cold water, cut along the edge of the marshmallow to release it from the foil. Transfer to a cutting board and remove the foil. Put the remaining 1 cup confectioners’ sugar in a medium bowl. Cut the marshmallow into cubes of different sizes, from 1/4 to 3/4 inch (you will need to continue to dip the knife in cold water as you cut the marshmallows). The marshmallows will be 
very sticky—dip the cut edges in the confectioners’ sugar to make them easier to handle. As you work, toss a few cubes at a time in the sugar to coat, then shake in a strainer to remove the excess.


Store in a tupperware.
Or use to top a really decadent chocolate cake :)

Friday, December 24, 2010

Daring Bakers December 2010: Christmas Stollen


Merry Christmas (Eve)!!!!


I hope you all are enjoying your time off for the holiday. 


Usually I expect snow on Christmas but since we are currently hanging out in Austin Texas we don't really have a chance of that happening. But we'll take what we can get.


Today, I am jumping into the middle of the scheduled guest posts to share my Daring Bakers challenge with you.


The 2010 December Daring Bakers’ challenge was hosted by Penny of Sweet Sadie’s Baking. She chose to challenge Daring Bakers’ to make Stollen. She adapted a friend’s family recipe and combined it with information from friends, techniques from Peter Reinhart’s book.........and Martha Stewart’s demonstration.


Normally, the Daring Bakers posts are scheduled for the 27th of each month. But since it is a holiday, we have been given special permission this month to share our challenge anywhere between the 23rd and 27th. So I chose today...Christmas Eve.


This one was super fun (though a lot of work) and mighty tasty. 


The tart cranberries and candied citrus peel gave a sweet and sour taste to this German bread. And the almonds gave a fun crunch.


This stollen travels well so I brought it to Texas with me to share with my family and friends. There have been rave reviews all around!


Thanks for the wonderful challenge Penny! As always, if you would like to see how the other Daring Bakers did with this challenge, check out the blogroll.


So let's go make some Christmas stollen!


First, we need to make our candied citrus peel. I used this recipe and altered the amounts to my needs. You will need oranges, lemon, sugar and water. Easy right? Just beware: this is time consuming!


Chop off the ends of your oranges and lemons then cut them in half. Gently spoon out the flesh inside.


Cut the citrus peel in thin strips (about 1/4 inch wide). For this recipe I cut mine into smaller chunks.


We will start with the blanching process. Place the citrus peel in a small pot. Cover with cold water.


Turn the heat on high, bring the water to a boil. 


Drain and rinse the peel. Then start all over. You want to blanch the peel at least 3 times. This helps the bitterness in the peel go away.


Now dissolve the sugar in the water. Bring to a boil and allow to boil, untouched, until the syrup reaches 230 degrees F.


Pour the peel into the syrup and let simmer for 30-45 minutes or longer...until the peel becomes translucent.


Lay the candied peel on parchment paper and allow to dry. This takes at least a few hours, if not days.


Once the peel is dry you can get started on the dough. Grab your ingredients: unbleached all purpose flour, milk, sugar, rum, sliced almonds, ground cinnamon, salt, active dry yeast, lemon extract, vanilla extract, an orange, a lemon, eggs, butter, dried cranberries and the candied citrus peel.


Soak the cranberries in the rum. Set aside for at least 5 minutes.


Lightly beat the eggs. Add in the vanilla and lemon extracts.


In a large mixing bowl, stir together the flour, orange zest, lemon zest, ground cinnamon, sugar and salt.


In a small bowl, sprinkle the yeast over the warm water. Set aside for 5 minutes (it doesn't foam up). After 5 minutes, stir to dissolve the rest of the yeast into the water.


In a small saucepan, melt the butter into the milk. Set aside about 5 minutes until the mixture cools to a lukewarm temperature.


In an electric mixer with the paddle attachment, mix together the flour mixture, egg mixture and yeast until just combined.


Add in the soaked cranberries, sliced almonds and candied citrus peel. Once mixed, cover with a tea towel and let rest about 10 minutes.


Either using a floured surface or the dough hook of the electric mixer, knead the dough until a tacky ball forms, 8 minutes on a floured surface, 6 minutes in the mixer.


Once thoroughly kneaded, lightly oil a large bowl. Place the ball of dough in the bowl, rolling it around to get the oil all over the dough. Cover the bowl with plastic wrap and place in the fridge overnight.


The dough will thicken and raise overnight. Take it out of the fridge and let it sit at room temperature for 2 hours.


Roll the dough out into a 16x24 inch rectangle. 


Starting with the long end, roll the dough into a tight roll. Then shape into a circle. Pinch the ends together to form a continuous circle.


Place the circle of dough onto a parchment lined baking sheet. Using kitchen scissors, cut slits into the dough about 2 inches apart, cutting about 2/3 of the way into the dough. Cover lightly with plastic wrap and allow to rest at room temperature for about 2 hours or until the dough is 1 1/2 times it's original size.


Bake in a preheated 350 degree F oven for 20 minutes. Rotate 180 degrees and bake another 20 to 30 minutes. The dough should be a deep brown color. 


While the stollen is still warm, spread melted butter across the top. Then sift powdered sugar over the top of the butter. Let sit a minute, then sift another coat of powdered sugar over the first one.


To thoroughly coat and "seal" the stollen, repeat the butter/powdered sugar process 2 more times (for a total of 3 times). Let sit on the counter over night to dry out a bit. 


Slice the stollen and serve it with coffee or tea for Christmas morning. Enjoy!!


Stollen Wreath
Retrieved from The Daring Kitchen


Stollen loaves. Serves 10-12 people


Printer Friendly Version
Ingredients

  • 1/4 cup lukewarm water (110º F)
  • 2 packages (4 1/2 teaspoons) active dry yeast
  • 1 cup milk
  • 10 tablespoons unsalted butter (can use salted butter)
  • 5 1/2 cups unbleached all-purpose flour
  • 1/2 cup sugar
  • 3/4 teaspoon salt (if using salted butter there is no need to alter this salt measurement)
  • 1 teaspoon cinnamon
  • 3 large eggs, lightly beaten
  • Grated zest of 1 lemon and 1 orange
  • 2 teaspoons vanilla extract
  • 1 teaspoon lemon extract or orange extract
  • 3/4 cup mixed candied peel
  • 1 cup firmly packed dried cranberries
  • 3 tablespoons rum
  • 12 red glacé cherries (roughly chopped) for the color and the taste. (optional)
  • 1 cup sliced almonds
  • Melted unsalted butter for coating the wreath
  • Powdered sugar for dusting wreath
Note: If you don’t want to use alcohol, double the lemon or orange extract or you could use the juice from the zested orange.


Directions:


Soak the raisins


In a small bowl, soak the raisins in the rum (or in the orange juice from the zested orange) and set aside. 


To make the dough

  1. Pour 1/4 cup warm water into a small bowl, sprinkle with yeast and let stand 5 minutes. Stir to dissolve yeast completely.
  2. In a small saucepan, combine 1 cup milk and 10 tablespoons butter over medium-low heat until butter is melted. Let stand until lukewarm, about 5 minutes.
  3. Lightly beat eggs in a small bowl and add lemon and vanilla extracts.
  4. In a large mixing bowl (or in the bowl of an electric mixer with paddle attachment), stir together the flour, sugar, salt, cinnamon, orange and lemon zests.
  5. Then stir in (or mix on low speed with the paddle attachment) the yeast/water mixture, eggs and the lukewarm milk/butter mixture. This should take about 2 minutes. It should be a soft, but not sticky ball. When the dough comes together, cover the bowl with either plastic or a tea cloth and let rest for 10 minutes.
  6. Add in the mixed candied peel, soaked fruit and almonds and mix with your hands or on low speed to incorporate. (Here is where you can add the cherries if you would like. Be delicate with the cherries or all your dough will turn red!)
  7. Sprinkle flour on the counter, transfer the dough to the counter, and begin kneading (or mixing with the dough hook) to distribute the fruit evenly, adding additional flour if needed. The dough should be soft and satiny, tacky but not sticky. Knead for approximately 8 minutes (6 minutes by machine). The full six minutes of kneading is needed to distribute the dried fruit and other ingredients and to make the dough have a reasonable bread-dough consistency. You can tell when the dough is kneaded enough – a few cranberries will start to fall off the dough onto the counter because at the beginning of the kneading process the dough is very sticky and the raisins will be held into the dough but when the dough is done it is tacky which isn't enough to bind the outside cranberries onto the dough ball.
  8. Lightly oil a large bowl and transfer the dough to the bowl, rolling around to coat it with the oil. Cover the bowl with plastic wrap.
  9. Put it in the fridge overnight. The dough becomes very firm in the fridge (since the butter goes firm) but it does rise slowly…the raw dough can be kept in the refrigerator up to a week and then baked on the day you want.
Shaping the Dough and Baking the Wreath

  1. Let the dough rest for 2 hours after taking out of the fridge in order to warm slightly.
  2. Line a sheet pan with parchment paper.
  3. Punch dough down, roll into a rectangle about 16 x 24 inches and ¼ inch thick.
  4. Starting with a long side, roll up tightly, forming a long, thin cylinder.
  5. Transfer the cylinder roll to the sheet pan. Join the ends together, trying to overlap the layers to make the seam stronger and pinch with your fingers to make it stick, forming a large circle. You can form it around a bowl to keep the shape.
  6. Using kitchen scissors, make cuts along outside of circle, in 2-inch intervals, cutting 2/3 of the way through the dough.
  7. Twist each segment outward, forming a wreath shape. Mist the dough with spray oil and cover loosely with plastic wrap.
  8. Proof for approximately 2 hours at room temperature, or until about 1½ times its original size.
  9. Preheat oven to 350°F with the oven rack on the middle shelf.
  10. Bake the stollen for 20 minutes, then rotate the pan 180 degrees for even baking and continue to bake for 20 to 30 minutes. The bread will bake to a dark mahogany color, should register 190°F in the center of the loaf, and should sound hollow when thumped on the bottom.
  11. Transfer to a cooling rack and brush the top with melted butter while still hot.
  12. Immediately tap a layer of powdered sugar over the top through a sieve or sifter. Wait for 1 minute, then tap another layer over the first. The bread should be coated generously with the powdered sugar.
  13. Coat the stollen in butter and icing sugar three times, since this many coatings helps keeps the stollen fresh - especially if you intend on sending it in the mail as Christmas presents!
  14. Let cool at least an hour before serving. 
  15. When completely cool, store in a plastic bag. Or leave it out uncovered overnight to dry out slightly, German style.
  16. Serve and enjoy!!
Related Posts with Thumbnails