Wednesday, September 29, 2010

Rustic Tomato Tart


I have a confession to make.

Okay....breathe...you can do this...

Here goes....

I love garlic.

There! I said it! And you heard me!

I.

Love.

Garlic.

I can't help myself. I don't care how many dates I may have ruined in the past. And anyway, I done caught my man so I can eat as much garlic as I want to and there's nothing he can do about it. He has to love me anyway.

Phew. I feel so much better that I got that off my chest.

You are probably wondering where all this came from. And if you aren't? I'm going to tell you anyway.

See...I've been trying to play catch up in my Google Reader. I have been so busy this past week that I just didn't have time to read anything. I barely eked out the posts for this blog, let alone my other one.

And let me tell you, when way behind on your friend's posts, it may not be a good idea to add more blogs to your already too long list. But sometimes, I run across a great new find and I have to stick around!

That's what has happened with Baking and Creating with Avril. This blog is new to me and I'm so glad I found it. Especially since I read her recent post about this dish I'm about to share with you. I literally ran out that day to get the finishing ingredients so I could make this meal that very night.

All I needed was the cheese so I'm telling you now...you probably already have most of the ingredients for this dish in your kitchen. It was easy and SO delicious.

I made this on a night that The Hubble had class because his usual response for things like this is "where's the meat??" However, I forgot that the meat was missing from this meal...it was THAT good.

I enjoyed this meal on my own with a glass of merlot and it was heaven.

However, as I said...I love garlic, so I often change the "salt and pepper" to "garlic salt and pepper." Why am I mentioning this now? Because I realized my obsession was a problem when I was making this dish. I realized that almost every time a recipe calls for "salt and pepper" I will change it to "garlic salt and pepper." See what I'm saying? It's a problem. And not everyone may share this love with me...but I don't care. It's GEWD!

Okay. Enough talking. Let's get cooking.


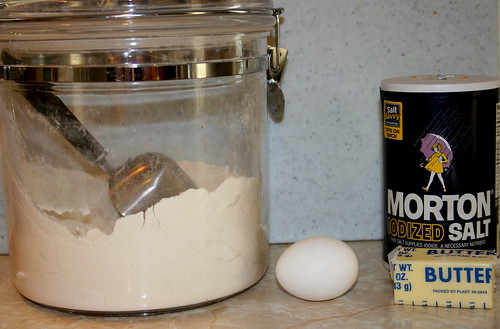
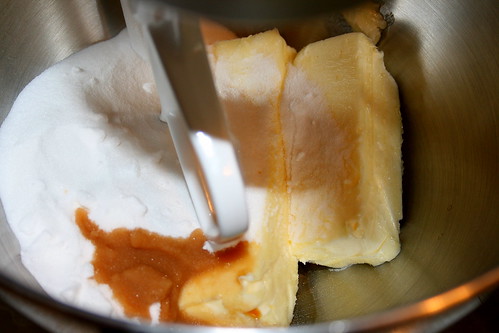
First, we start by making the crust. Grab some flour, salt, butter (cold) and an egg. I actually used salted butter for this but you can do either. I did not find it too salty either. And no...I did not change this one to garlic salt...silly!


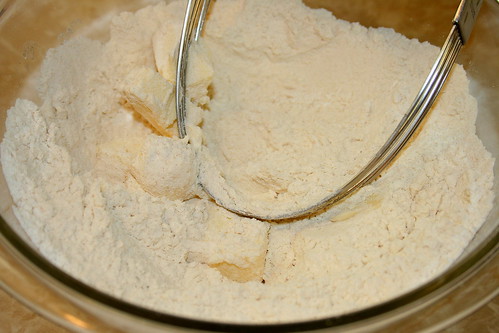
Take a pastry cutter (or two knives) and work the butter and flour together until it resembles a cornmeal type substance.


At this point you are supposed to take a separate bowl and dump in the egg and water, beat it lightly, make a well in the flour and butter mixture, then gently work it all together. Unfortunately, I didn't do that. I cracked the egg into the flour mix then dumped in the water. THEN I read the directions and realized my mistake. So I took the pastry cutter and kind of blended the egg and water in the center of the flour...it was salvaged.


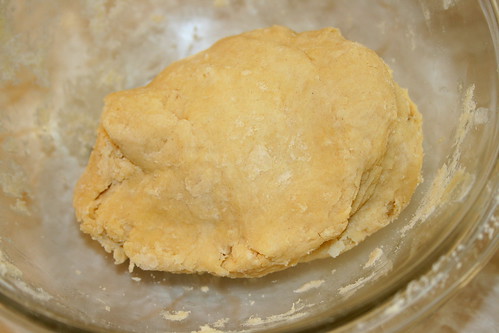
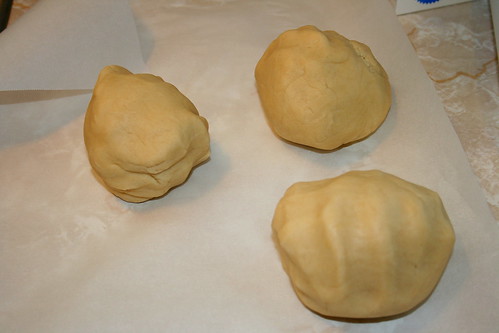
See??? You mix the egg into the flour then I ended up kneading a bit with my hands to make a ball of dough.


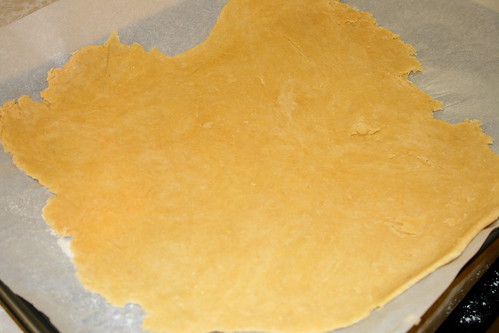
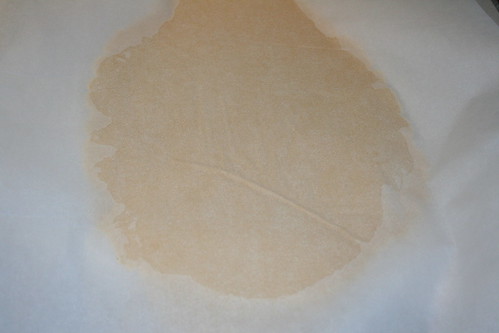
I then rolled the ball into a 14 inch "circle" onto a piece of parchment paper. When the dough was rolled out I transferred the whole thing (parchment and all) onto a baking sheet.


Now for the innards! You will need 2-3 large tomatoes (I used 2 1/2), some olive oil, mozzarella cheese (the good kind), stone ground and dijon mustards (sorry the dijon isn't in the picture), some basil (or other herbs of your choosing), pepper and...you guessed it! Garlic salt!


For this part I was planning on just using the stone ground mustard but I found out I didn't have enough. So I made a mix of dijon and stone ground mustard. Spread the mustard onto the unbaked tart shell.


Now slice the tomato and pile it up in the center of the shell.


At this point I decided I wanted to add a little balsamic vinegar because it's SO good with basil and tomato.


So you drizzle a little olive oil and balsamic vinegar over the tomatoes.


Then sprinkle on some garlic salt, pepper and basil.


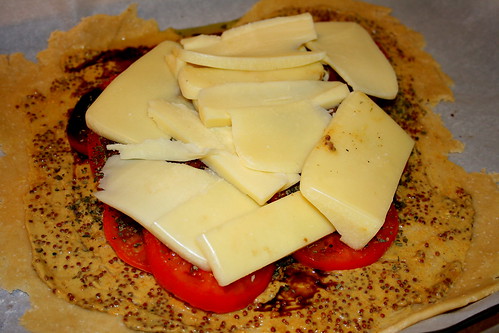
Slice up the cheese and place it on top of the tomatoes.


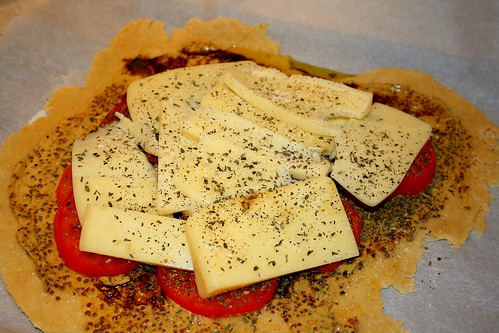
Add a bit more garlic salt, pepper and basil.


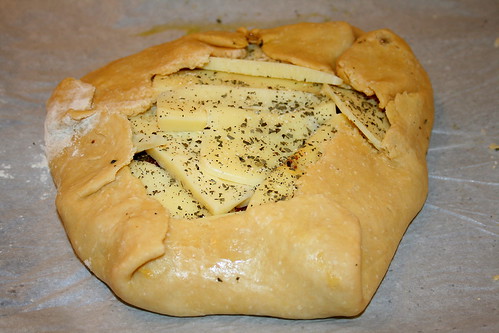
Fold up the edges of the crust over the sides of the tomatoes and cheese. At this point I considered using an egg wash because I was worried about the crust. But, I followed the directions and just left it like this.


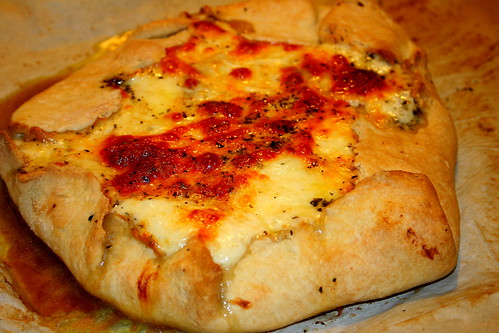
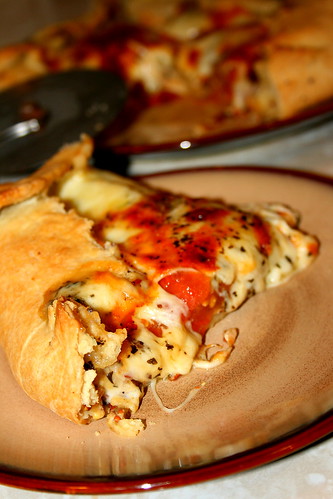
Toss it in the oven for 30 minutes. The crust becomes golden brown and the cheese gets all gooey, brown and bubbly. Oh my!


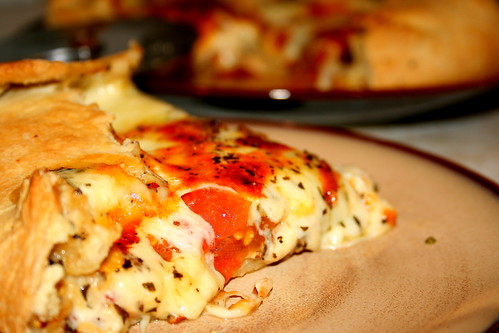
Let it cool for a bit, then slice it with a pizza cutter. Serve and enjoy!

Please, please, please go out and get the stuff to make this tonight. I promise you will hear the angels sing upon your first bite and you will find yourself exclaiming "who needs meat!!!". I know I did! Yum!

Linked with:


Rustic Tomato Tart
Slightly adapted from Baking and Creating with Avril

Printer Friendly Version

Ingredients:

For the crust:

  • 1 1/2 cups all purpose flour
  • 4 Tablespoons chilled butter, cut into cubes
  • 1/2 teaspoon salt
  • 1 large egg
  • 2-3 Tablespoons cold water
For the Filling:
  • 3 Tablespoons stone ground or dijon mustard (use a mix of both if desired)
  • 2-3 large fresh tomatoes
  • 2 Tablespoons Extra Virgin Olive Oil
  • 2 Tablespoons Balsamic Vinegar
  • 2 teaspoons dried basil
  • 8 ounces good quality mozzarella cheese
  • garlic salt and pepper (to taste)
Directions:
  1. Preheat oven to 425 degrees F.
For crust:
  1. Mix salt and flour in medium bowl. With pastry cutter (or using two knives) cut in chilled butter until mixture has a cornmeal consistency.
  2. In separate bowl, lightly beat egg; add 2 Tablespoons water.
  3. Make a well in center of flour mixture and pour egg mixture in the well; mix until well incorporated and a non-sticky dough forms. (During this process, if dough is still too dry, add third Tablespoon of water).
  4. Knead dough into a ball, transfer to parchment paper; roll out into a 14 inch circle. Transfer parchment paper and dough to a baking sheet.
For Filling:
  1. Spread mustard over the unbaked crust until well covered.
  2. Slice tomato and arrange in center of crust circle.
  3. Drizzle tomatoes with olive oil and balsamic vinegar; sprinkle with garlic salt, pepper and basil.
  4. Top with sliced mozzarella; sprinkle with a bit more garlic salt, pepper and basil.
  5. Bring edges of crust up over the edges of tomato and cheese.
  6. Bake in oven for 30 minutes until crust is golden brown and cheese is brown and bubbly.
  7. Allow to cool about 10 minutes, slice with pizza cutter.
  8. Serve and enjoy!

Monday, September 27, 2010

Daring Bakers September 2010: Decorated Sugar Cookies


For a while now I've been extremely interested in the idea of decorating sugar cookies. I've stalked many cookie blogs. Some of my favorites are been Bridget, Amanda and Marian and there is always fantastic information and tutorials at University of Cookie as well.

A couple months ago, I started acquiring different cookie cutters. I drew up sketches of what I wanted to create and for which people I wanted to send them. But I never quite worked up the courage to create the "masterpieces" I felt I would be able to create.

So I was more than excited to find that the Daring Bakers challenge host had read my mind yet again...

The September 2010 Daring Bakers’ challenge was hosted by Mandy of “What the Fruitcake?!” Mandy challenged everyone to make Decorated Sugar Cookies based on recipes from Peggy Porschen and The Joy of Baking.

Because of Many I was able to push past my fear of decorated sugar cookies and channel my inner Bridget.

We were supposed to decorate the cookies based on what September means to us. Here's what September has meant to me this year:


A friend of mine celebrated her 30th birthday on the 22nd and she invited me over for a pre-birthday girl's celebration the night before. I wanted to do something special for her so I made her these cookies. Little Butt picked the pink for the numbers.

Though they didn't come out exactly like I wanted (they aren't the best or prettiest) I was still excited to give them to her.


Living in New York for 5 years has made me associate September with apples. September is when all the apple festivals were held and I just automatically think of apples when I think of September now. My friend Elsa has a business called Gold & Apel so I wanted to make my apples golden in honor of her (actually, I wanted to send her these golden apple cookies for her birthday but she took off on some crazy European tour instead...I couldn't compete with that!).


And finally...September to me means National Talk Like a Pirate Day. And no Pirate Day is complete without Skull and Crossbones cookies!! These were super fun to make!

Though my cookies aren't perfect and are nowhere near the professional level of the ladies I mentioned above, I'm quite happy with my creations. They were super fun to make. The only downside is that my back ached like crazy when I was finished. I went to bed with a Soma in my belly that night that's for sure.

I definitely think that with a little practice I could get better at these and would be much happier with the results. But not too shabby for a first timer, in my biased opinion anyway.

Thanks to Many for choosing this challenge and forcing me to get with the cookie decorating program. Without her I probably would have continued to procrastinate and never would have discovered how fun these could be.

And now let me show you how I made them:


I started with my ingredients: flour, super fine sugar, butter (unsalted), vanilla and an egg.


Toss the sugar, butter and vanilla in the mixer...


And cream them all together until smooth.


Add in the flour and mix until you get a non-sticky dough.


Knead the dough into a large ball.


Then separate the dough into 3 even pieces.


Roll out each portion between 2 sheets of parchment paper and place in the fridge for at least 30 minutes.


Once the dough is chilled, peel off one sheet of the parchment paper.


And use your cutters to cut out shapes. Place the shapes on a parchment lined baking sheet and return to the fridge for another 30 minutes (the refrigeration time reduces the chance of spreading during baking).


After that second chill time, bake the cookies until golden then place on a cooling rack to cool completely.


Then whip up your icing. The recipe I used calls for powdered sugar, milk, light corn syrup and a little lemon juice.

After you make your icing, tint the icing to the colors you are using and go to town. Again, for some great tutorials on making icing for outlines and flooding you can check out University of Cookie.


Finally, decorate your cookies and allow plenty of drying time. Then share and enjoy!!!

To check out all the other fantastic decorated sugar cookies this month, check out the Daring Bakers Blogroll!

Decorated Sugar Cookies

Basic Sugar Cookie recipe adapted from Peggy Porschen

Ingredients:
  • ½ cup + 6 Tbsp Unsalted Butter, at room temperature
  • 3 cups + 3 Tbsp All Purpose Flour, sifted
  • 1 cup Caster Sugar / Superfine Sugar
  • 1 Large Egg, lightly beaten
  • 1 tsp Vanilla Extract / Or seeds from 1 vanilla bean
Directions:
  1. Cream together the butter, sugar and any flavorings you’re using. Beat until just becoming creamy in texture. (Tip: Don’t over mix otherwise you’ll incorporate too much air and the cookies will spread during baking, losing their shape.) 
  2. Beat in the egg until well combined, make sure to scrape down the sides of the bowl.
  3. Add the sifted flour and mix on low until a non sticky dough forms. (Tip: If you don’t have a stand mixer you may find it easier to switch to dough hooks at this stage to avoid flour flying everywhere.)
  4. Knead into a ball and divide into 2 or 3 pieces.
  5. Roll out each portion between parchment paper to a thickness of about 5mm/1/5 inch (0.2 inch)
  6. Refrigerate for a minimum of 30mins. (Tip: Recipes commonly just wrap the whole ball of dough in clingwrap and then refrigerate it for an hour or overnight, but by rolling the dough between parchment, this shortens the chilling time and then it’s also been rolled out while still soft making it easier and quicker.)
  7. Once chilled, peel off parchment and place dough on a lightly floured surface.
  8. Cut out shapes with cookie cutters or a sharp knife.
  9. Arrange shapes on parchment lined baking sheets and refrigerate for another 30mins to an hour. (Tip: It’s very important you chill them again otherwise they’ll spread while baking.) 
  10. Re-roll scraps and follow the above process until all scraps are used up.
  11. Preheat oven to 180°C (160°C Fan Assisted) / 350°F / Gas Mark 4.
  12. Bake until golden around the edges, about 8-15mins depending on the size of the cookies. (Tip: Bake same sized cookies together otherwise mixing smaller with larger cookies could result in some cookies being baked before others are done.) (Tip: Rotate baking sheets half way through baking if your oven bakes unevenly.)
  13. Leave to cool on cooling racks.
  14. Once completely cooled, decorate as desired. (Tip: If wrapped in tinfoil/cling wrap or kept in airtight containers in a cool place, un-decorated cookies can last up to a month.)
Sugar Cookie Icing adapted from I am Baker 

Ingredients:
  • 1 cup powder sugar (confectioners sugar)
  • 1 tablespoon milk
  • 1 tablespoon light corn syrup
  • 1/2 teaspoon lemon emulsion (original recipe calls for 1 drop lemon juice)
Directions:
  1. Sift the powdered sugar into mixing bowl.
  2. Add milk, corn syrup, and lemon emulsion or lemon juice.
  3. Mix everything together. If too dry, add milk a drop at a time until desired consistency.
  4. Tint to desired colors and decorate cookies as desired.

Friday, September 24, 2010

Green Chile Chicken Enchilada Casserole


Have you ever made one of those meals that people ask for time and time again? The kind of meal that you often take to potlucks because it's just that good?

For me, it would be this dish.

Many years back...don't ask me how many because I really don't remember now...I learned how to make these enchiladas from my mother-in-law. I then proceeded to take them to one potluck at work and that was all she wrote!

There was no turning back!

These were requested at many potlucks after that first one. Then, even when I moved from state to state, I would make them for more potlucks.

It got so bad at one point that The Hubble and I had to come up with a vegetarian version of these. Which, we somehow did...and I was told that they were still quite delicious.

So, if you need a potluck or dinner party dish at some point, I suggest you give these a try. The recipe makes quite a bit. If you serve the enchiladas with rice and beans your meal is sure to be a hit!

Ready to learn how to make them? Let's go:


Grab your ingredients: Shredded cheese, chicken, cream of chicken soup, chopped green chiles, green chile enchilada sauce, corn tortillas. You can also add an onion, as my mother-in-law would do, but The Hubble wanted this sans onions this time.


Throw the chicken in a pot full of water and bring it to a boil...


Cook the chicken in the boiling water until the chicken turns white, about 20 minutes. Remove from the water and place on a cutting board.


Take a couple forks or use your hands and shred up the chicken. Put the shredded chicken in a large bowl.


Dump in the cream of chicken soup and the green chiles. If you are using the onion, you want to dice it up and add it at this point as well.


And mix it all up until well combined. This is your "filling."


Pour your enchilada sauce into a shallow bowl and dunk your corn tortillas in the sauce making sure the tortillas are well covered.


Lay six sauce covered tortillas in a layer at the bottom of a 13x9 inch baking dish or pan. You can also spoon a bit more enchilada sauce over the tortillas at this point if you would like.


Take 1/3 of the filling and spread it over the tortillas in an even layer.


Now take 1/3 of the cheese and sprinkle it over the filling in an even layer.


Repeat this process of tortillas, filling, cheese until you have 3 layers in the pan. The top should be the last cheese layer. Now toss it in a 350 degree F oven and cook for about 45 minutes or until the cheese is melted and bubbly.


Serve with rice and beans and great company. Enjoy!

Linked up at Mommie Cooks.

Green Chile Chicken Enchilada Casserole

Printer Friendly Version

Ingredients:
  • 3 boneless, skinless chicken breasts
  • 2 cans cream of chicken soup
  • 3 cans chopped green chiles
  • 1 can Las Palmas green enchilada sauce
  • 4 cups shredded cheese
  • 18 corn tortillas
  • onion, diced (optional)
Directions:
  1. Preheat oven to 350 degrees F.
  2. Cook chicken in boiling water until white all the way through; about 20 minutes. 
  3. Shred chicken; add cream of chicken soup, green chiles and onion (optional)
  4. Pour enchilada sauce into shallow bowl; coat tortillas.
  5. Layer sauce smothered tortillas in even layer covering the bottom of a 13x9 inch pan.
  6. Cover tortillas evenly with 1/3 of chicken mixture; sprinkle 1/3 shredded cheese evenly over chicken mixture. Repeat process until you have 3 layers; ending with cheese layer.
  7. Cook in oven for 45 minutes or until cheese is melted and bubbling.
  8. Serve and enjoy!

Wednesday, September 22, 2010

Sweet Green Bean Bundles


As the weather turns chilly and Summer turns into Fall, my thoughts always turn toward the holidays.

How could they not?? With the annual release of the pumpkin spice latte and walking through stores decked out in holiday garb, it's no wonder that I begin to think of the fun times and family visits ahead.

One of my favorite holidays is Thanksgiving (insert "duh" here).

Yes, yes...I know. Thanksgiving is supposed to be a time of thanks. Of being with loved ones and being grateful for everything life has given us. But I choose to focus on what is most important about Thanksgiving. The food!

One of my favorite things to make for Thanksgiving dinner (and any other pot luck, get together or finger foods type meals) are these sweet green bean bundles. My friend Wendy brought these for a pot luck dinner a few years back and I've been making them ever since.

To be honest, I don't usually like vegetables. But when they are smothered in butter and brown sugar and wrapped in bacon I just can't resist myself! What pushes these little guys over the edge though is the hint of garlic salt. Yum!

Do you want to learn how to make these?? Well let's go!


These ingredients are simple: bacon, brown sugar, garlic salt, butter, and 3 cans of green beans.


Start by draining the juice from all the cans of green beans.


Now take your package of bacon and just cut it right down the middle.


Gather up about 7 green beans and wrap them in one of those half slices of bacon.


Place the bundle in a 9x13in baking dish and repeat until all the green beans and bacon are bundled up and placed in the dish.


Now toss a stick of butter in a small saucepan and melt it down.


Once the butter is melted, toss in your brown sugar.


Stir continuously until all the brown sugar dissolves and the butter and sugar are well incorporated. You should be left with a yummy looking sauce.


Now quickly pour that sauce over the green bean bundles making sure each bundle gets nice and sauced.


Now sprinkle some garlic salt on top of the glazed bundles.


Cover the dish and bake the whole thing for about 45 minutes. (NOTE: If the bacon is not crispy enough for you when the cooking time is complete, turn on the broiler for a few minutes to brown and crisp the bacon).


When it's done, you will have this sugary, buttery, bacony, melty, crispy, delicious treat either for eating by themselves or as a side with one of your favorite dishes. Enjoy!

Sweet Green Bean Bundles
Retrieved from Allrecipes.com

Printer Friendly Version

Ingredients:
  • 3 (14.5 ounce) cans whole green beans, drained
  • 1 pound bacon, cut in half
  • 1/2 cup butter
  • 1 cup brown sugar
  • 1 teaspoon garlic salt
Directions:
  1. Preheat oven to 350 degrees F.
  2. Drain green beans.
  3. Cut bacon in half.
  4.  Wrap 7 green beans in a half slice of bacon and place in 9x13inch baking dish repeating until all bacon and or green beans are used.
  5. Melt butter in small saucepan.
  6. Add brown sugar and stir continuously until sugar dissolves and butter and sugar are well incorporated.
  7. Pour sugar and butter mixture over green bean bundles.
  8. Sprinkle with garlic salt.
  9. Cover with foil and bake 45 minutes. (NOTE: If the bacon is not crispy enough for you when the cooking time is complete, turn on the broiler for a few minutes to brown and crisp the bacon).
  10. Enjoy!
Related Posts with Thumbnails